Wear on Earth
View Sequence overviewStudents will:
- construct and observe water erosion using models of different landscapes.
- consider the importance and dangers of erosion and floods.
Students will represent their understanding as they:
- draw annotated diagrams of model landscapes, showing changes caused by water erosion.
- contribute to discussions to identify limitations of modelling and the positive and negative effects of water erosion and flooding.
In this lesson, assessment is formative.
Feedback might focus on:
- students’ claims about erosion by water. Are they referring to the definitions of ‘transportation’ and ‘deposition’ along with their evidence to make their claims? Have they recognised that erosion is the process that moves rocks and sediments from one place to another?
Whole class
Class science journal (digital or hard-copy)
Demonstration copies of the relevant pages of the Modelling water erosion Resource sheet
Optional video: River erosion: the wrath of nature unveiled (3:09)
Each group
In this lesson students have the option of modelling water erosion in three different landscapes. You might test all models across the classroom, select and test one model that is most appropriate for your location and students' experiences, or modify the models to suit your context more closely. See the Investigate lesson step or the Modelling water erosion Resource sheet for details of each model.
Copy of the relevant pages of the Modelling water erosion Resource sheet, as applicable
Water erosion caused by rainfall on a sloping landscape
1 x large aluminium or plastic tray
Sand and/or soil
A container holding at least 500ml water
Optional: A spray bottle or cup with holes in the bottom to simulate rainfall
Book wrapped in plastic, a chunk of wood, or another item to prop up the tray
Water erosion caused by waves
1 x large aluminium/plastic tray
Sand and/or soil
A container holding at least 500ml water
Wide piece of hard plastic to push the water
Water erosion of riverbanks caused by heavy rainfall
1 x large aluminium/plastic tray
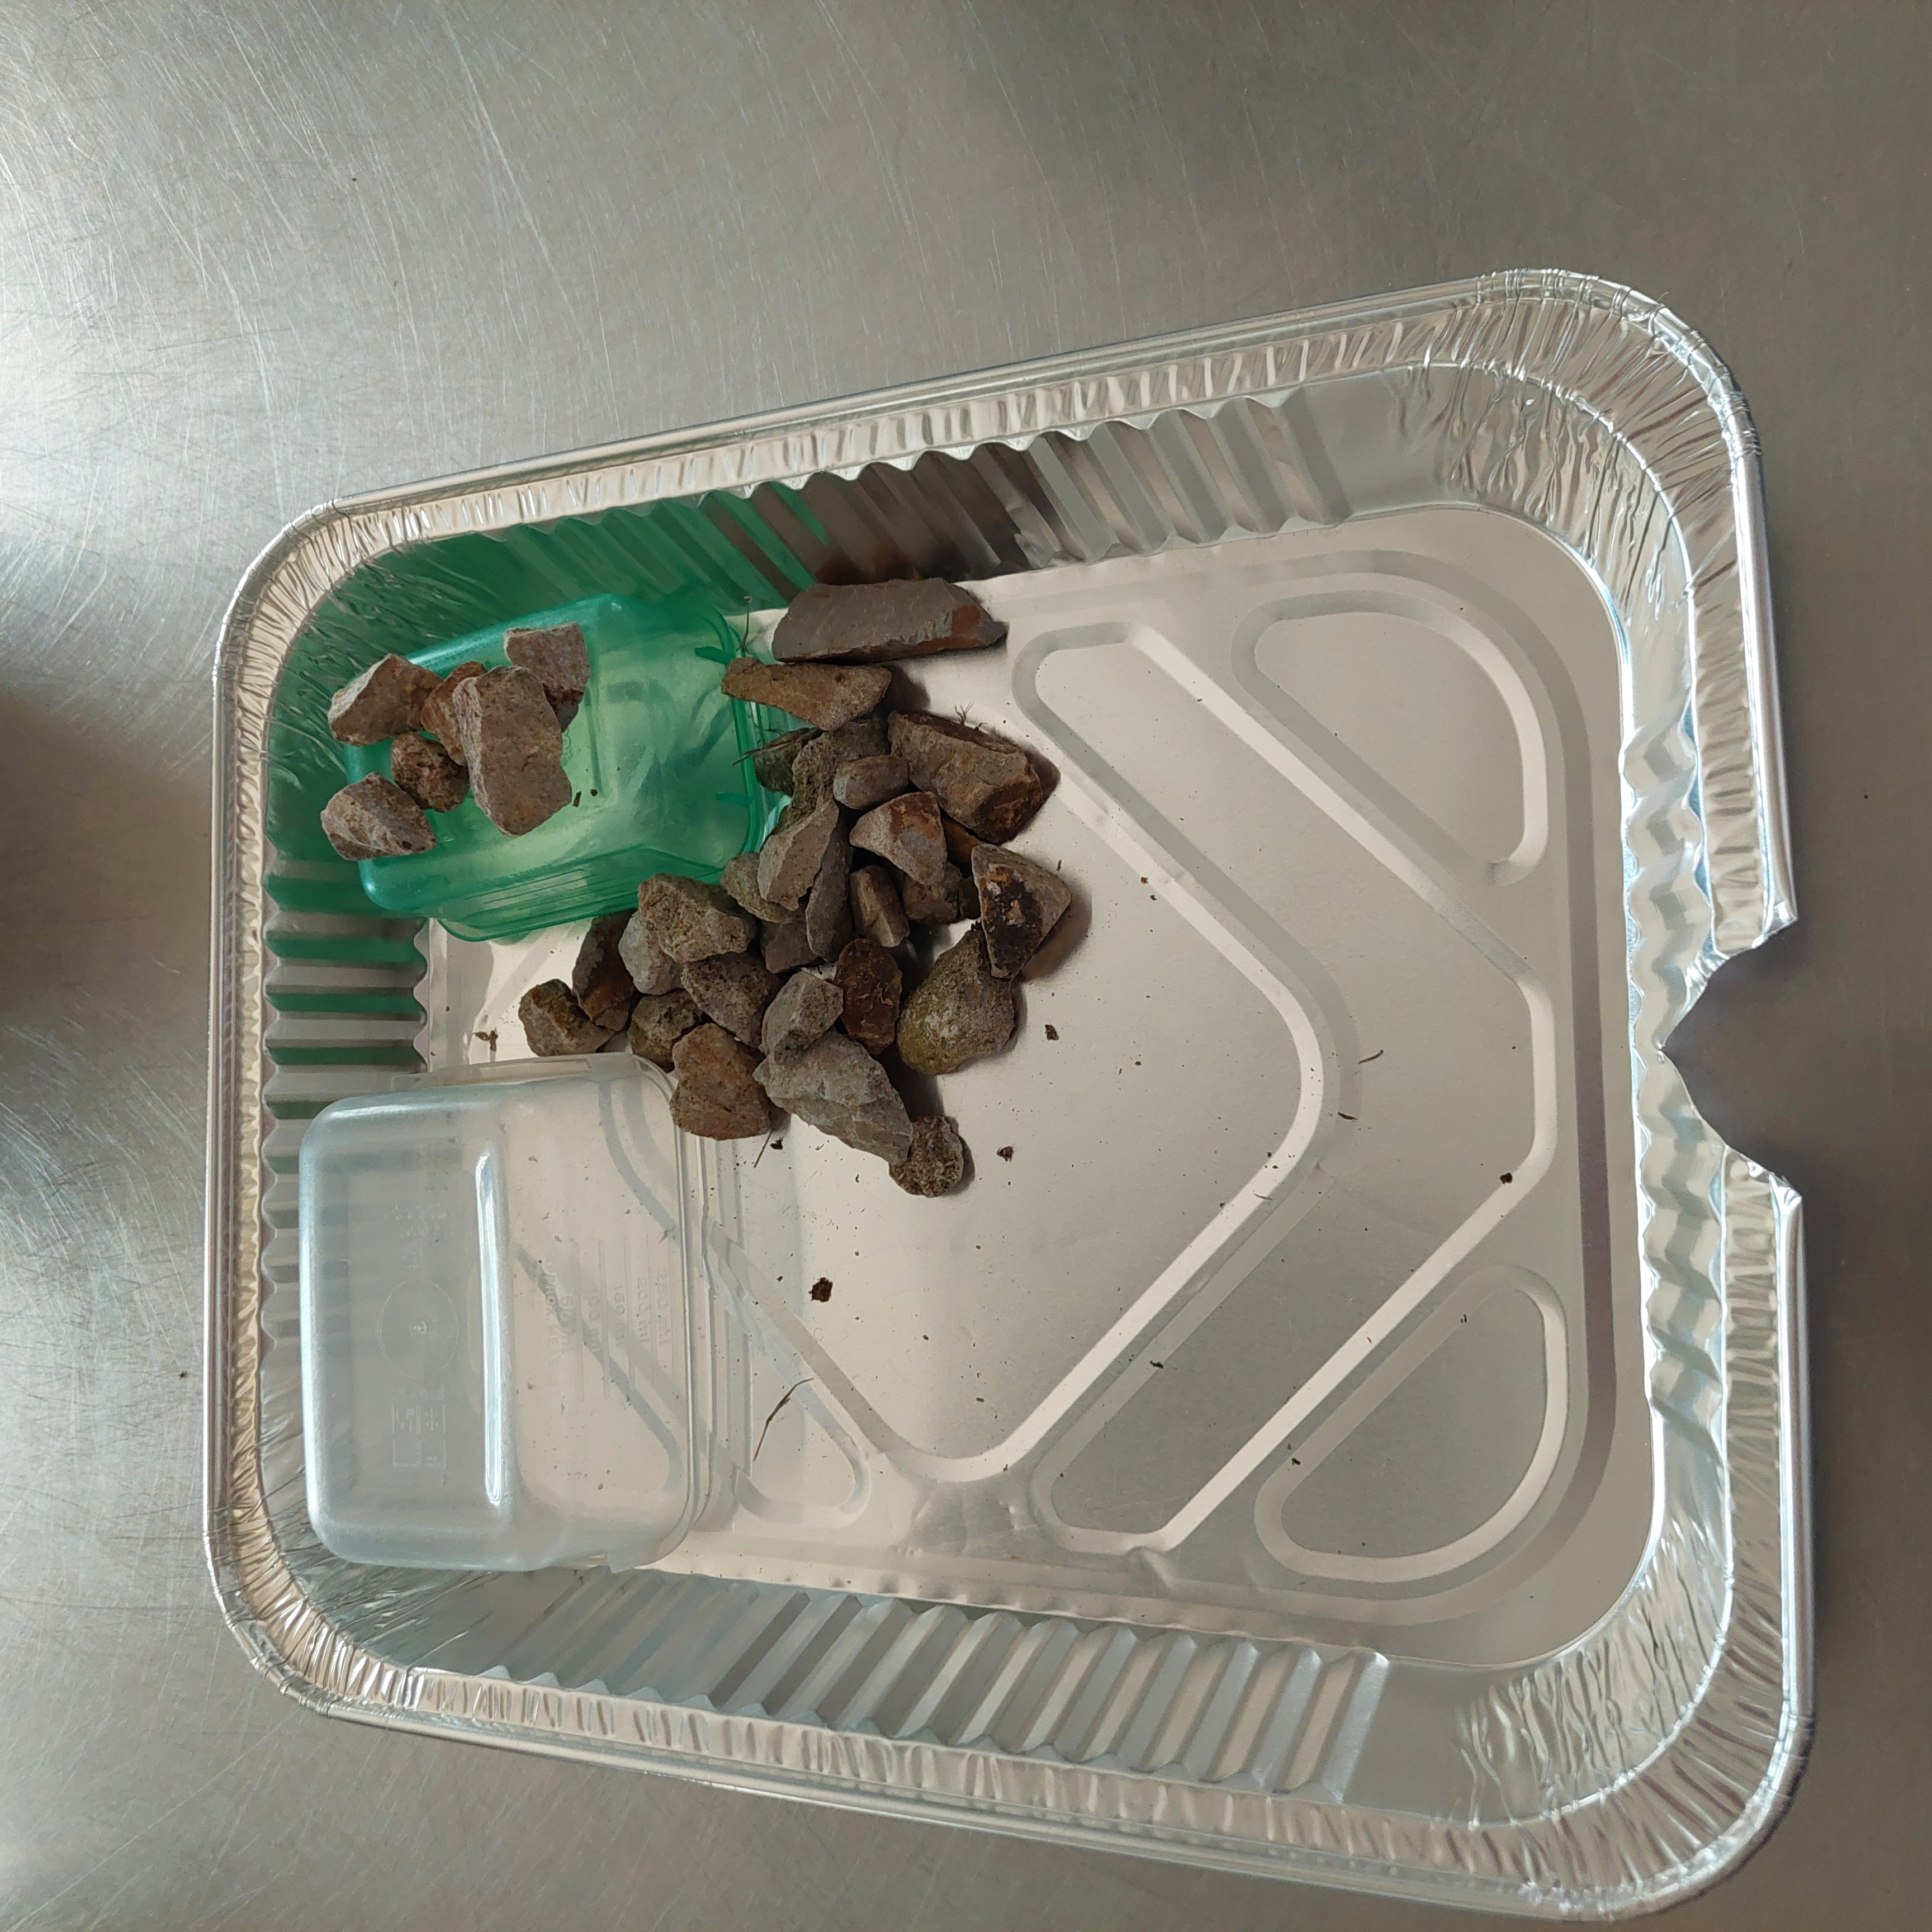
Rocks/block/small containers
Sand and or soil
A container holding at least 500ml water
All teams might also use any of the following materials to build their landscapes, such as:
- Rocks, plastic containers or building blocks to act as bedrock
- Modelling clay, plaster to build embankments
- Coloured aquarium stones to act as small rocks that appear in the landscape
- Twigs, string, uprooted weeks to model trees and grasses in the landscape
Access to scissors, glue, sticky-tape, blu-tac to use as required
Note: Any materials used to build model landscapes, or even the models themselves, should be kept for further use in Lessons 7 and 8 so that students can test their erosion control strategies.
Each student
Individual science journal (digital or hard-copy)
Lesson
Re-orient
Revise what students have learned about erosion so far, with a focus on wind erosion as explored last lesson.
The Inquire phase allows students to cycle progressively and with increasing complexity through the key science ideas related to the core concepts. Each Inquire cycle is divided into three teaching and learning routines that allow students to systematically build their knowledge and skills in science and incorporate this into their current understanding of the world.
When designing a teaching sequence, it is important to consider the knowledge and skills that students will need in the final Act phase. Consider what the students already know and identify the steps that need to be taken to reach the level required. How could you facilitate students’ understanding at each step? What investigations could be designed to build the skills at each step?
Read more about using the LIA FrameworkIdentifying and constructing questions is the creative driver of the inquiry process. It allows students to explore what they know and how they know it. During the Inquire phase of the LIA Framework, the Question routine allows for past activities to be reviewed and to set the scene for the investigation that students will undertake. The use of effective questioning techniques can influence students’ view and interpretation of upcoming content, open them to exploration and link to their current interests and science capital.
When designing a teaching sequence, it is important to spend some time considering the mindset of students at the start of each Inquire phase. What do you want students to be thinking about, what do they already know and what is the best way for them to approach the task? What might tap into their curiosity?
Read more about using the LIA FrameworkWater erosion
Revise the ways that water can contribute to weathering, including facilitating the movement of rock down a river, or in freeze-thaw weathering.
Noting the difference between weathering and erosion—as students have already discussed over the course of the sequence—pose the question: How does water cause erosion?
The Inquire phase allows students to cycle progressively and with increasing complexity through the key science ideas related to the core concepts. Each Inquire cycle is divided into three teaching and learning routines that allow students to systematically build their knowledge and skills in science and incorporate this into their current understanding of the world.
When designing a teaching sequence, it is important to consider the knowledge and skills that students will need in the final Act phase. Consider what the students already know and identify the steps that need to be taken to reach the level required. How could you facilitate students’ understanding at each step? What investigations could be designed to build the skills at each step?
Read more about using the LIA FrameworkThe Investigate routine provides students with an opportunity to explore the key ideas of science, to plan and conduct an investigation, and to gather and record data. The investigations are designed to systematically develop content knowledge and skills through increasingly complex processes of structured inquiry, guided inquiry and open inquiry approaches. Students are encouraged to process data to identify trends and patterns and link them to the real-world context of the teaching sequence.
When designing a teaching sequence, consider the diagnostic assessment (Launch phase) that identified the alternative conceptions that students held. Are there activities that challenge these ideas and provide openings for discussion? What content knowledge and skills do students need to be able to complete the final (Act phase) task? How could you systematically build these through the investigation routines? Are there opportunities to build students’ understanding and skills in the science inquiry processes through the successive investigations?
Read more about using the LIA FrameworkBuilding landscapes
This step provides three different models for simulating soil erosion on different landscapes (also outlined on the Modelling water erosion Resource sheet). You might test all models across the classroom, select and test one model that is most appropriate for your location and students' experiences, or modify the models to suit your context more closely.
Students should work in collaborative teams to build one of the landscapes, test how water moves through it, and observe any erosion that occurs.
Provide students with a variety of materials that they may use to build their landscapes within a defined container in order to hold the water. An aluminium or plastic tray is ideal. The other materials you provide for students to use can be varied, but should include soil and/or sand so that students see how it specifically moves through the landscape. See the List of materials above for suggested materials.
You might model this process of building a landscape as a class beforehand, discussing the materials that can be used to mimic the features of that landscape. For example you might use rocks or plaster to build elevated embankments, twigs/sticks and string to mimic trees and tree roots, pop-sticks to build fences or barriers, or uprooted weeds as grasses/plants.
Optional: Allow teams time to search for and look at images of examples of their chosen landscape so their models are more accurate.
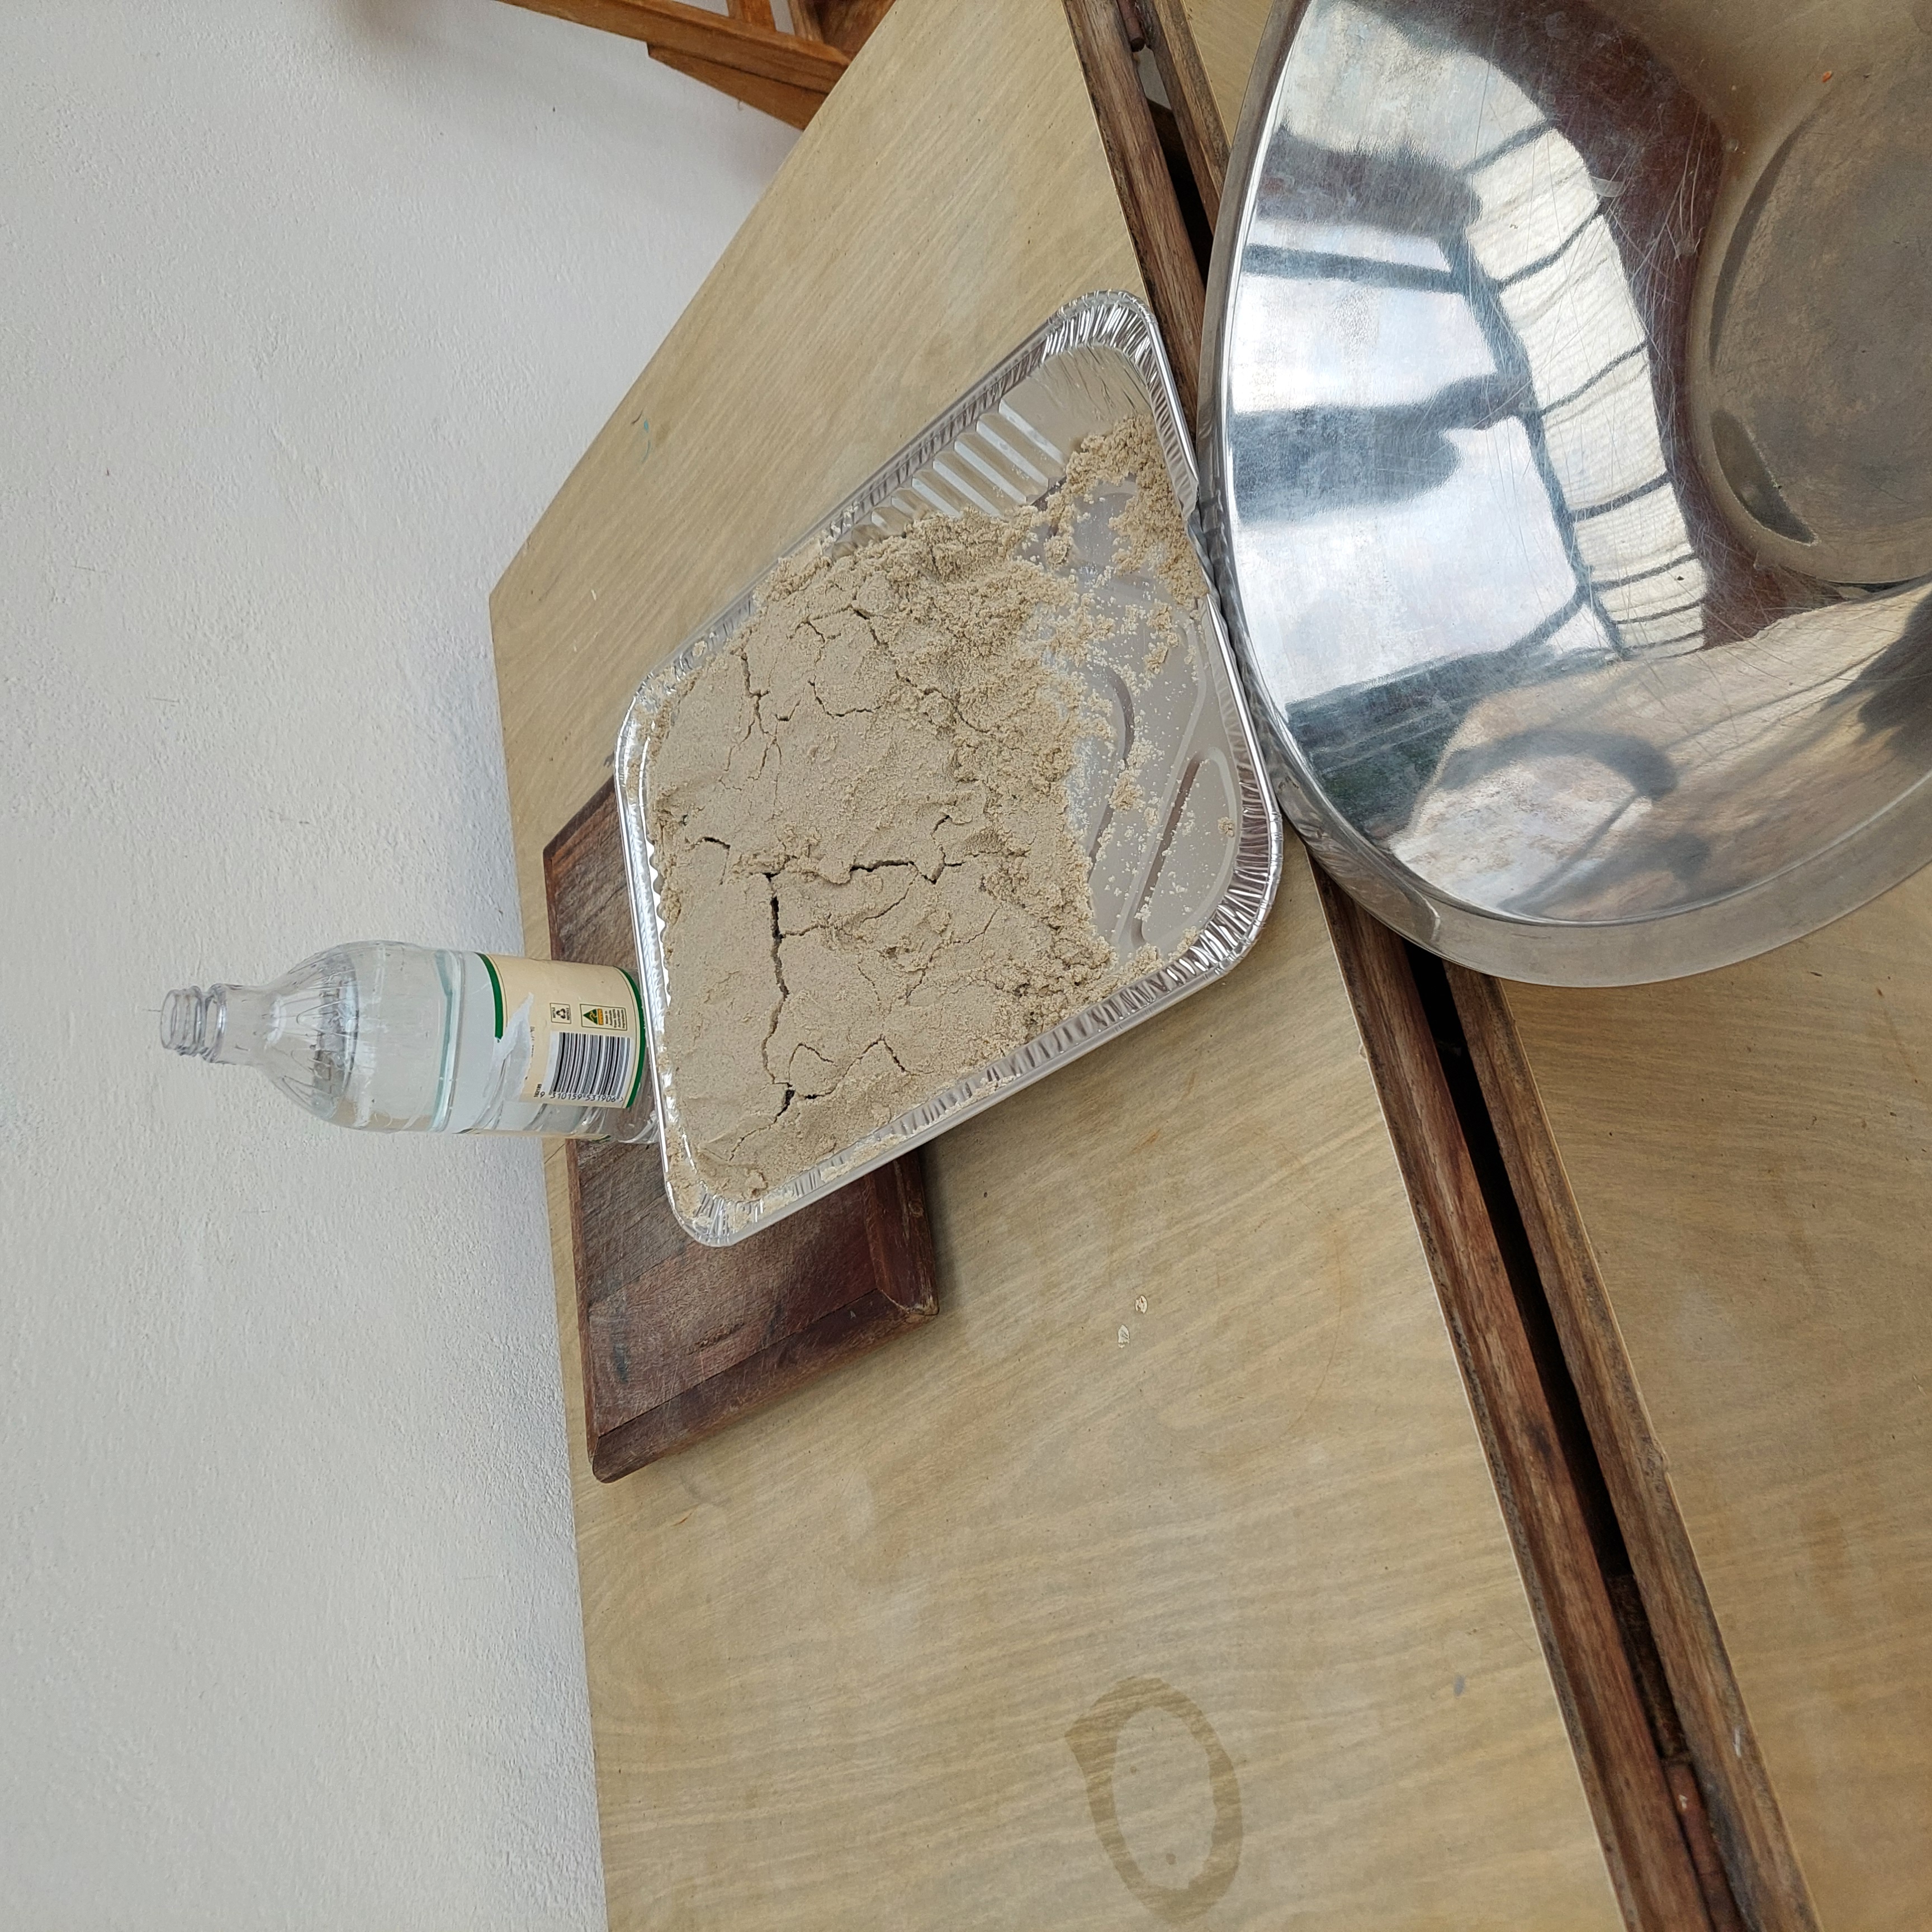
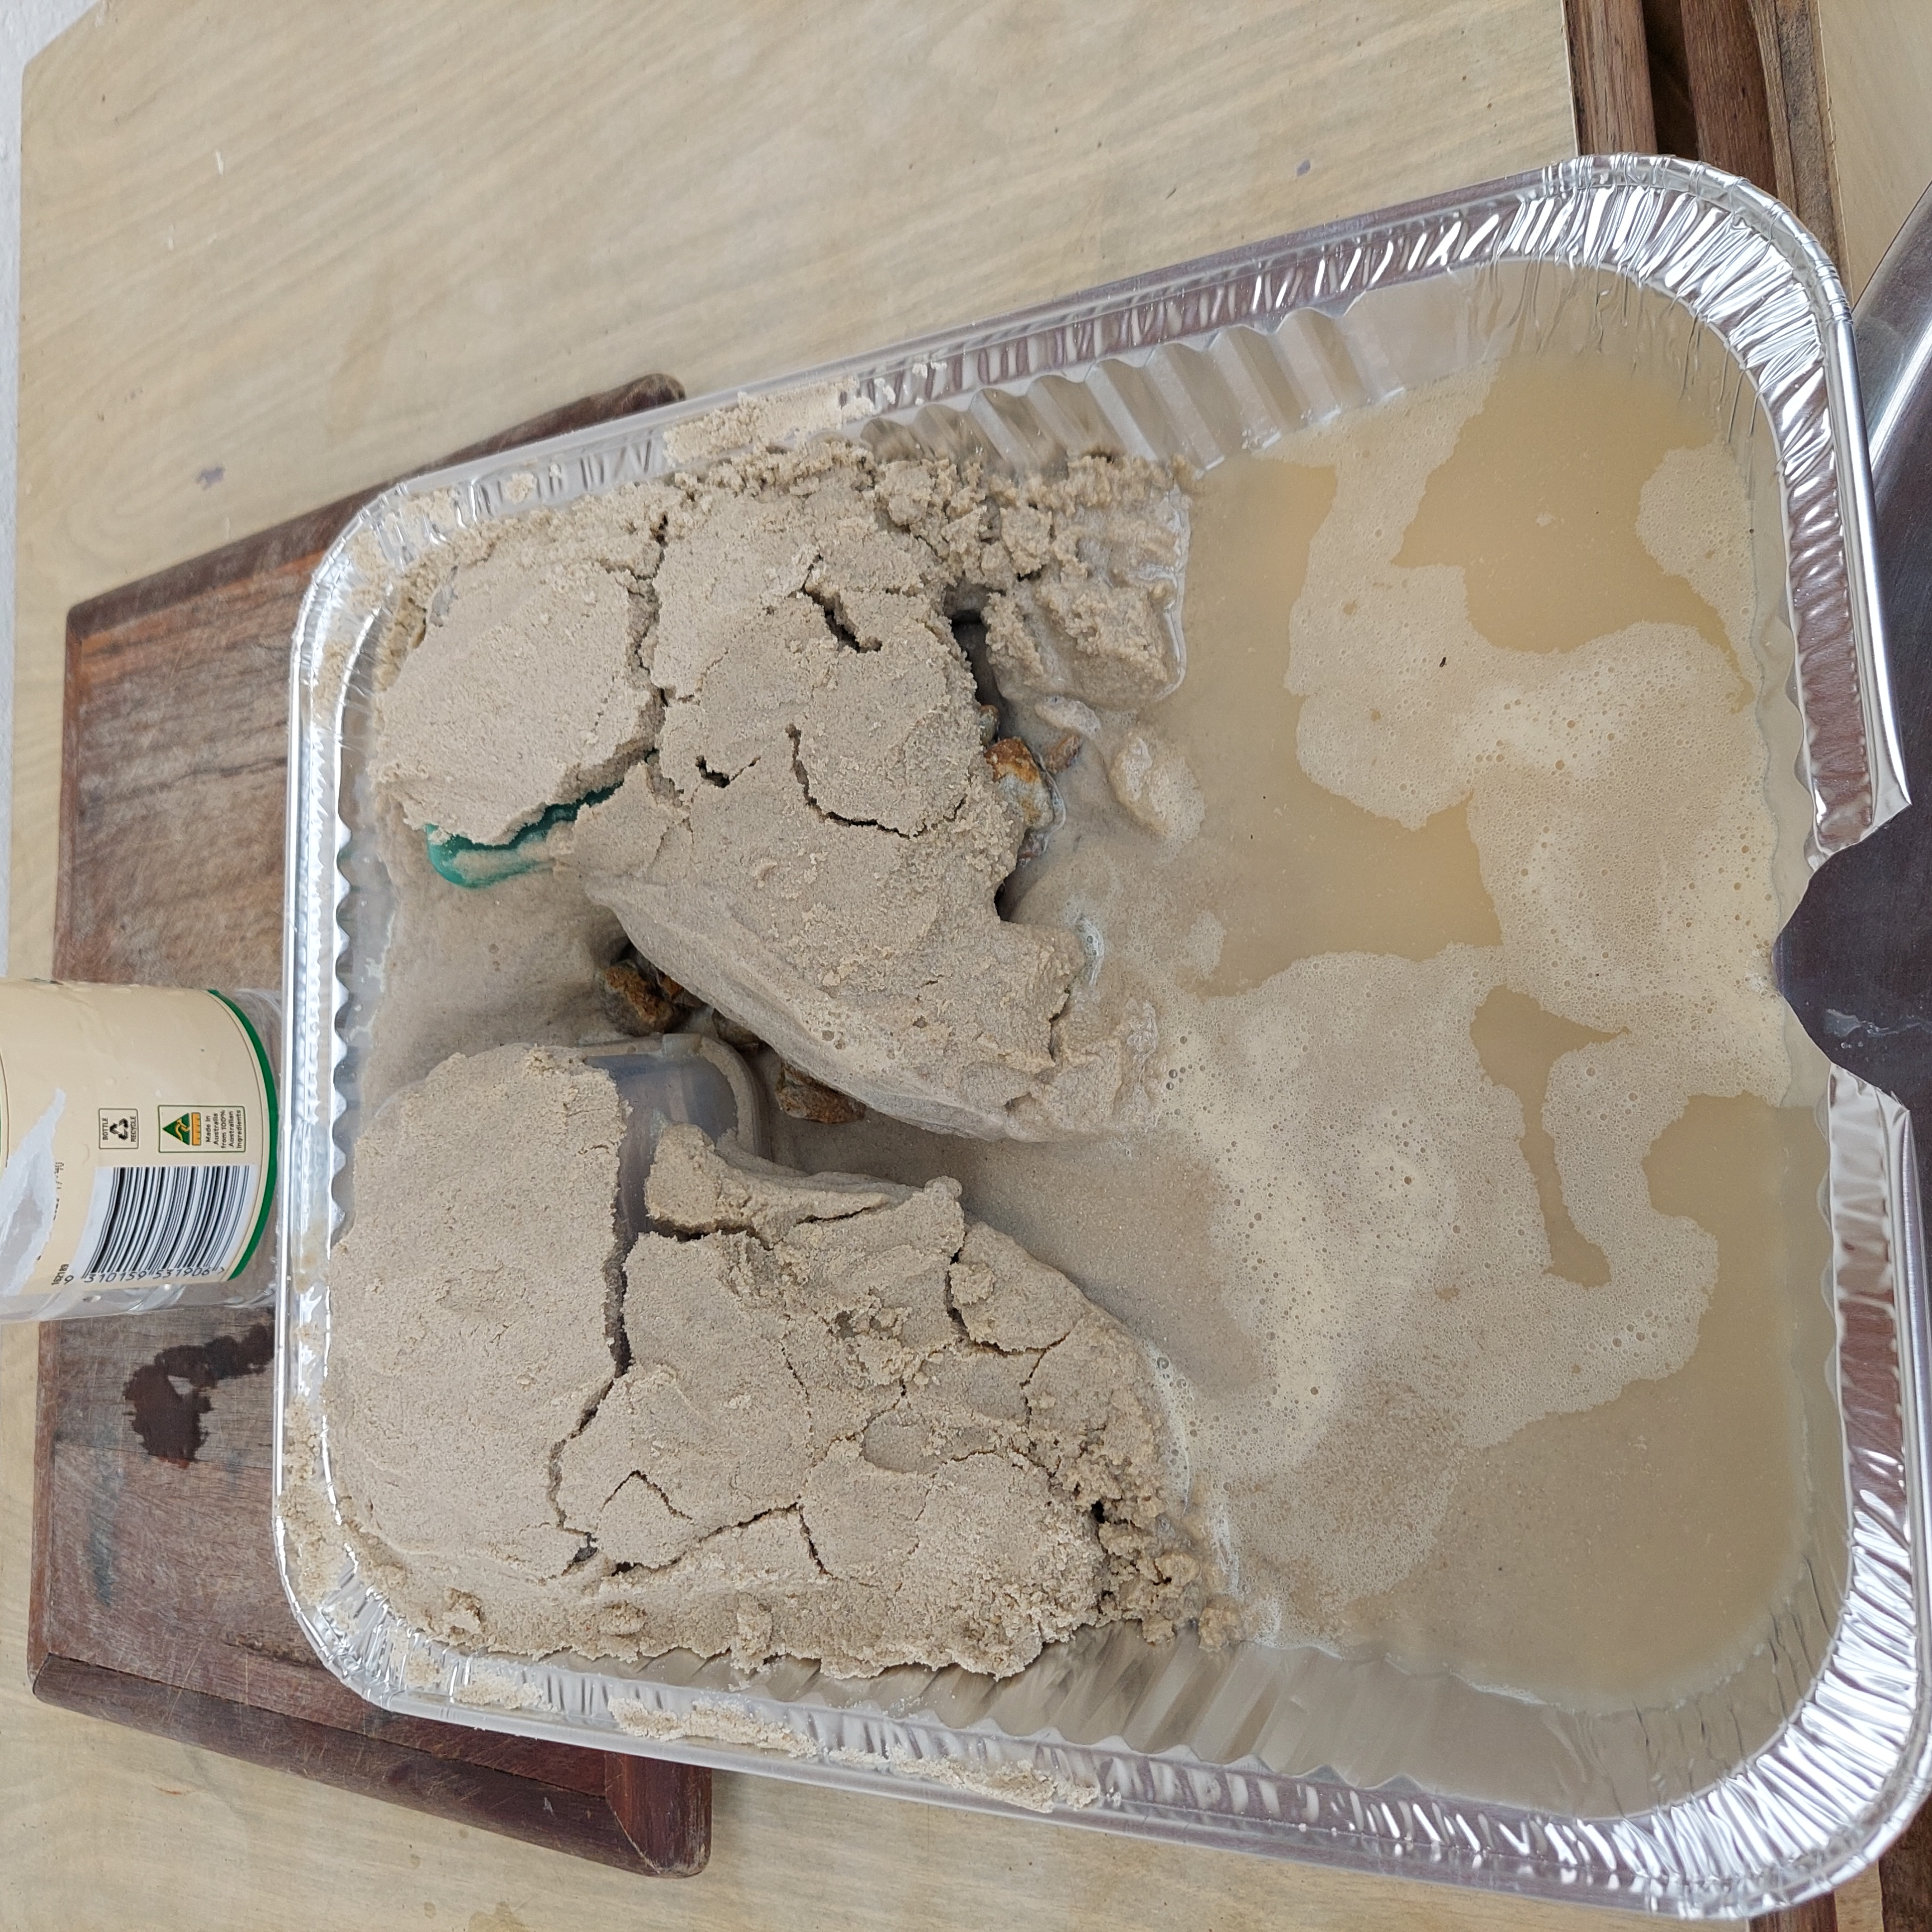
Modelling water erosion caused by rainfall on a sloping landscape
Students build a sloping landscape in an aluminium or plastic tray, then pour water over the landscape.
- Build a sloping/hillside landscape in the aluminium or plastic tray.
- Build an elevated section at one end of the tray, making sure that the ‘land’ at the other end is lower.
- Cover the landscape in things you might find on a hillside. Leave parts of the soil exposed.
- Cut a small notch at the end of the tray where the land is lower.
- Draw an annotated diagram of the landscape in your science journal.
- Prop up the end of the tray opposite the notch to ensure the water flows downwards.
- Hold the bucket/tub under the notch to catch overflow of water and sand.
- Using the bottle, pour the water on a specific area of the landscape, at a consistent rate. Alternatively, use a spray bottle or cup with holes in the bottom to simulate rainfall.
- Observe how the water flowing interacts with features of the landscape.
- On the annotated diagram mark the areas where water was poured.
- On the annotated diagram draw how the water has affected the landscape, using a different coloured pen.
Optional: Students could collect numerical data by adding coloured aquarium stones to the sloping landscape, then counting the number of stones that end up at the base of the tray after the water has been poured on it. This data could be graphed. This could be built on in the following lesson, if students test erosion control strategies, by calculating the difference between the number of stones that end up at the base of the tray when there are no erosion control strategies in place compared to when there are.
Modelling water erosion caused by waves
- Build a beach landscape in an aluminium or plastic tray.
- Cover the whole tray with sand to simulate a beach.
- One section of the ‘land’ should be very low, to simulate the seabed where the water will sit. One section should be higher to simulate the beach, and one section should be higher again to simulate sand dunes.
- Include other natural features you might find at a beach.
- Fill the shallow side of the tray with water, making sure you leave some flat area exposed to represent the shoreline.
- Draw an annotated diagram of the landscape in your science journal.
- Use a wide piece of hard plastic to push large amounts of water towards the ‘shore’, simulating waves.
- Observe how the waves interact with features of the landscape, particularly the sand dunes.
- On the annotated diagram draw how the water has affected the landscape, using a different coloured pen.
Modelling water erosion of riverbanks caused by heavy rainfall
- Build a river landscape in an aluminium or plastic tray.
- Each side of the landscape should be elevated (but not necessarily completely flat) with a gully/channel running through it.
- Include bends in your ‘river’ and other features you might see in the landscape.
- Pour a small amount of water into the river, as would appear in nature.
- Draw an annotated diagram of the landscape in your science journal.
- Use a large water bottle or bucket to pour a large amount of water into one end of the ‘river’ all at once.
- Observe how the sudden increase in water level interacts with features of the landscape, particularly the riverbanks and any bends in the river.
- On the annotated diagram draw how the water has affected the landscape, using a different coloured pen.
 |  |  |
Water erosion
How does the water cause erosion?
Water erosion occurs when soil is detached from the Earth’s surface by water, such as rainfall or runoff, and is transported away and deposited in another location.
Water erosion can be caused by:
- rainfall. Raindrops dislodge particles of soil, particularly on bare ground, and runoff carries them away.
- runoff. As the water flows over the surface of the land it carries away particles of soil. It can cause channels and gullies to form.
- river and stream flow. As water flows down rivers and streams it can erode riverbeds and banks. This is heightened in times of intense rainfall, where increased water volume and velocity speed up the process.
Water erosion is a natural process and has helped shape the surface of the Earth as we know it. It forms rivers, streams and lakes and creates and sustains habitats. However, water erosion can be exacerbated by human activities such as agriculture.
Water erosion can lead to loss of topsoil, resulting in reduced growing capacity, infrastructure damage (including to roads, bridges, and other structures), issues with water quality and habitat destruction.
There are several types of water erosion.
- Splash erosion: Raindrops falling on the surface of the soil cause pits to form as the force of the drop dislodges soil. Bare land is especially susceptible. It can cause the formation of soil crusts which stop water penetrating deeper into the ground, thus contributing to runoff.
- Sheet erosion: A uniform layer of topsoil is removed by runoff.
- Rill erosion: Shallow channels are formed in the surface by runoff. These can normally be removed by cultivation.
- Gully erosion: Deeper channels are formed by concentrated runoff, that can’t be removed by cultivation.
- Tunnel erosion: Water moving through the soil under the surface of the land creates tunnels. These can collapse and create gullies or sinkholes.
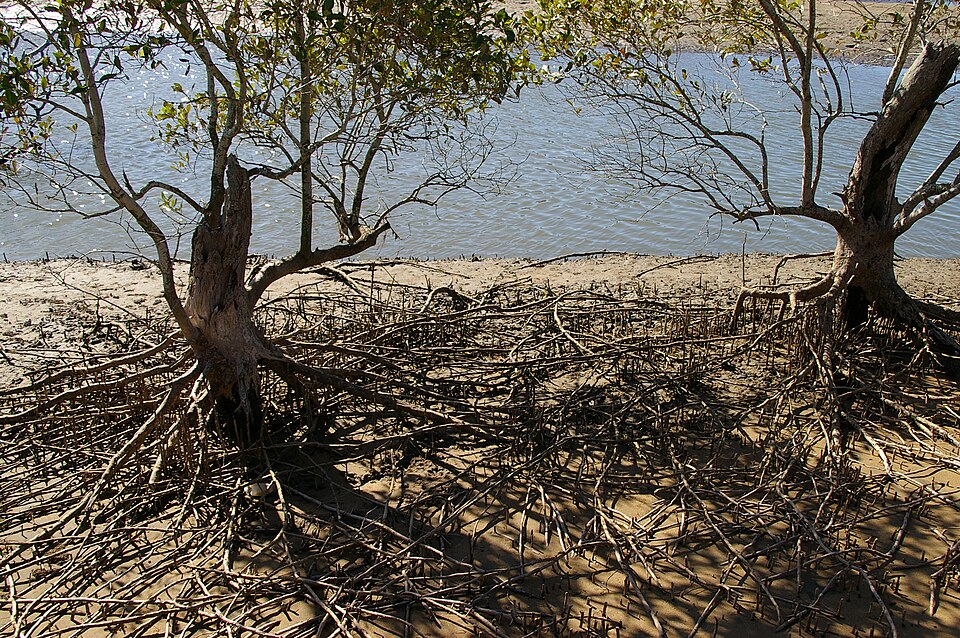
- Coastal erosion: Ocean waves and current erode the coastline, moving sand and reshaping beaches. It can be exacerbated by high tides and powerful storm systems.
Water erosion occurs when soil is detached from the Earth’s surface by water, such as rainfall or runoff, and is transported away and deposited in another location.
Water erosion can be caused by:
- rainfall. Raindrops dislodge particles of soil, particularly on bare ground, and runoff carries them away.
- runoff. As the water flows over the surface of the land it carries away particles of soil. It can cause channels and gullies to form.
- river and stream flow. As water flows down rivers and streams it can erode riverbeds and banks. This is heightened in times of intense rainfall, where increased water volume and velocity speed up the process.
Water erosion is a natural process and has helped shape the surface of the Earth as we know it. It forms rivers, streams and lakes and creates and sustains habitats. However, water erosion can be exacerbated by human activities such as agriculture.
Water erosion can lead to loss of topsoil, resulting in reduced growing capacity, infrastructure damage (including to roads, bridges, and other structures), issues with water quality and habitat destruction.
There are several types of water erosion.
- Splash erosion: Raindrops falling on the surface of the soil cause pits to form as the force of the drop dislodges soil. Bare land is especially susceptible. It can cause the formation of soil crusts which stop water penetrating deeper into the ground, thus contributing to runoff.
- Sheet erosion: A uniform layer of topsoil is removed by runoff.
- Rill erosion: Shallow channels are formed in the surface by runoff. These can normally be removed by cultivation.
- Gully erosion: Deeper channels are formed by concentrated runoff, that can’t be removed by cultivation.
- Tunnel erosion: Water moving through the soil under the surface of the land creates tunnels. These can collapse and create gullies or sinkholes.
- Coastal erosion: Ocean waves and current erode the coastline, moving sand and reshaping beaches. It can be exacerbated by high tides and powerful storm systems.
The Inquire phase allows students to cycle progressively and with increasing complexity through the key science ideas related to the core concepts. Each Inquire cycle is divided into three teaching and learning routines that allow students to systematically build their knowledge and skills in science and incorporate this into their current understanding of the world.
When designing a teaching sequence, it is important to consider the knowledge and skills that students will need in the final Act phase. Consider what the students already know and identify the steps that need to be taken to reach the level required. How could you facilitate students’ understanding at each step? What investigations could be designed to build the skills at each step?
Read more about using the LIA FrameworkFollowing an investigation, the Integrate routine provides time and space for data to be evaluated and insights to be synthesized. It reveals new insights, consolidates and refines representations, generalises context and broadens students’ perspectives. It allows student thinking to become visible and opens formative feedback opportunities. It may also lead to further questions being asked, allowing the Inquire phase to start again.
When designing a teaching sequence, consider the diagnostic assessment that was undertaken during the Launch phase. Consider if alternative conceptions could be used as a jumping off point to discussions. How could students represent their learning in a way that would support formative feedback opportunities? Could small summative assessment occur at different stages in the teaching sequence?
Read more about using the LIA FrameworkWater’s sculpting force
In this integrate step, guide students to link their experiences in the investigation to the processes of erosion caused by water in real-life. Through questioning and discussion, students should come to a consensus that:
|
Invite teams to share their observations, encouraging the use of the terms ‘transportation’ and ‘deposition’.
Discuss the people and animals that will be most affected by erosion in the scenario/s students modelled, and how they would be affected.
- What have we learned about how water erosion affects landscapes?
- Where did the water transport the sand/soil?
- Why did the sand deposition occur where it did?
- Who might use this information in their work?
- What do you think this model helps us understand about real-life landscapes? What other elements does this model not take into account?
- Who lives and/or works in the types of environments of environment you modelled?
- Farmers, beach goers, people who live on the water’s edge, people who live near rivers, bushwalkers, park rangers.
- How might they be affected by erosion?
- Ask students to name a specific group of people and how they might be affected.
- For example, people who live near rivers might be affected by flooding in sudden or very heavy rain events. As the riverbanks are eroded, people may need to evacuate home and be displaced. Houses can be lost in floods. Dirty river water can cause people to become sick.
- What animals live in these environments and how might they be affected?
- How might the environment itself change?
- Are all the impacts necessarily negative? Are there some positive changes that may occur?
- How might water erosions be stopped or controlled?
Optional: Further consolidate understanding of how water erosion causes changes to the landscape and can re-shape rivers by viewing River Erosion: The Wrath of Nature Unveiled (3:09).
In their science journal, and in reference to their observations of their model, students write a response to answer the question How does water cause erosion?
Reflect on the lesson
You might:
- add new words and images to the word wall or glossary.
- add to the W and H sections of the TWLH chart.
- create a table to compare the positive and negative effects of water erosion.
- discuss how students were thinking and working like scientists during the lesson. Focus on the use of modelling to represent changes that occur over long time scales and/or in large environments.