Packaging pioneers
View Sequence overviewStudents will:
- explore and identify properties of food packaging from the past.
- conduct an investigation to compare the properties of fish and chip packaging.
Students will represent their understanding as they:
- identify different materials used to package hot foods.
- record observations/measurements in a table.
- compare the strength of each material when wet and dry.
- draw conclusions from their findings and compare findings with their peers.
In this lesson, assessment is formative.
Feedback might focus on:
- the accuracy and details of the data students have recorded during their investigation.
- whether students are using this data as evidence to justify their conclusions.
- students’ contributions to the discussions about keeping the tests fair.
- the appropriateness of other properties students identified for testing.
Whole class
Class science journal (digital or hard copy)
1 large clothes peg
1cm x 15cm strip of tissue paper (or some other paper-based material other than those the students will use, see below)
Demonstration copy of the Fish and chips packaging Resource sheet
Optional: Samples of the materials depicted in the Fish and chips packaging Resource sheet, including newspaper, thin cardboard boxes, paper cups, greaseproof paper, paper bags, Styrofoam.
Demonstration copy of the Testing the strength of paper packaging Resource sheet
Each group
At least 1 clothes peg
2 or more 1cm x 15cm strips of at least 3 paper-based materials, for example paper, newspaper, magazine paper, tissue paper, paper towel, greaseproof paper etc.
Optional: Magnifying glass
Each student
Individual science journal (digital or hard copy)
Testing the strength of paper packaging Resource sheet
Lesson
Re-orient
Recall the previous lessons, focusing on the materials identified in students’ packed lunches.
Remind students of the difference between natural materials, processed materials and man-made materials.
The Inquire phase allows students to cycle progressively and with increasing complexity through the key science ideas related to the core concepts. Each Inquire cycle is divided into three teaching and learning routines that allow students to systematically build their knowledge and skills in science and incorporate this into their current understanding of the world.
When designing a teaching sequence, it is important to consider the knowledge and skills that students will need in the final Act phase. Consider what the students already know and identify the steps that need to be taken to reach the level required. How could you facilitate students’ understanding at each step? What investigations could be designed to build the skills at each step?
Read more about using the LIA FrameworkIdentifying and constructing questions is the creative driver of the inquiry process. It allows students to explore what they know and how they know it. During the Inquire phase of the LIA Framework, the Question routine allows for past activities to be reviewed and to set the scene for the investigation that students will undertake. The use of effective questioning techniques can influence students’ view and interpretation of upcoming content, open them to exploration and link to their current interests and science capital.
When designing a teaching sequence, it is important to spend some time considering the mindset of students at the start of each Inquire phase. What do you want students to be thinking about, what do they already know and what is the best way for them to approach the task? What might tap into their curiosity?
Read more about using the LIA FrameworkHot food packaging
Ask students if they have ever had takeaway fish and chips or hot chips, and discuss their experiences.
Depending on your students you might substitute fish and chips/hot chips with another food that students have experience eating. See the embedded professional learning Adapting to your context below for more details.
Optional: Discuss the ‘healthiness’ of fish and chips/hot chips and if and why they are considered ‘sometimes’ foods, rather than food we should be eating regularly. Be mindful that students in Year 4 have no or very limited control over the foods they eat, as their food is provided to them by parents/carers.
- Have you ever had a fish and chips takeaway, or hot chips?
- What temperature are they when you buy them?
- How do you know that? What do you observe about the food to know that (see, touch, taste)?
- What type/s of packaging do they come in?
- Is the packaging made of a natural/processed/man-made material?
- Common packaging for fish and chips/hot chips is paper, which comes from a natural material that needs to be processed.
- What happens to the food over time? What might it be like 5 minutes, 10 minutes, or 20 minutes after you buy it?
- Have you ever seen steam coming off the food?
- What is steam?
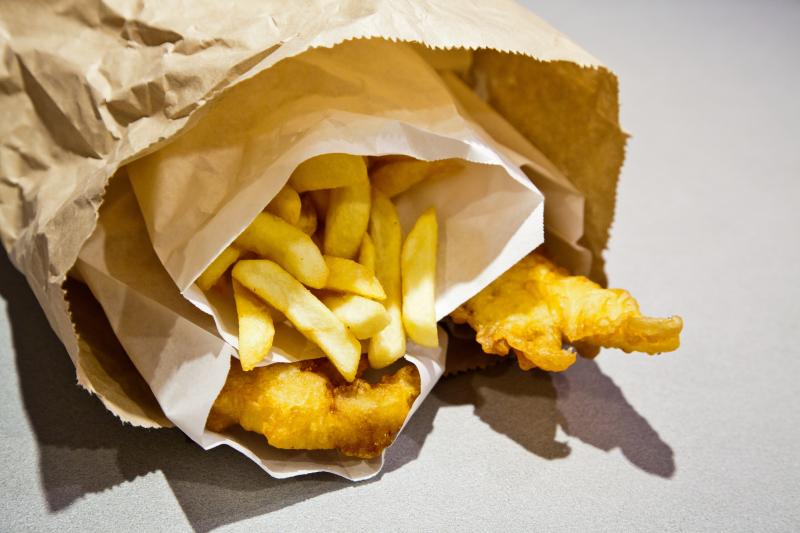
Look at a demonstration copy of the Fish and chips packaging Resource sheet. Discuss what students notice about the packaging that can be seen in each image. If possible, have an example of each type of packaging available for students to examine in person.
The following information is for teacher reference. Students should be guided to make their own observations first, before offering any supplemental information that may further their understanding.
- Image 1: Printed newspaper (a natural material with a small amount of processing involved), commonly used in the 1970s and 1980s. No longer used today, as condensation often made the ink bleed into and discolour the food.
- Image 2: Cardboard box, paper sauce container, wooden fork (processed natural materials). More likely to be seen now as it is more environmentally friendly and can be recycled.
- Image 3: Layered paper bags (a processed natural material). Also more likely to be seen now as it is more environmentally friendly and can be recycled.
- Image 4: Styrofoam boxes (a completely man-made material—a type of expanded plastic less common today for environmental reasons) and greaseproof paper (a processed natural material, paper often with a man-made silicone coating. More recently, some greaseproof papers are marked as ‘bio-degradable’ or ‘eco’ as the coating breaks down more quickly/easily.)
- What types of packaging can you see in the pictures?
- Which type do you think we still use today, and which ones don’t we use anymore?
- Why don’t we use them anymore?
- Can you see a difference between the ‘paper’ in images 3 and 4?
- The paper in image 4 is shiny.
- What do you think makes the paper shiny?
- The paper is coated in plastic so it doesn’t soak up the moisture created by the steam coming off the hot food.
- How has the packaging changed?
- Do you think all changes are ‘good’?
- What do you think might have informed these choices?
- What do you think would be important properties for fish and chips packaging?
Guide the discussion so that students identify strength as an important property in selecting packaging. Strength is important as the materials need to be able to hold the chips, so they don’t fall out and burn you.
Pose the question: Which packaging material is the strongest?
Adapting to your context
How can you adapt this activity to explore a different food besides fish and/or chips?
This lesson has been designed to support students to understand that wet/damp paper has decreased strength.
Many hot foods are served packaged in some form of paper product. As the hot food lets off steam the paper becomes damp, decreasing its strength.
Fish and chips/hot chips have been chosen as the demonstration food because many students will have experience eating these foods during family outings, at sporting events etc., and because, in recent years, you will find it more typically packaged in some form of paper product. It also provides an opportunity to consider the ways and reasons why fish and chips packaging has changed over time.
If your students are unlikely to have eaten fish and chips/hot chips, any food that is typically served warm and wrapped in paper can be used to begin the discussion. Many foods that are sold in school canteens can be used as an example. You could also demonstrate this to the class by wrapping a warm food in paper and observing what happens in real-time. Adapt the Fish and chips packaging Resource sheet accordingly.
You might also incorporate Aboriginal and Torres Strait Islander knowledge on materials used to hold specific items, by focusing on water carriers. Examples include:
- Skin bags: Waterproof bags made from the skin of kangaroos, wallabies, possums, and bandicoots.
- Wooden coolamons: Curved carrying vessels made from wood or bark that were used to store and transport water.
- Wooden bowls: Used throughout Australia to carry water.
- Large waxy leaves: Used in tropical areas to carry water short distances.
- Kelp: A form of seaweed used near the sea.
- Large shells: Used near the sea to boil water.
Consider the features of these materials that make them suitable for holding water.
Promote critical thinking by drawing on different perspectives, e.g. convenience, environmental friendliness, cost etc.
The Inquire phase allows students to cycle progressively and with increasing complexity through the key science ideas related to the core concepts. Each Inquire cycle is divided into three teaching and learning routines that allow students to systematically build their knowledge and skills in science and incorporate this into their current understanding of the world.
When designing a teaching sequence, it is important to consider the knowledge and skills that students will need in the final Act phase. Consider what the students already know and identify the steps that need to be taken to reach the level required. How could you facilitate students’ understanding at each step? What investigations could be designed to build the skills at each step?
Read more about using the LIA FrameworkThe Investigate routine provides students with an opportunity to explore the key ideas of science, to plan and conduct an investigation, and to gather and record data. The investigations are designed to systematically develop content knowledge and skills through increasingly complex processes of structured inquiry, guided inquiry and open inquiry approaches. Students are encouraged to process data to identify trends and patterns and link them to the real-world context of the teaching sequence.
When designing a teaching sequence, consider the diagnostic assessment (Launch phase) that identified the alternative conceptions that students held. Are there activities that challenge these ideas and provide openings for discussion? What content knowledge and skills do students need to be able to complete the final (Act phase) task? How could you systematically build these through the investigation routines? Are there opportunities to build students’ understanding and skills in the science inquiry processes through the successive investigations?
Read more about using the LIA FrameworkTesting for tensile strength
Discuss what students think ‘strong’ means in terms of packaging materials.
- Which packaging materials are strong?
- Why do you think that?
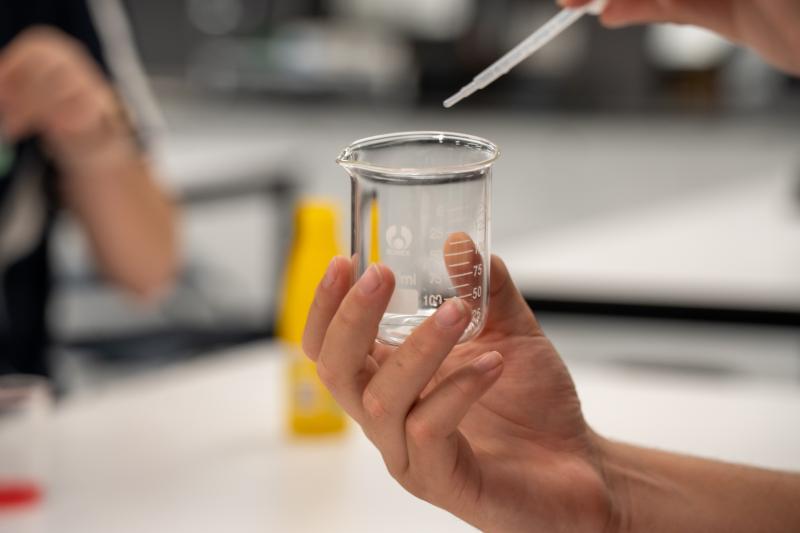
- Is glass a strong material? Why/Why not?
- Would we package fish and chips in glass? Why/why not?
- What do we package fish and chips in today?
- Can paper or cardboard be strong?
- How would we know if a material is strong? How could we test it?
Explain that students are going to be testing some paper products to see which ones would be suitable for use as fish and chips packaging. They will test both wet and dry samples of different types of paper.
Discuss why it might be important to test the paper when it’s wet: the steam from the hot food makes the paper wet, so they need to know if it will be strong enough to hold the fish and chips after that.
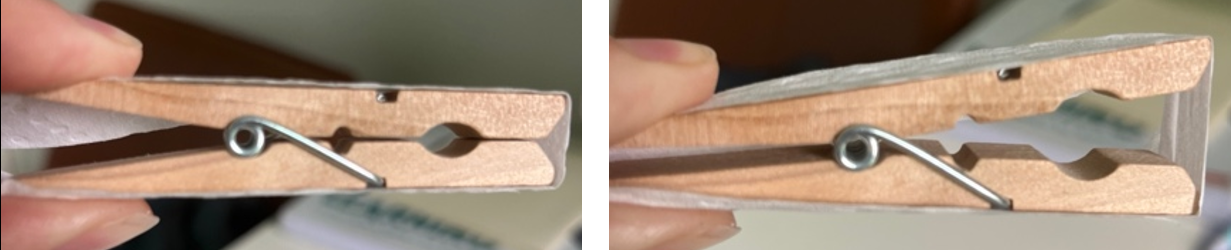
Model the investigation by using a material other than those that the students will test (e.g. tissue paper). Model how to wrap the strip of paper around the clothes peg, how to hold it, and how to squeeze the ends of the peg until the material breaks or the peg opens to its limit.
Model how to use the magnifying glass to examine the snap, tear, or stretch in the material and how to record the observations.
Discuss the fair testing procedure and explain that students will be undertaking two comparative fair tests (a test that changes only one thing to compare if the changed variable makes a difference).
For Test 1, they will test all the materials when dry.
- Change: The type of material
- Keep the same: The size of the material, how the material is wrapped around the peg, and the force used to open the peg
- Measure/observe/record: How the material snaps, tears, or stretches
In Test 2, students will test the same materials but when they are wet. Model how to wet each material and gently squeeze out the excess water.
- Change: The moisture in the material
- Keep the same: The size of the material, how the material is wrapped around the peg and the force used to open the peg, how much water we put on it
- Measure/observe/record: How the material snaps, tears or stretches
You may choose to complete all of Test 1 before introducing and explaining Test 2 to students. Determine the approach that is most suitable for your students’ needs and level of experience with fair testing.
In collaborative teams, students carry out the investigation and record their results using the Testing the strength of paper packaging Resource sheet.
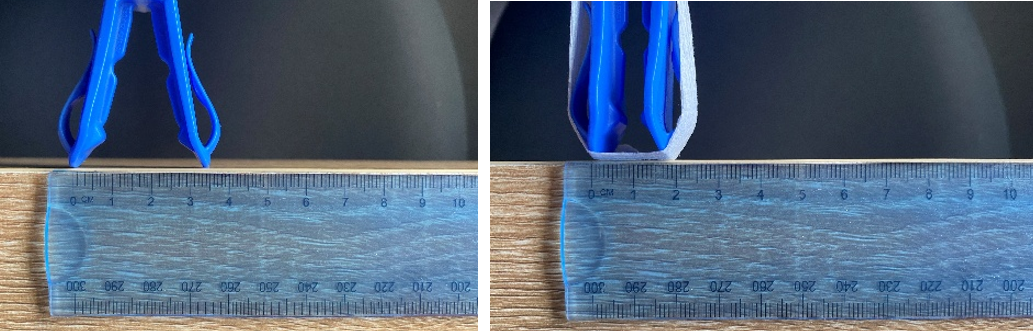
Optional: Students can collect quantitative data during this investigation regarding how far each material can stretch before it snaps (if at all). One way to do this is to measure and record the distance the peg will open without anything wrapped around it. Students could then measure how far the peg opens when the materials are wrapped around it, carefully observing when it begins to tear, and record this measurement. Using a ruler placed at the edge of the table is one way to provide a fixed measurement method, whilst allowing students to space to manoeuvre the peg as required.
Taking it further
How can you extend students who are experienced in carrying out fair tests?
This lesson describes a comparative test, where students determine the strength of different types of papers when dry and wet.
Students might also be extended to plan their own fair test investigation focusing on the most-needed features for fish and chips/hot chips packaging.
First list some design criteria for fish and chips packaging, with a focus on user needs. For example, it would need to keep clothing, car and furniture grease free, let steam escape so the paper doesn’t go soggy, keeping the food warm enough from purchase to consumption, be easy to hold/eat from when outside, be recyclable/biodegradable so it doesn’t add to landfill etc.
Groups could then select a criteria and design and carry out a fair test to investigate it.
The level of teacher guidance and scaffolding would depend upon students’ needs.
The Inquire phase allows students to cycle progressively and with increasing complexity through the key science ideas related to the core concepts. Each Inquire cycle is divided into three teaching and learning routines that allow students to systematically build their knowledge and skills in science and incorporate this into their current understanding of the world.
When designing a teaching sequence, it is important to consider the knowledge and skills that students will need in the final Act phase. Consider what the students already know and identify the steps that need to be taken to reach the level required. How could you facilitate students’ understanding at each step? What investigations could be designed to build the skills at each step?
Read more about using the LIA FrameworkFollowing an investigation, the Integrate routine provides time and space for data to be evaluated and insights to be synthesized. It reveals new insights, consolidates and refines representations, generalises context and broadens students’ perspectives. It allows student thinking to become visible and opens formative feedback opportunities. It may also lead to further questions being asked, allowing the Inquire phase to start again.
When designing a teaching sequence, consider the diagnostic assessment that was undertaken during the Launch phase. Consider if alternative conceptions could be used as a jumping off point to discussions. How could students represent their learning in a way that would support formative feedback opportunities? Could small summative assessment occur at different stages in the teaching sequence?
Read more about using the LIA FrameworkWhat’s the strongest?
Share and discuss the results of teams’ investigations. Use the question prompts below, which also appear on the Testing the strength of paper packaging Resource sheet so that teams can consider their responses before sharing their results.
- Which material did your team find was the strongest?
- Why did you make that decision?
- Does that match what other teams found?
- Which material might be best for chips packaging (only based on its strength)?
- What other properties might be important to test?
Introduce the term ‘tensile strength’: a measure of the force needed to pull or stretch a material to the point where it breaks. Ask students why they think fish and chip packaging would need to have high tensile strength, especially when wet.
Model in the class science journal how to write a claim based on the test, using the data from the recording table and the term ‘tensile strength’. Ask students to write their own conclusions based on their own investigations.
Discuss why, if greaseproof paper has a higher tensile strength than regular paper, we don’t use it as much anymore to wrap fish and chips. Why do students think that decision was made? What is greaseproof paper made of that makes it stronger? In a later lesson, students will examine these ideas further.
Reflect on the lesson
You might:
- discuss how students were thinking and working like scientists during the lesson. When might scientists use comparative testing?
- consider how knowing about tensile strength is helpful in our everyday lives.
- For example, when comparing two brands of the same product to determine which is best.
- update the TWLH chart by having students add what they have learned (L) and evidence/observations that show how they know that (H). They may also pose any additional questions that they are curious about (W).
- consider how the investigation will help students to design their food packaging solution.