Packaging pioneers
View Sequence overviewStudents will:
- explore how the properties of materials can change when using them in combination.
- identify and compare the water resistance of fabrics combined with different substances.
- consider how Aboriginal and Torres Strait Islander Peoples’ knowledge of natural and processed materials informs the preparation of effective, vibrant and long-lasting paints.
Students will represent their understanding as they:
- make appropriate observations and measurements to compare properties of fabric combinations.
- use observations to explain how the properties of fabrics change when they are coated in different materials.
- share their ideas about the changes of properties to a material, and whether these changes make the material better or worse, listen to each other’s ideas and share unexpected findings/posing questions for further investigations.
In this lesson, assessment is formative.
Feedback might focus on:
- students' identification of the properties of materials and how these properties influence their use.
OR:
In this lesson, assessment is summative.
Students working at the achievement standard (science inquiry) should:
- be able to use provided scaffolds to plan and investigate to answer questions or test predictions, including identifying the elements of fair tests, and considering the safe use of materials and equipment.
Refer to the Australian Curriculum content links on the Our design decisions tab for further information.
Whole class
Class science journal (digital or hard-copy)
A variety of classroom items made of more than one material. For example a sharpener (plastic and metal), windows (metal or wood and glass), chairs (plastic, metal, foam, fabric) etc.
A square of fabric 15 x 15cm approximately (a wash cloth for example)
3 x jars or cups
3 x elastic bands
A pipette or water dropper
A cup of water
Demonstration copy of the Combining materials Resource sheet
A square each of regular paper, baking paper, and cling wrap 15 x 15cm approximately
Optional: a fourth jar/cup
Optional: silicone baking sheet
Examples of food packages that are made using more than one material, e.g. greaseproof paper, plastic-coated wrapping paper, and plastic-coated aluminium chip packets.
Each group
3 x jars or cups
3 x elastic bands
A selection of fabrics in squares of 15 x 15 cm approximately (wash cloths work well)
An elastic band
1 cup of water
A pipette or water dropper
A selection of substances that can be used to coat each material (e.g. vegetable oil, wax crayons, glue, foil)
Each student
Individual science journal (digital or hard-copy)
Combining materials Resource sheet (or make their own)
Lesson
Re-orient
Recall the previous lesson, focusing on comparing the property of thermal insulation of different materials. Ask students to recall what they found out from their investigations, e.g. how the thermal insulation was affected by changing the number of layers, the colour or the material. Ask students to explain why some materials are better at preventing heat transfer than others.
Links can be made to what students learned about heat transfer in Year 3.
The Inquire phase allows students to cycle progressively and with increasing complexity through the key science ideas related to the core concepts. Each Inquire cycle is divided into three teaching and learning routines that allow students to systematically build their knowledge and skills in science and incorporate this into their current understanding of the world.
When designing a teaching sequence, it is important to consider the knowledge and skills that students will need in the final Act phase. Consider what the students already know and identify the steps that need to be taken to reach the level required. How could you facilitate students’ understanding at each step? What investigations could be designed to build the skills at each step?
Read more about using the LIA FrameworkIdentifying and constructing questions is the creative driver of the inquiry process. It allows students to explore what they know and how they know it. During the Inquire phase of the LIA Framework, the Question routine allows for past activities to be reviewed and to set the scene for the investigation that students will undertake. The use of effective questioning techniques can influence students’ view and interpretation of upcoming content, open them to exploration and link to their current interests and science capital.
When designing a teaching sequence, it is important to spend some time considering the mindset of students at the start of each Inquire phase. What do you want students to be thinking about, what do they already know and what is the best way for them to approach the task? What might tap into their curiosity?
Read more about using the LIA FrameworkCombinations of materials
Examine a variety of classroom items made of more than one material, and introduce the idea that most of these items use a combination of materials to make them more useful.
Identify the material components of each item, what each material is used for, and the properties that make them useful. For example, a pencil sharpener is usually made of metal and plastic. The plastic is lightweight and durable, so it doesn't break easily, and the metal can be sharp enough to shave a thin layer of wood off the pencil to reveal more lead.
Challenge students to list as many examples as possible of items made with combinations of different materials, within a given time limit, either individually or with a partner. Collate a list in the class science journal using the cumulative listing technique.
Optional: Introduce how some First Nations Peoples used saps and resins to waterproof animal hides so that they could be used to carry water. See the embedded professional learning Aboriginal and Torres Strait Islander Histories and Cultures below for more information.
Pose the question: How can we combine materials to make fabric waterproof?
Aboriginal and Torres Strait Islander Histories and Cultures
How did some First Nations Peoples make waterproof animal skins?
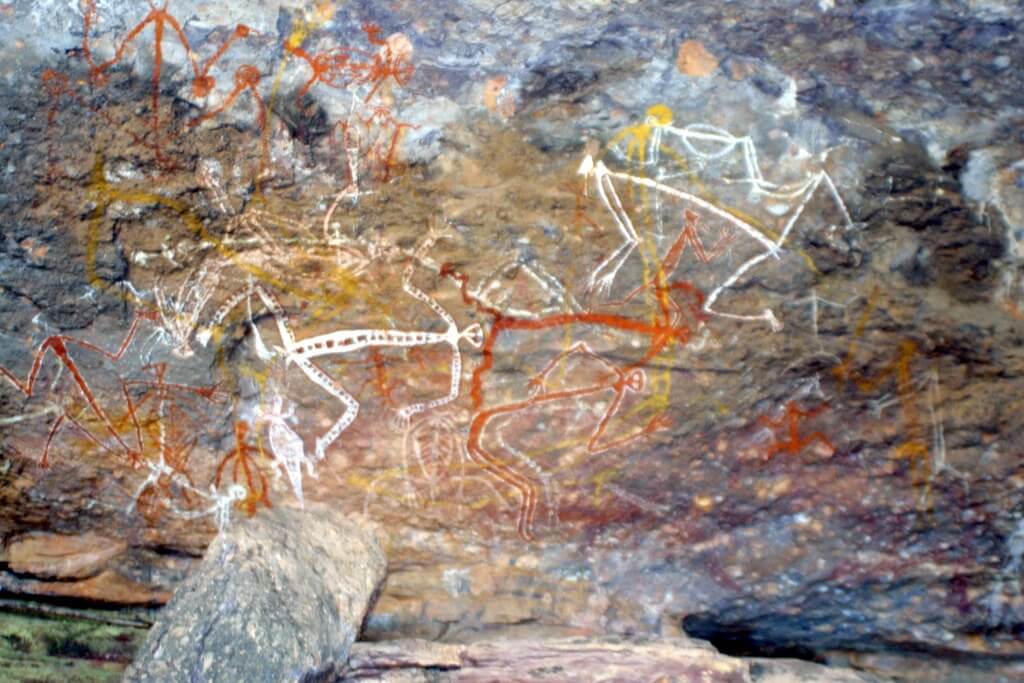
Australia's First Nations Peoples have long used their knowledge of natural materials to create practical tools.
One such example can be found in the process of tanning animal skins. Skins from kangaroos, possums, wallabies, and bandicoots were combined with resins from trees such as Eremophila and Acacia to create water carriers of different sizes and strengths.
The Wodiwodi People from the Illawarra region of New South Wales use sap from the Myimbarr tree (a Dharawal word for a type of Acacia) to tan animal skins. This process makes the skins stronger and prevents them from rotting.
The Wiradjuri People from central New South Wales tanned wallaby skins to make water carriers, carefully removing the skin in one piece, drying it, and then adding resin.
In Queensland, kangaroo skins were tanned with bloodwood gum. These water carriers, called ‘nilpa’ by the Pitta Pitta Peoples and ‘norlo’ by the Kalkadoon Peoples, were essential for carrying water over long distances.
The Inquire phase allows students to cycle progressively and with increasing complexity through the key science ideas related to the core concepts. Each Inquire cycle is divided into three teaching and learning routines that allow students to systematically build their knowledge and skills in science and incorporate this into their current understanding of the world.
When designing a teaching sequence, it is important to consider the knowledge and skills that students will need in the final Act phase. Consider what the students already know and identify the steps that need to be taken to reach the level required. How could you facilitate students’ understanding at each step? What investigations could be designed to build the skills at each step?
Read more about using the LIA FrameworkThe Investigate routine provides students with an opportunity to explore the key ideas of science, to plan and conduct an investigation, and to gather and record data. The investigations are designed to systematically develop content knowledge and skills through increasingly complex processes of structured inquiry, guided inquiry and open inquiry approaches. Students are encouraged to process data to identify trends and patterns and link them to the real-world context of the teaching sequence.
When designing a teaching sequence, consider the diagnostic assessment (Launch phase) that identified the alternative conceptions that students held. Are there activities that challenge these ideas and provide openings for discussion? What content knowledge and skills do students need to be able to complete the final (Act phase) task? How could you systematically build these through the investigation routines? Are there opportunities to build students’ understanding and skills in the science inquiry processes through the successive investigations?
Read more about using the LIA FrameworkHow can we change the properties of fabric?
Explain that fabric is a good material for a lunch bag because it is flexible, sustainable (because you can use it more than once), and light. However, fabrics are not always waterproof.
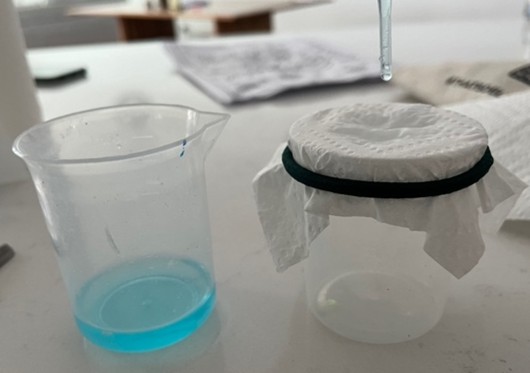
Model the investigation by stretching a square of fabric over a jar or plastic cup, securing with an elastic band, and using a pipette or water dropper to drop 20 drops of water onto the fabric. Observe and measure the length of time the water drops remain on the fabric before being absorbed, and any water that passes through the fabric.
Challenge students to work in collaborative teams to think about how they can change the fabric to make it more waterproof. In this investigation, students should discuss how they are going to observe/measure how waterproof their materials are. For example, they may choose to time how long it takes for the water to soak through the material, how much water goes through the material, or how easy it is to wipe off the water from the surface.
Task each team to choose two different combinations to compare to the original sample. For example, they may select fabric, fabric sandwiched together using glue, and fabric covered in wax crayon. Once they have set up their investigation, ask students to use 20 drops of water on each sample, and to record their descriptive and measured observations using the Combining materials Resource sheet.
Alternatively, they can construct their own table in their individual science journals, using the sample on the resource sheet as a guide.
The Inquire phase allows students to cycle progressively and with increasing complexity through the key science ideas related to the core concepts. Each Inquire cycle is divided into three teaching and learning routines that allow students to systematically build their knowledge and skills in science and incorporate this into their current understanding of the world.
When designing a teaching sequence, it is important to consider the knowledge and skills that students will need in the final Act phase. Consider what the students already know and identify the steps that need to be taken to reach the level required. How could you facilitate students’ understanding at each step? What investigations could be designed to build the skills at each step?
Read more about using the LIA FrameworkFollowing an investigation, the Integrate routine provides time and space for data to be evaluated and insights to be synthesized. It reveals new insights, consolidates and refines representations, generalises context and broadens students’ perspectives. It allows student thinking to become visible and opens formative feedback opportunities. It may also lead to further questions being asked, allowing the Inquire phase to start again.
When designing a teaching sequence, consider the diagnostic assessment that was undertaken during the Launch phase. Consider if alternative conceptions could be used as a jumping off point to discussions. How could students represent their learning in a way that would support formative feedback opportunities? Could small summative assessment occur at different stages in the teaching sequence?
Read more about using the LIA FrameworkWhat happened?
Teams communicate their findings by answering the following questions:
- Which material combination was the most leakproof? What evidence do you have to support your claim?
- What were the downsides to your material combinations?
- For example, it was sticky or would make the food smell.
- Were there any unexpected findings? What further questions could we investigate?
Remind students of how they found that greaseproof paper had a stronger tensile strength than regular paper, but that greaseproof paper is not always used to package fish and chips.
Set up a demonstration with three cups, with regular paper, baking paper, and cling wrap secured over the top.
Optional: Use a fourth cup with a silicone baking sheet placed over the top.
Place 10-20 drops of water onto the regular paper secured to the top of a cup and wait a length of time (10 or 15 seconds) before testing to see how easily something can be pushed through the paper, for example, a finger.
Repeat so that a few students get the opportunity to experience this.
Now repeat the process for the other materials and cups.
Determine which material was the weakest once it had been covered in water. Discuss what this might mean if it were used for food wrapping.
- Which material was the weakest?
- Does that match what we learned during our tensile strength testing?
- Could you describe the difference between regular paper and greaseproof paper? How does it feel? What happens when you scrunch it etc.?
- Have some samples for students to manipulate and observe.
- Would you call the cling wrap strong in this case? Was it easy to put a hole in it?
- Do you think cling wrap is good for carrying food?
- What food is cling wrap not suitable for and why?
- How do you think they make greaseproof paper?
- Greaseproof paper is covered in a thin layer of silicone.
- What property does the greaseproof paper have that normal paper doesn’t have?
- It’s more waterproof.
- Why do we use greaseproof paper then, instead of just using cling wrap?
- The cling wrap can melt if the food is hot enough, and plastic isn’t good for the environment. Baking paper decomposes faster than cling wrap, although the silicone or wax coating slows down the process a lot.
- Some greaseproof paper is marked as ‘bio-degradable’ or ‘eco’. These are the most environmentally friendly ones available at the moment.
- Why do you think most shops use paper instead of greaseproof paper for fish and chips?
- Greaseproof paper is not as easy to recycle as paper, because of the plastic coating. The plain paper soaks up some of the oil from the fish and chips, making it a bit healthier when we eat the food.
Present students with food packages that are made using more than one material, e.g. greaseproof paper, plastic-coated wrapping paper, and plastic-coated aluminium chip packets. Discuss what students observe about their different materials and properties.
- What combinations of materials have been used here?
- Why do you think they have been combined?
- What properties do they have together that they didn’t have when they were used separately?
- How does the combination make the materials more useful?
- How does the combination make the materials less useful?
Reflect on the lesson
You might:
- add to the class word wall vocabulary related to properties, e.g. absorbency, waterproof, airtight.
- re-examine the intended learning goals for the lesson and consider how they were achieved.
- discuss how students were thinking and working like scientists during the lesson. Focus on the importance of critical thinking when investigating properties of materials, thinking about the idea that there is more than one way to make observations.
- consider how what they have investigated will be helpful designing their food packaging solution.