Making sense of changes
View Sequence overviewStudents will:
- observe and compare the effect of removing heat from different liquids.
- consolidate their understanding of materials as solids and liquids at different temperatures.
Students will represent their understanding as they:
- describe properties of a variety of liquids at room, fridge and freezer temperatures.
- discuss and contribute to a class summary table showing if materials are solid or liquid at freezer/fridge/room/warmer temperatures.
- discuss how different materials are recycled by melting at different temperatures.
In this lesson, assessment is formative.
Feedback might focus on:
- the freezing/melting point of solids and liquids. Do students recognise that different materials freeze/melt at different temperatures?
- changing states from solid to liquid and back again. Do students identify adding and removing heat as the reason for materials changing from solid to liquid and vice versa?
- identifying solutions that use scientific explanations. Can students transfer their knowledge of melting to predict with fair reasoning, materials that are recyclable?
- Students are not expected to know that paper/wood products combust and cannot be melted.
Whole class
Small resealable bags
Scales
Optional: Multiple sets of scales, included at each station set up for liquids being explored, or at easily accessible locations in the classroom.
Markers
A variety of liquids, for example water, oil, tomato sauce, honey, shampoo/conditioner, washing up liquid, prepared at least 24 hours before the lesson as follows:
- Create 3 samples of each liquid by placing small amounts (preferably the same amount, for example 25mls or as close to as possible) into resealable bags.
- One at a time, place a resealable bag on a scale, zero the scale, and place a small amount of the liquid into the bag.
- Label each bag with the liquid’s name, weight, and where it will be stored—one sample in the freezer, one in the fridge, and one at room temperature.
- Gather samples of students’ ice monsters to be placed with the fridge, freezer and room temperature samples. Label where each will be stored.
- Optional: Gather 3 x small bottles of alcohol-based hand sanitiser. Label one fridge, one freezer and one room temperature.
- Place the samples in their labelled location—either the fridge, the freezer, or somewhere where they will remain at room temperature.
Note: You could involve students in organising these samples prior to the lesson commencing, and with enough time to ensure they will freeze.
Class science journal (individual or hard-copy)
Demonstration copy of the Cool liquid observations Resource sheet (or make your own)
1 x copy of the Cool liquid observations Resource sheet (or make your own) for each liquid you have prepared samples for
Optional: Video The Story of Aluminium Recycling (2:05)
Optional: Video The Smashing Story of recycling Glass (2:15)
Each student
Individual science journal (digital or hard copy)
Lesson
Re-orient
Review if/how adding and removing heat energy to the samples of liquids in the previous lesson affected their viscosity.
The Inquire phase allows students to cycle progressively and with increasing complexity through the key science ideas related to the core concepts. Each Inquire cycle is divided into three teaching and learning routines that allow students to systematically build their knowledge and skills in science and incorporate this into their current understanding of the world.
When designing a teaching sequence, it is important to consider the knowledge and skills that students will need in the final Act phase. Consider what the students already know and identify the steps that need to be taken to reach the level required. How could you facilitate students’ understanding at each step? What investigations could be designed to build the skills at each step?
Read more about using the LIA FrameworkIdentifying and constructing questions is the creative driver of the inquiry process. It allows students to explore what they know and how they know it. During the Inquire phase of the LIA Framework, the Question routine allows for past activities to be reviewed and to set the scene for the investigation that students will undertake. The use of effective questioning techniques can influence students’ view and interpretation of upcoming content, open them to exploration and link to their current interests and science capital.
When designing a teaching sequence, it is important to spend some time considering the mindset of students at the start of each Inquire phase. What do you want students to be thinking about, what do they already know and what is the best way for them to approach the task? What might tap into their curiosity?
Read more about using the LIA FrameworkFreezing liquids
Discuss the process of removing heat from liquids.
- How did we remove the heat from the liquids last lesson?
- What are some other ways you might remove heat from a liquid?
- How did removing heat affect the viscosity of the liquids?
- Would you consider any of the liquids frozen? Why or why not?
- How do you freeze a liquid?
Pose the questions: Do all liquids freeze the same way? Do all frozen liquids look and feel the same? Do all liquids at fridge temperature look and feel the same?
Freezing point
What is meant by the terms ‘freezing point’ and ‘melting point’? And are they the same for every substance?
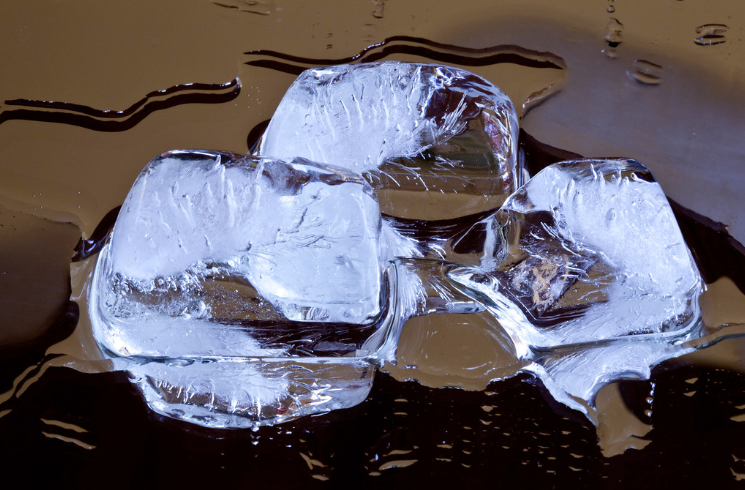
When a material changes from a solid to a liquid, this process is called melting or liquefying. When the material changes from a liquid back to a solid, the process is called freezing or solidifying. Every material has a specific temperature at which this change happens—this is known as its melting point or freezing point, depending on the direction of the change.
The speed at which this change occurs can vary, and temperature is a key factor. In general, increasing the temperature speeds up how quickly things melt. For example, how quickly chocolate melts depends on its size and surrounding temperature. A smaller piece of chocolate melts faster than a larger one because heat is transferred through it more easily. Similarly, chocolate melts faster in a warm environment than in a cooler one. However, since chocolate must be heated above its melting point to melt, it won’t melt in a refrigerator.
When a material changes state, its atoms stay the same. What changes is how the particles of the material are arranged and held together. These physical changes are usually reversible if the material is pure (if it contains just one type of particle).
In contrast, when a non-pure solid (a mixture of different substances) melts, the components may separate. This can prevent the solid from returning to its original form when refrozen. A good example is ice cream: once it melts and is refrozen, it can separate into ice crystals and frozen cream instead of returning to its original smooth texture.
The freezing point of a substance can change when it is mixed with a new substance. For example, pure water has a freezing point of 0°C. If salt is added to the water, the temperature at which the water freezes (its freezing point) decreases. This is the reason why some countries add salt to the road surface in cold weather.
Different substances have different freezing and melting points. This is because the molecular structures of each substance, and the forces that bind those molecules together, are different. Therefore it takes a different amount of heat energy (or removal of heat energy) to overcome those forces.
So whilst pure water freezes at 0°C, olive oil becomes highly viscous at that temperature and will not freeze until it reaches temperatures of between -10°C and -23°C. Meanwhile, ethyl alcohol freezes at -117.3°C and liquid nitrogen freezes at the much lower -209.86°C!
Pure water in its solid form, ice, will melt at any temperature above 0°C, even at 0.1°C. Milk chocolate typically melts between 29°C and 32°C, depending on the type, whilst butter melts at 32°C-35°C. Aluminum melts at a temperature of 660.3°C, gold at 1064°C, and iron at a whopping 1538°C!
The Inquire phase allows students to cycle progressively and with increasing complexity through the key science ideas related to the core concepts. Each Inquire cycle is divided into three teaching and learning routines that allow students to systematically build their knowledge and skills in science and incorporate this into their current understanding of the world.
When designing a teaching sequence, it is important to consider the knowledge and skills that students will need in the final Act phase. Consider what the students already know and identify the steps that need to be taken to reach the level required. How could you facilitate students’ understanding at each step? What investigations could be designed to build the skills at each step?
Read more about using the LIA FrameworkThe Investigate routine provides students with an opportunity to explore the key ideas of science, to plan and conduct an investigation, and to gather and record data. The investigations are designed to systematically develop content knowledge and skills through increasingly complex processes of structured inquiry, guided inquiry and open inquiry approaches. Students are encouraged to process data to identify trends and patterns and link them to the real-world context of the teaching sequence.
When designing a teaching sequence, consider the diagnostic assessment (Launch phase) that identified the alternative conceptions that students held. Are there activities that challenge these ideas and provide openings for discussion? What content knowledge and skills do students need to be able to complete the final (Act phase) task? How could you systematically build these through the investigation routines? Are there opportunities to build students’ understanding and skills in the science inquiry processes through the successive investigations?
Read more about using the LIA FrameworkObserving liquids
Set up stations around the room where teams can make observations about the liquid samples prepared for this lesson at their three different temperatures.
At each station, place:
- three samples of the same liquid at different temperatures, in their clearly labelled bags.
- 1 copy of Cool liquid observations Resource sheet, or butchers’ paper with columns labelled ‘room temperature,’ ‘fridge,’ and ‘freezer’. The observation sheet should be labelled with the name of the liquid at the station.
- textas/pens.
- Optional: a scale to weigh each sample
Note: If you prepared bottles of hand sanitiser as part of the lesson preparation, do not include the hand sanitiser as a station. This sample should be handled by the teacher and used for demonstration only.
As a class list all of the liquids that will be examined in this lesson. Ask students to make predictions about what changes the liquid might have undergone in the fridge or freezer. Record students’ ideas in the class science journal.
- Do you think all these liquids will be frozen after being in the freezer? Why or why not?
- Will they be more viscous? Why or why not?
- If you think that one won't freeze, what do you think the freezer will do to it?
- What experiences have you had that make you think this?
Using a demonstration copy of the Cool liquid observations Resource sheet (or on a table drawn up in the class science journal), model and discuss how students might make observations of each liquid. If scales are available for student use, the alternative conception of a substance changing when it freezes can be addressed by weighing each liquid in the three forms and recording the weight. Note that the weight of the resealable bag will need to be excluded, so students will need to zero the scale with a ‘control’ bag before weighing each sample.
If you have prepared samples of hand-sanitiser stored in the freezer, fridge, and at room temperature, use this as your demonstration. If not, then use the samples of any other liquid at a station. Look at each different temperature sample individually and record words, phrases and images to describe it.
Allow teams time to move around the room, looking at the samples at each station and adding their observations to the chart. If a team has visited that station before and already added something to the sheet that they agree with, they can place a tick next to the statement to indicate their agreement.
Ensure teams have visited each station to observe each liquid at its three different temperatures.
The Inquire phase allows students to cycle progressively and with increasing complexity through the key science ideas related to the core concepts. Each Inquire cycle is divided into three teaching and learning routines that allow students to systematically build their knowledge and skills in science and incorporate this into their current understanding of the world.
When designing a teaching sequence, it is important to consider the knowledge and skills that students will need in the final Act phase. Consider what the students already know and identify the steps that need to be taken to reach the level required. How could you facilitate students’ understanding at each step? What investigations could be designed to build the skills at each step?
Read more about using the LIA FrameworkFollowing an investigation, the Integrate routine provides time and space for data to be evaluated and insights to be synthesized. It reveals new insights, consolidates and refines representations, generalises context and broadens students’ perspectives. It allows student thinking to become visible and opens formative feedback opportunities. It may also lead to further questions being asked, allowing the Inquire phase to start again.
When designing a teaching sequence, consider the diagnostic assessment that was undertaken during the Launch phase. Consider if alternative conceptions could be used as a jumping off point to discussions. How could students represent their learning in a way that would support formative feedback opportunities? Could small summative assessment occur at different stages in the teaching sequence?
Read more about using the LIA FrameworkBringing it together
In this Integrate step, guide students to link their experiences in the investigation to the science concept being explored—in this instance, the observable properties of liquids and how adding or removing heat can change these properties. Through questioning and discussion, students should come to a consensus that:
|
Review the charts created at each liquid’s station, discussing students’ observations about each liquid at its three different temperatures.
- Did what you predicted would happen to the sample happen?
- If you thought something would freeze, did it?
- If you thought something would stay a liquid, did it?
- Did what happened to any of the samples surprise you? How and why?
- Did you notice any samples where there was almost no change at all compared to the room temperature sample after they’d been in the freezer and fridge?
- What did you notice about the weight of a substance before and after it was in the freezer?
Create a class summary table to show how liquids and solids have different properties at different temperatures. For example:

Add data to the Warm place column by recalling what happened to the liquids that were warmed up for race testing in the previous lesson.
If using hand sanitiser, note that it is flammable and may contain substances that are dangerous if inhaled, and that it should never be left in a location where it can become warm, nor should it be intentionally heated. If appropriate, explain that this is because of the alcohol component of the sanitiser, and that this is also the same reason why it won't freeze.
Weigh the samples, comparing them to their original weights, and discuss how the weight did not change regardless of their change of state.
Specifically discuss how much heat was removed from each sample, and how they changed as a result.
- How did we remove the heat from the liquids?
- We put them in the fridge and freezer.
- Does one method remove more heat than the other? How do you know?
- Putting them in the freezer removed more heat than putting them in the fridge.
- The samples from the freezer (average -18°C) felt colder than the ones from the fridge (average 4°C).
- The samples from the freezer were frozen and had become solids. This only happens in the freezer.
- Where do you think the heat went? Why do you think that?
- Do you think the hand sanitiser would freeze if it were left in the freezer for longer? What about the (cooking) oil?
Add the names of some things students would typically think of as solids, but that liquefy under high heat, for example, chocolate, plastic, glass, or metal. Ask students how they would classify these items at the different temperatures named on the table, and to predict what might happen to them if they were exposed to very high temperatures.
Use the think-pair-share strategy for students to consider how they could use what they have learned about turning solids into liquids as part of the sensory experience they design. Some prompts to stimulate their thinking might include:
- How would it feel to have something melting in your hand?
- What would be the difference between holding an ice chip in your hand as compared to an ice cube? Why do you think that?
- Would it be safe to hold a big piece of ice for a long time, or put your hands into an ice bath? Why?
- How would the feel of something change as it melted?
- How could you make watching something melt visually interesting?
Optional: View the video The Story of Aluminium Recycling (2:05).
Students could predict other items in their recycling bin that require the addition of heat during the recycling process.
Optional: View the video The Smashing Story of recycling Glass (2:15).
Reflect on the lesson
You might:
- add to the class word wall any vocabulary related to changing states.
- review the questions asked about changing states and add any new questions students have.
- discuss the safety of undertaking investigations, and why some tests can be conducted in the classroom, but others cannot. For example, we might wonder what hand sanitiser looks like when it is warmed up. Testing this would need to consider the risk of flames (alcohol is highly combustible) and ventilation (breathing in the vaporised alcohol would be a risk for young children).