Making sense of changes
View Sequence overviewStudents will:
- review and discuss what they have learned about solids, liquids, melting and freezing.
- be guided through the design thinking process to select materials to create a sensory experience for others.
In this lesson, assessment is summative.
Students working at the achievement standard should have:
- demonstrated an understanding of the observable properties of solids and liquids and how adding or removing heat energy leads to a change of state. Evidence might include:
- drawing their sensory experience prototype with labels identifying solids, liquids and any changes in state that will occur by adding/removing heat.
- describing any melting or freezing required for their sensory experience and how it will occur.
- anticipating logistical challenges and time allowances for materials used for melting or freezing.
Refer to the Australian Curriculum content links on the Our design decisions tab for further information.
Whole class
Class science journal (digital or hard-copy)
Optional: Demonstration copy of the Sensory experience design Resource sheet
Various materials that students or teams can use to create their sensory experiences, or part thereof. This might include:
- access to fridges and freezers.
- access to warm water or other equipment that can be used to warm materials such as microwaves, heaters, heating pads/bags or hairdryers.
- moulds to shape liquids for freezing.
- various types of liquids.
- items that can be placed in liquids for freezing such as plants, twigs, glitter, small plastic items.
- food colouring.
- solids that can be melted, such as chocolate, cheese, butter, crayons.
Each student
Individual science journal (digital or hard-copy)
Sensory experience design Resource sheet
Lesson
The Act phase empowers students to use the Core concepts and key ideas of science they have learned during the Inquire phase. It encourages students to develop a sense of responsibility as members of society—to act rather than be acted upon. It provides students with the opportunity to positively influence their own life and that of the world around them. For this to occur, students need to build foundational skills in an interactive mutually supportive environment with their community.
When designing the Act phase, consider ways that students could use their scientific knowledge and skills. Consider their interests and lifestyles that may intersect with the core concepts and key ideas. What context or problem would provide students with a way to use science to synthesise a design? How (and to whom) will students communicate their understanding?
Read more about using the LIA FrameworkScience education consists of a series of key ideas and core concepts that can explain objects, events and phenomena and link them to the experiences encountered by students in their lives. The purpose of the Anchor routine is to identify and link students’ learning to these ideas and concepts in a way that builds and deepens their understanding.
When designing the Act phase of a teaching sequence, consider the core concepts and key ideas that are relevant. The Anchor routine provides an opportunity to collate and revise the key knowledge and skills students have learned, in a way that emphasises the importance of science as a human endeavour.
What have we learned?
Discuss what conclusions students have drawn about solids and liquids, adding and removing heat, and the resulting processes of melting and freezing.
- What materials are solid/liquid/melted/frozen?
- What kinds of materials can be easily changed by adding/removing heat?
- What kinds of materials are harder to change by adding/removing heat?
- Can all materials be changed from a solid to a liquid?
- What materials might be readily available for our sensory experience?
The Act phase empowers students to use the Core concepts and key ideas of science they have learned during the Inquire phase. It encourages students to develop a sense of responsibility as members of society—to act rather than be acted upon. It provides students with the opportunity to positively influence their own life and that of the world around them. For this to occur, students need to build foundational skills in an interactive mutually supportive environment with their community.
When designing the Act phase, consider ways that students could use their scientific knowledge and skills. Consider their interests and lifestyles that may intersect with the core concepts and key ideas. What context or problem would provide students with a way to use science to synthesise a design? How (and to whom) will students communicate their understanding?
Read more about using the LIA FrameworkEach student comes to the classroom with experiences made up from science-related knowledge, attitudes, experiences and resources in their life. The Connect routine is designed to tap into these experiences, and that of their wider community. It is also an opportunity to yarn with community leaders (where appropriate) to gain an understanding of the student’s lives, languages and interests. In the Act phase, this routine reconnects with the science capital of students so students can appreciate the relevance of their learning and the agency to make decisions and take action.
When designing a teaching sequence, consider the everyday occurrences, phenomena and experiences that might relate to the science that they have learned. How could students show agency in these areas?
Read more about using the LIA FrameworkSensing our world
Refer to some of the sensory reels viewed in the Launch phase.
Reels used in Lesson 1 to focus on the senses included:
- painting yellow curves on canvas (sight, touch)
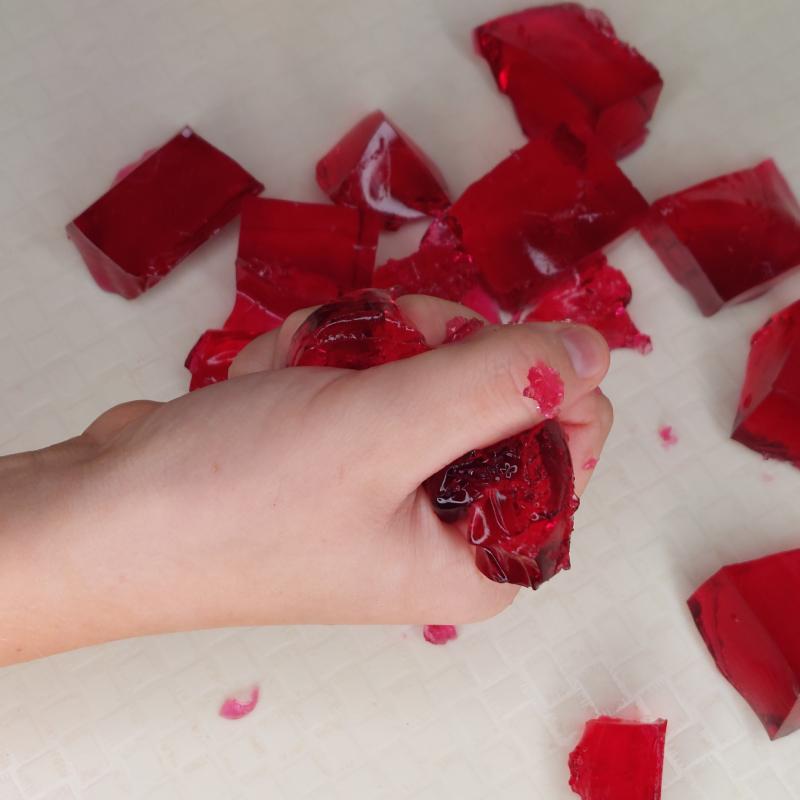
- ice sensory play (sight, touch)
- playing at a sand table (sight, touch, hearing)
- bubble wrap (touch, hearing)
- slime (touch, hearing)
- person with flowers (sight, smell, touch)
Reels that included melting or freezing included:
- Easy hack to melt chocolate without burning it
- Dog eating ice cubes (requires sound)
- Babies first taste of ice cream
- Melting ice cream time lapse
Discuss which of the experiences shown in the reels would be suitable for a sensory experience related to solids, liquids, melting, and freezing, which would not be, why and if the ideas could be modified to be included. For example, the reel of the person smelling flowers is a good example of the senses of sight, smell and touch, but it doesn't explore anything to do with solids and liquids, or melting or freezing. However, you could explore the ideas by getting ‘solid’ flowers and the scent in liquid form (essential oils, a candle) and explore the differences between the two. You might even freeze a flower to see if the scent is affected, or see if the essential oil or wax freezes and how it affects the scent.
Discuss when it is and isn’t safe to taste items during a science investigation, and determine why it would not be appropriate to include taste as a part of the sensory experience they will be designing.
Optional: Distribute the mystery substance from last lesson and discuss the senses that students used while investigating to determine whether it was solid or liquid.
The Act phase empowers students to use the Core concepts and key ideas of science they have learned during the Inquire phase. It encourages students to develop a sense of responsibility as members of society—to act rather than be acted upon. It provides students with the opportunity to positively influence their own life and that of the world around them. For this to occur, students need to build foundational skills in an interactive mutually supportive environment with their community.
When designing the Act phase, consider ways that students could use their scientific knowledge and skills. Consider their interests and lifestyles that may intersect with the core concepts and key ideas. What context or problem would provide students with a way to use science to synthesise a design? How (and to whom) will students communicate their understanding?
Read more about using the LIA FrameworkWhen students use their knowledge and skills in new ways, they also have an opportunity to develop and use their creative and critical thinking skills. With scaffolded support, they can become more confident to work in a team and develop a stronger sense of autonomy. This results in stronger student outcomes, attitudes and sense of empowerment.
When designing a teaching sequence, consider what activity would allow students to showcase their knowledge and skills. Consider the current abilities of your students. What are they capable of explaining? What props could they design or build that would support their explanations? How much information would they need in their design brief to support their thinking? How does this connect with their lives and interests?
Designing and building a sensory experience
Using the steps of the design thinking process, students use their understanding of solids, liquids, and adding or removing heat from materials, to design a sensory experience for a specific person or audience. You might present students with a design brief to outline what you would like them to do. Consider if you will add some parameters around the design (for example, requiring students to incorporate a material that can melt and/or freeze, or using a melted/frozen or solid/liquid sample of the ‘same’ thing—like honey, and a honey-scented/flavoured item). Consider if the sensory experience should adhere to a specific theme related to your school or community context.
Define
Outline the problem in a simple manner such as:
How can we … (add or remove heat from solid and liquid materials) ... to ... (design a sensory experience)…for…(students)?
Ideate
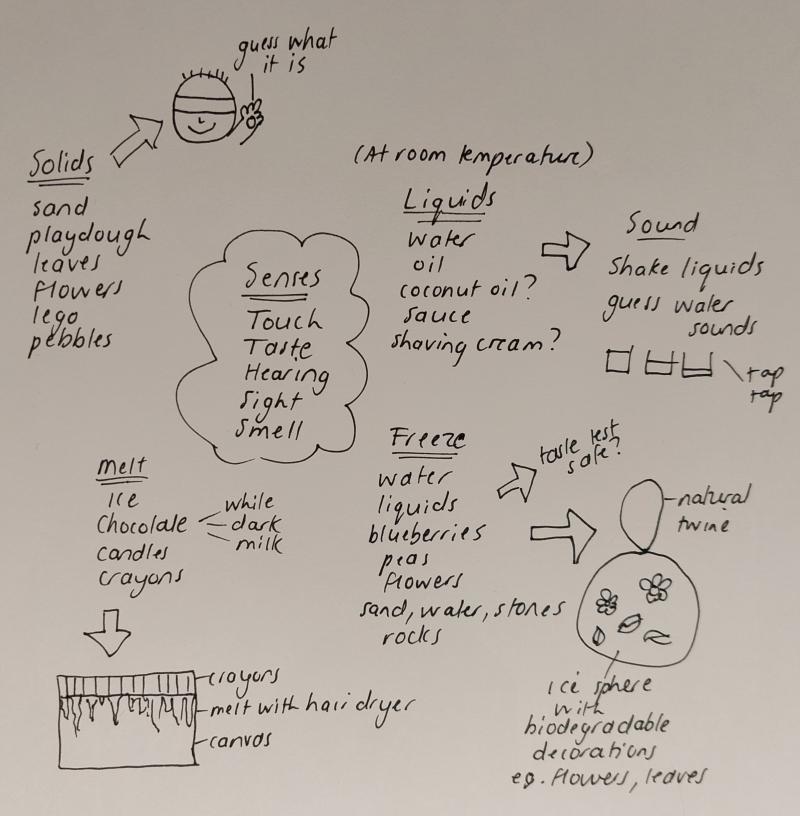
Brainstorm ideas related to the design of the sensory experience. At this stage, to support creative thinking, every idea offered by students should be recorded in the class science journal. No idea is discounted, as the practicality/possibility of each idea will be considered later.
As students offer ideas, ask probing questions (Why do you think… or How do you know that…) to draw out the reasoning and evidence behind the idea.
- What materials could we use?
- Examples include sand, shaving cream, playdough.
- What materials could involve melting or freezing?
- Examples include water, coconut oil, chocolate.
- What materials could represent other things?
- For example, shaving cream can represent snow or sea foam, leaves and flowers can represent hair/trees and playdough shapes can represent natural or man-made objects.
- How might the materials be changed by adding or removing heat?
- Which materials would be a pleasant sensory experience and which would be uncomfortable?
- For example, playdough is a comfortable temperature, ice blocks are fun if they can put them down when their hands feel too cold.
- Which senses could be safely used during the sensory experience?
Once all ideas are listed, discuss which ideas might be easy to include in a design and which ones might not be. Introduce the criteria by which the designs will be assessed. Invite students to add to these criteria if appropriate.
Potential criteria might include:
- the person experiencing the sensory experience uses two or more of the main senses.
- the materials are safe for people to use.
- it is not too hot or too cold for people to use.
- it has some of the properties of either/both a solid or a liquid.
- the students can explain the properties of the materials used and relate them to solid, liquid, melting and freezing.
- it is fun to do the experience.
- the experience can be easily and safely cleaned up.
- Does it matter how small or large the sensory experience is?
- Does the experience need to be colourful?
- Will the sensory experience need to be moved from one place to another? How will this affect your design?
- Are any materials too expensive or difficult to get?
Prototype
Students draw a design of their sensory experience using the Sensory experience design Resource sheet. Their design should include clear labels stating the materials used and if/how they will change from solid to liquid, or liquid to solid.
Optional: Model for the students how to draw and label their design using the demonstration copy of the Sensory experience design Resource sheet.
Conduct a gallery walk for students to share and explore design ideas.
After the gallery walk, decide whether students will proceed with their own designs or select a range of experiences to proceed with as a class.
Adapting to your context
How might I adapt this task to suit my students and context?
The sensory experience can be readily adapted to suit your context in the Design phase of the process.
By looking at the bigger picture first and deciding where and when the sensory experience will take place, this information can help to guide the finer details. For example, an upcoming school fete can provide an opportunity to involve the broader community and create other cross-curricular connections. Or perhaps another class will be invited to visit to undertake the sensory experience during class time.
There might be a theme that helps to guide and shape the sensory experience, such as seasons, animals or colour. Or perhaps the experience needs to be readily moveable from one location to another.
Finally, a long list of materials can be refined to suit the context of the experience and logistics, such as freezer space and material availability.
The Act phase empowers students to use the Core concepts and key ideas of science they have learned during the Inquire phase. It encourages students to develop a sense of responsibility as members of society—to act rather than be acted upon. It provides students with the opportunity to positively influence their own life and that of the world around them. For this to occur, students need to build foundational skills in an interactive mutually supportive environment with their community.
When designing the Act phase, consider ways that students could use their scientific knowledge and skills. Consider their interests and lifestyles that may intersect with the core concepts and key ideas. What context or problem would provide students with a way to use science to synthesise a design? How (and to whom) will students communicate their understanding?
Read more about using the LIA FrameworkA key part of Science Inquiry, the Communicate routine provides students with an opportunity to communicate their ideas effectively to others. It allows students a chance to show their learning to members of their community and provides a sense of belonging. It also encourages students to have a sense of responsibility to share their understanding of science and to use this to provide a positive influence in the community.
When designing a teaching sequence, consider who might be connected to the students that have an interest in science. Who in their lives could share their learning? What forum could be used to build an enthusiasm for science. Are there members of the community (parents, teachers, peers or wider community) who would provide a link to future science careers?
Read more about using the LIA FrameworkA sensory experience
Test and share
Students share their sensory experience with a selected audience.
You may choose to have students share their designs including explaining how the science concepts they have explored in this sequence are demonstrated in the experience. Alternatively you might allow students the opportunity to create part or all of the components of their sensory experience, and invite students to take part before school, during lunchtime, or in any other way that suits the context of your school.
Optional:
- Record video of students discussing their design.
- Take photographs of each sensory experience for students to annotate what is shown/happening in the experience they designed.
- Create a book with photos of the sensory experience and the designers.
Reflect on the sequence
You might:
- refer back to the list of student questions asked in the Launch phase. Determine which questions have been answered over the course of the learning sequence, what the ‘answers’ to the questions are, and the evidence that supports these claims. Address questions that have not been answered during the learning sequence, discuss why they might not have been addressed and potential investigations that might support students to answer them.
- consider what students have learnt about solids and liquids and how adding and removing heat can change the state of solids and liquids. Ask students to represent this learning in words, symbols and pictures.
- discuss why it’s important to have a good understanding of solids, liquids, melting and freezing. What kinds of jobs would require you to understand this? What about in your everyday life?