Access all areas
View Sequence overviewStudents will:
- observe how different materials and surfaces impact on friction.
- explore what ‘more’ or ‘less’ friction feels like.
- use arrows to represent forces.
Students will represent their understanding as they:
- use oral, written and visual language (force diagrams) to describe observations of how an object moves across different surfaces.
- carry out investigations about frictional forces between different shoes and surfaces.
- interpret and communicate their findings to describe ways to reduce and increase friction.
In this lesson, assessment is formative.
Feedback might focus on:
- the accuracy of students’ observations and/or measurements when exploring the friction generated by pulling objects along surfaces.
- how students use evidence to support their claims. Does their evidence confirm the claim they have made?
Whole class
Class science journal (digital or hard-copy)
A range of shoes (or students’ own)
Demonstration copy of the Which shoes to choose? Resource sheet
Demonstration copy of the Variables grid Resource sheet
Optional: Demonstration copy of the Shoe grip investigation planner Resource sheet
Demonstration copy of the Force diagram Resource sheet
A way to feel or measure the force of friction. The lesson uses the following options:
- LOW TECH: An elastic band or similar, such as an exercise resistance band
- HIGH TECH 1: A push and pull spring meter
- HIGH TECH 2: A Newton meter
Optional: A mass (e.g. 100g) to put inside the shoes
Each student
Individual science journal (digital or hard-copy)
Shoe grip investigation planner Resource sheet
- If students use the low-tech option described above to measure force, they will need pages 1-3 of this resource sheet.
- If students use one of the high-tech options described above to measure force, they will need pages 1 and 4-5 of this resource sheet.
Lesson
Re-orient
Recall the previous lesson—first revising the definitions of ‘push’, ‘pull’ and ‘force’, then focusing on students’ experiences pulling their packages across different surfaces and different terrains.
- Which surfaces were easiest to push/pull the package across? Why do you think this was?
- Which surfaces made it harder to pull/push the package? Why do you think this was?
- What might have been happened if you tried to move the contents of the package, without the box?
- What if the box had been made of a material other than cardboard (or plastic, if applicable)? How easy or difficult would these materials be to drag?
The Inquire phase allows students to cycle progressively and with increasing complexity through the key science ideas related to the core concepts. Each Inquire cycle is divided into three teaching and learning routines that allow students to systematically build their knowledge and skills in science and incorporate this into their current understanding of the world.
When designing a teaching sequence, it is important to consider the knowledge and skills that students will need in the final Act phase. Consider what the students already know and identify the steps that need to be taken to reach the level required. How could you facilitate students’ understanding at each step? What investigations could be designed to build the skills at each step?
Read more about using the LIA FrameworkIdentifying and constructing questions is the creative driver of the inquiry process. It allows students to explore what they know and how they know it. During the Inquire phase of the LIA Framework, the Question routine allows for past activities to be reviewed and to set the scene for the investigation that students will undertake. The use of effective questioning techniques can influence students’ view and interpretation of upcoming content, open them to exploration and link to their current interests and science capital.
When designing a teaching sequence, it is important to spend some time considering the mindset of students at the start of each Inquire phase. What do you want students to be thinking about, what do they already know and what is the best way for them to approach the task? What might tap into their curiosity?
Read more about using the LIA FrameworkIn their shoes
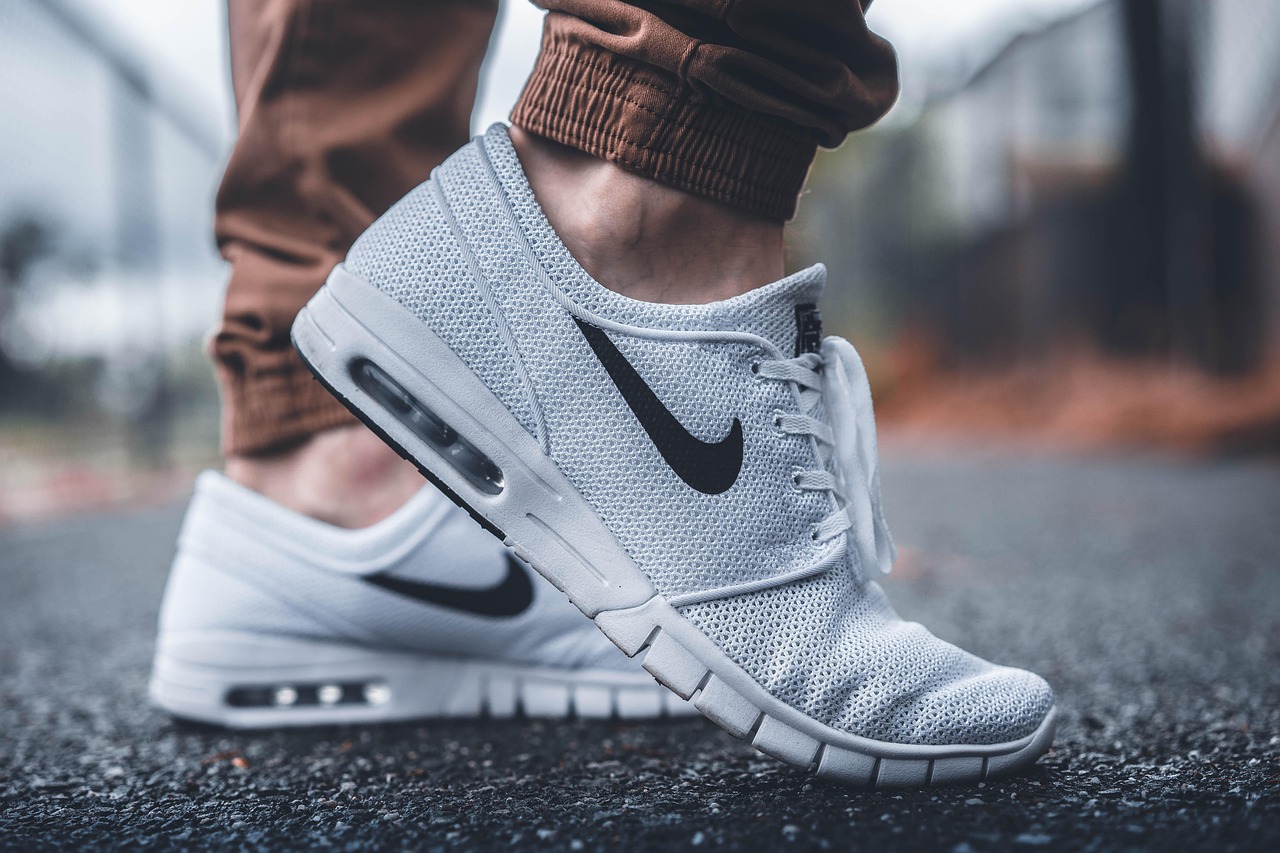
Using the Which shoes to choose? Resource sheet, discuss the different types and uses of shoes, with a focus specifically on the design and material of the soles. This resource sheet contains images of a wide variety of shoes including running shoes, soccer/football boots, gumboots, work boots, ballet shoes, thongs and dress shoes. Discuss as many or as few as is relevant for your students and context, and add other examples as required. If possible, having physical examples of different types of shoes for students to examine in person is best.
- What type of shoe is this?
- What is it used for?
- What types of surfaces/environments is it used on/in?
- What material is it made of?
- Is the sole made of the same material as the rest of the shoe?
- What is the design of the sole like? Does it have any special features or patterns?
- Why do you think the shoe is designed this way?
Explain that students are going to investigate how well different materials grip on different surfaces, by testing how easily it is to drag shoes with different types of soles across different surfaces.
Pose the question: Do some materials grip better on different surfaces?
Friction
Why is it easier for some materials to slide than others?

When an object moves against a surface or in the air or water, it experiences an opposite force called friction. Moving objects slow down because the force of friction pushes in the opposite direction to the motion and slows it to a stop.
When sliding along a surface, uneven or rough materials cause more friction because the microscopic bumps and valleys on the surface of the material interlock or adhere more to the surface, creating resistance to movement.
Surfaces that are smooth tend to slide more easily, because there are fewer bumps to ‘catch’ on a surface and create adhesion.
Some surfaces, such as rubber-soled shoes, have soft, flexible surfaces that can sink into any grooves that are present. This increases the friction being experienced. This is why rubber-soled shoes are used for playing basketball or netball. Their softer surface experiences high friction levels with the floor, preventing the player from slipping.
Static friction is a friction force that resists the initial motion of two surfaces that are in contact. An example of this is the static friction between shoes and the slope they are resting on. This force can be equal to, but never larger than, the push or pull force trying to move the object. Once the push/pull force is larger than the static friction, the object will start moving.
Alternative conceptions
What alternative conceptions might students hold about friction? How does this sequence address them?
This teaching sequence begins with an exploration of friction because it is a force that students will have experiential knowledge of, although they may not realise it. Because of this, it is important to take care to address alternative conceptions and not to reinforce them.
Friction is the force that resists the movement of one object over another (i.e. rolling, sliding, or grinding against each other). It is a contact force that acts in the opposite direction of motion.
Many students think that a force has to be continuously applied to an object to keep it moving and that objects stop moving when this force ‘runs out’. They may not recognise that force is not a property of objects, and it is actually the opposing force of friction between the surfaces of two objects that slows and stops an object.
By providing students with first-hand experiences of friction, including explicit discussion about the surfaces that had contact, students will be able to develop an understanding that it is this contact that slows and stops movement, and not because a force is ‘running out’.
The Inquire phase allows students to cycle progressively and with increasing complexity through the key science ideas related to the core concepts. Each Inquire cycle is divided into three teaching and learning routines that allow students to systematically build their knowledge and skills in science and incorporate this into their current understanding of the world.
When designing a teaching sequence, it is important to consider the knowledge and skills that students will need in the final Act phase. Consider what the students already know and identify the steps that need to be taken to reach the level required. How could you facilitate students’ understanding at each step? What investigations could be designed to build the skills at each step?
Read more about using the LIA FrameworkThe Investigate routine provides students with an opportunity to explore the key ideas of science, to plan and conduct an investigation, and to gather and record data. The investigations are designed to systematically develop content knowledge and skills through increasingly complex processes of structured inquiry, guided inquiry and open inquiry approaches. Students are encouraged to process data to identify trends and patterns and link them to the real-world context of the teaching sequence.
When designing a teaching sequence, consider the diagnostic assessment (Launch phase) that identified the alternative conceptions that students held. Are there activities that challenge these ideas and provide openings for discussion? What content knowledge and skills do students need to be able to complete the final (Act phase) task? How could you systematically build these through the investigation routines? Are there opportunities to build students’ understanding and skills in the science inquiry processes through the successive investigations?
Read more about using the LIA FrameworkGetting grippy
Ask students to pull a shoe across the carpet. They can use either their own shoe (after removing it) or a demonstration shoe.
Note: Not all students will feel comfortable removing their shoes in the classroom. Alternatives should be offered, such as using spare ‘demonstration’ shoes or having materials available to mimic the soles of a shoe.
After all students have had a go observing how easy or difficult it is to pull a shoe across carpet, use the think-pair-share strategy to brainstorm variables that might change the amount of force required to pull the shoe.
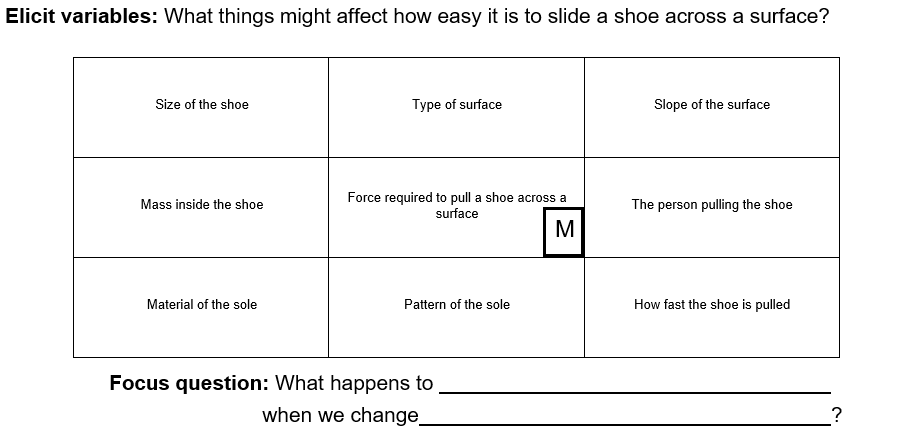
Record these variables using the demonstration copy of the Variables grid Resource sheet, marking the measurable variable—the force required to pull a shoe across a surface—in the centre of the grid with a bold M, and recording the other variables around it. You can add or remove columns/rows as required. Some examples you might provide as prompts include the size of the shoe, mass inside the shoe, pattern of the sole, material of sole, type of surface, gradient/slope of surface.
Determine which variable the students will test and write an investigable question using the question stem on the Variable grid Resource sheet. The students’ level of experience with planning and carrying out fair-test investigations will determine if all teams conduct the same investigation, or if they select their own variable to change.
The investigable question might read: What happens to the force required to pull a shoe across a surface when we change [the type of shoe sole, the mass inside the shoe, the slope of the surface etc.]?
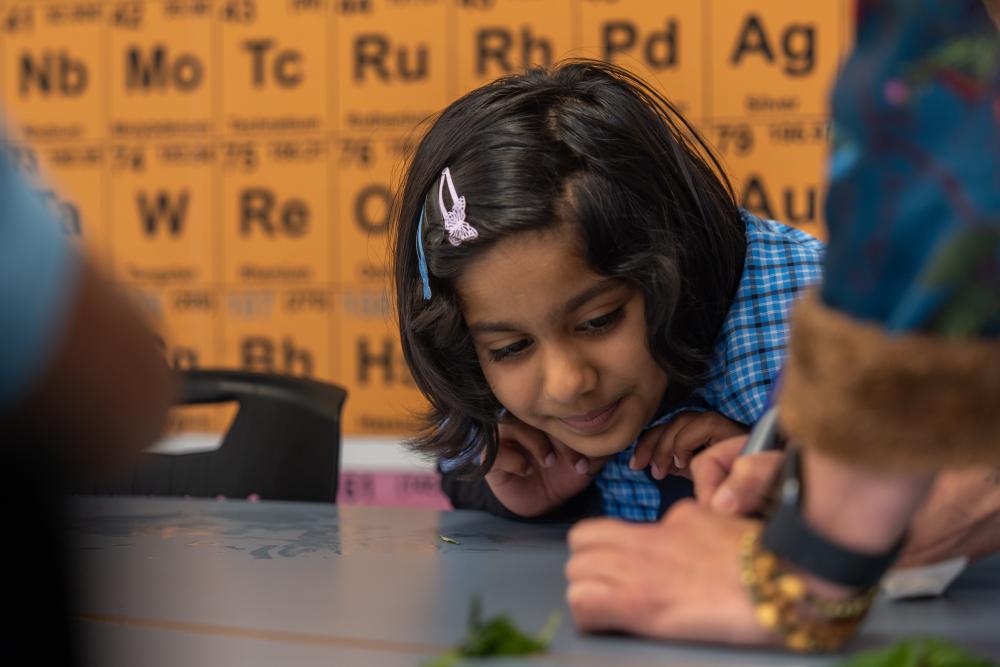
Students work in collaborative teams to plan their investigation using page 1 of the Shoe grip investigation planner Resource sheet, including drawing a picture of their plan.
Two options have been provided for students to measure and record their results. Use only the pages that are relevant for your students and context:
- LOW TECH OPTION: Teams use pages 2-3 to record their experiential observations about the force required to pull the shoe with an elastic band attached to the shoelace, strap, or heel as relevant. These pages include a Predict, Reason, Observe, Explain template, a section to draw a labelled diagram of what they think is happening, and a prompt to make a claim to answer the investigable question.
- HIGH TECH OPTION: Teams use pages 4 and 5 to record the measurement of force (in Newtons) as they pull a shoe across a surface, as shown on a push and pull balance scale or a Newton meter when attached to the shoe. These pages include a data table for recording quantitative data, a column graph to represent that data, a section to draw a labelled diagram of what they think is happening, and a prompt to make a claim to answer the investigable question. Students should take their readings as soon as the shoe begins to move.
Using a variables grid to plan a fair test investigation
How might you support students to conduct an accurate fair test investigation, with a clear investigable question?
All scientific fair tests involve variables. Variables are things that can be changed (independent), measured/observed (dependent) or kept the same (controlled) in an investigation.
When planning a fair-test investigation, to make it a fair, we need to identify the variables. A variables grid can be used to record the identified variables. We then use these variables to turn a broad question, such as What affects plant growth?, into an investigable one, such as What happens to the growth of a plant when I change how much water it gets?.
Investigable questions are characterised by their clear identification of what is being changed and what outcome is being measured in a fair test, supporting students to investigate a specific physical phenomenon.
Investigable questions enable students to plan a fair test investigation. The question they have devised can be answered empirically, and data can be collected to support and justify claims made.
By planning for and conducting a fair test, students can make claims about how the variable they have changed in their investigation may have affected what is being measured and/or observed.
To support students to identify variables, and to use those variables to inform their planning of a fair test, we suggest this handy mnemonic ‘Cows Moo Softly’. This helps students remember the letters C, M and S, representing the three types of variables in a fair test:
- Cows: Change one thing (independent variable)
- Moo: Measure/Observe the outcome (dependent variable) and
- Softly: Keep the other things (controlled variables) the Same
Predict, Reason, Observe, Explain (PROE)
What is PROE and how can it support your students with science inquiry?
PROE is a tool to engage students in the investigative process and support deep thinking. It affords students experience with developing argumentation skills through science inquiry, and supports you, the teacher, to monitor their thinking in order to guide the inquiry.
At this stage, student predictions will be based on their everyday experiences with the materials they are working with. They will likely be able to predict that shoes with ‘grippy’ soles will be more difficult to move, or they may have seen shoes slip on particular surfaces. Students may find it more difficult to make predictions about materials that they have less experience with, or might compare an unfamiliar material with a more familiar one. These are valid ways of making predictions.
The Inquire phase allows students to cycle progressively and with increasing complexity through the key science ideas related to the core concepts. Each Inquire cycle is divided into three teaching and learning routines that allow students to systematically build their knowledge and skills in science and incorporate this into their current understanding of the world.
When designing a teaching sequence, it is important to consider the knowledge and skills that students will need in the final Act phase. Consider what the students already know and identify the steps that need to be taken to reach the level required. How could you facilitate students’ understanding at each step? What investigations could be designed to build the skills at each step?
Read more about using the LIA FrameworkFollowing an investigation, the Integrate routine provides time and space for data to be evaluated and insights to be synthesized. It reveals new insights, consolidates and refines representations, generalises context and broadens students’ perspectives. It allows student thinking to become visible and opens formative feedback opportunities. It may also lead to further questions being asked, allowing the Inquire phase to start again.
When designing a teaching sequence, consider the diagnostic assessment that was undertaken during the Launch phase. Consider if alternative conceptions could be used as a jumping off point to discussions. How could students represent their learning in a way that would support formative feedback opportunities? Could small summative assessment occur at different stages in the teaching sequence?
Read more about using the LIA FrameworkThe force of friction
In this Integrate step, guide students to link their experiences in the investigation to the science concept being explored—in this instance, the force of friction. Through questioning and discussion, students should come to a consensus that:
|
Teams share their investigation data with the class.
The following questions pertain to an investigation where students pulled the same shoe across different types of surfaces. These questions can be easily adapted to suit different investigations, such as different shoes pulled across the same surface or the same shoe pulled up/down a ramp of varying slopes.
- How would you describe the surfaces you investigated—both the sole of the shoe and the surfaces you pulled the shoe across? Were they smooth, bumpy, gritty, shiny etc.?
- Which surface was it easiest to pull the shoe across? How do you know?
- Did the rubber band stretch more or less when the shoe was harder to pull? Alternatively, did the push-pull spring balance/ Newton meter reach a higher or lower number when the shoe was harder to pull?
- Did you identify any patterns?
- For example, smoother surfaces were easier to pull the shoe over, or rubber soles were harder to pull than plastic ones.
- What claim did you make to answer your investigable question?
- How did your evidence support your claim?
Students undertake a gallery walk to examine each other's labelled diagrams of a shoe being pulled across a surface. Ask them to make note of any features of the diagrams they found especially helpful, ones they used themselves, or ones they would like to add to their own diagrams.
Use the huddle method to focus on teams’ work during the gallery walk, drawing attention specifically to the use of arrows to represent pull forces.
- What features of others’ diagram did you notice that you thought were helpful in explaining what happened?
- Did you notice anyone using arrows to show how the shoe was moving?
- What forces were they showing, a push or a pull?
- If you were to push the shoe, would the arrow face the same direction? Why/why not?
- Were the arrows the same size? Do you think the size of the arrow might mean something specific in a scientific diagram?
- The direction of the arrow shows the direction of the force, and the length of the arrow identifies the strength of the force.
- Did anyone else use arrows in a different way?
- Students may have drawn arrows to show the opposing force of friction pushing back in the opposite direction than the shoe being pulled. If so, this is a great opportunity to introduce and discuss friction. If not, the following section suggests how this might be introduced to the students in context.
Explain that, in science, forces are represented with arrows, with the arrow heads always showing the direction of the push or pull.
Introduce the word ‘friction’ and ask students what, if anything, they think they know about it. Record their ideas in the relevant column of the TWLH chart.
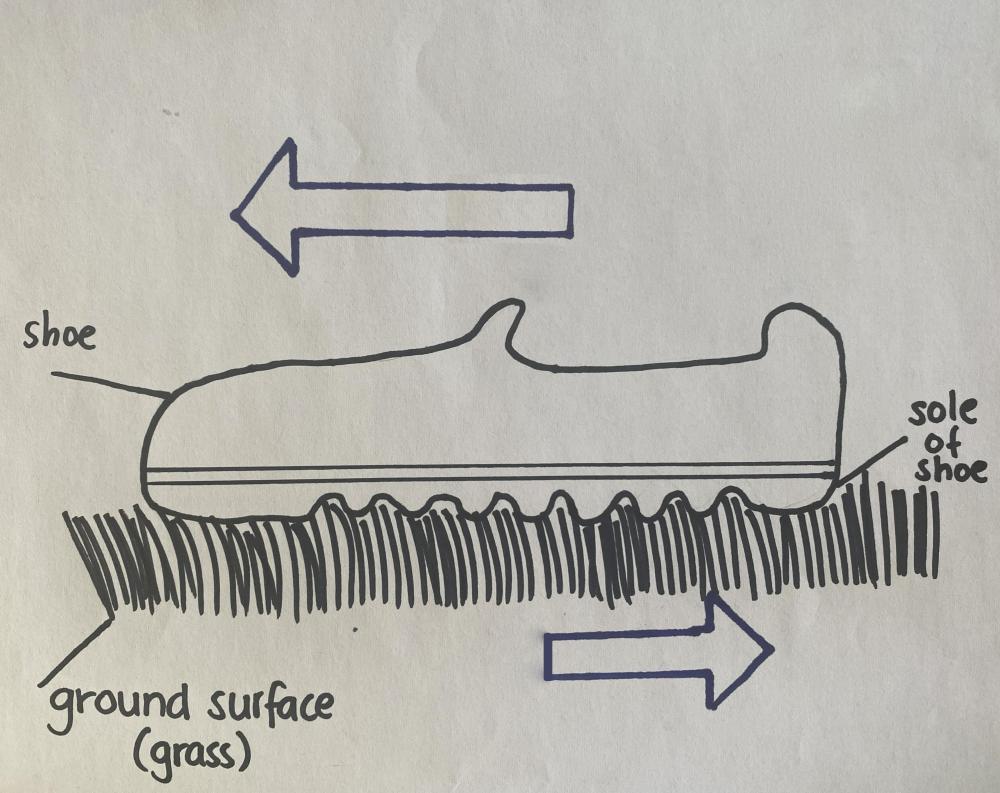
Display a diagram showing opposing forces of a push or pull and friction. You may create your own diagram based on the example below or display the example using the Force diagram Resource sheet.
Ask students which arrow they would identify as the pulling force, and label the diagram as such. In the given example, below the pulling force would occur when the shoe is pulled across the grass.
Identify and label the other arrow as the force of friction, pushing back against the shoe/foot, making it more difficult to slide along the grass.
Ask students if they find it difficult or easy to slide their feet along grass and to explain their thinking.
- Is it easy or hard to slide your feet along the grass?
- Does it depend on the type of shoes you are wearing (or you might be barefoot)?
- Would it be easy to slide your feet if you were wearing football/soccer boots? Why do you think that?
- What about if the soles of your shoes were really smooth? Would it be easier/harder? Why do you think that?
- Do you think the material and surface might have an impact on how difficult/easy it is to slide something against a surface? How do you know? What evidence can you draw from our investigation today and our walk around the school with the package to support your thinking?
Through demonstration or by allowing students time to investigate on their own, explore how smoother surfaces generate less friction than a rough surface when they rub against each other. You might compare a smooth object (a book) and a rough object (a shoe) against a smooth surface (a tabletop) and a rough surface (the carpet, concrete, or a cloth).
As a class, complete the following sentence by selecting the term students think is correct: Smooth surfaces generate (more/less) friction.
Explain/demonstrate that smooth surfaces have fewer ridges and dents to catch on each other when they slide, and that is why they generate less friction.
Ask students how this same idea might apply to rough surfaces: there are more bumps/ridges to catch on each other, making them harder to slide, thus they generate more friction.
Consider how adding weight would also impact this. With extra mass, the ridges and bumps are pressed closer together, making it harder for them to slide against each other; thus, they generate more friction. Heavier objects also need a greater force to accelerate.
Pose the question: If something is hard to push, how might you help it move? Record students’ ideas in the class science journal.
Come to a consensus about a list of key scientific findings from the lesson and record them in the class science journal. See the list at the beginning of this step for guidance on what these key findings might be. Students might not use the most accurate, scientific language when summarising their key findings. This is acceptable at this stage of the sequence. Encourage students to accurately use the terms already explicitly introduced, such as push, pull, force, and friction.
Discuss how what was learned in today’s lesson might help inform the students’ design of their accessibility solutions at the end of the sequence (material choice, mass, surface area contact etc.).
Reflect on the lesson
You might:
- discuss students’ experiences of friction, and choices they might make because of it. For example, selecting specific footwear or clothing, making sure there is a mat/cloth underneath them when sliding down a slide.
- add to the class word wall vocabulary related to friction (e.g. contact, surface, friction, Newton meter, Newton).
- re-examine the intended learning goals for the lesson and consider how they were achieved.
- discuss how students were thinking and working like scientists during the lesson. Focus on using evidence to draw conclusions.
Huddle method
What is the huddle method?

The huddle method is a simple strategy to get students to focus on a particular work sample that demonstrates features or ideas that will support the development of student understanding. Huddles often occur during a gallery walk, when you want students to focus on a specific work sample.
Call a ‘huddle’ and direct students to stand in a location where they can see the work clearly.
Use questioning and discussion to guide a conversation about the features you would like to draw attention to. For example, one team may have represented the shoe with the entire surface of the shoe in contact with the ground surface. Another team may have drawn the shoe going over an uneven surface.
Consider carefully the questions you pose to the class and to the team/student whose work you are examining. For example, you might first ask the class how much of the two surfaces are in contact, then ask the team to confirm or add to this. You might continue to question and discuss the relationship between the amount of contact between the surfaces and the size of the forces needed (as shown by the size of the arrows).
Students might progress to calling their own huddles around work samples they’d like to discuss.
Take care to consider and manage negative or discouraging questioning and discussion during a huddle.
Many teachers use this or similar strategies under different names, such as ‘fishbowl’, ‘assemble’, ‘cluster’.
Productive discussion—building understanding and consensus
How might you support your class to build a shared understanding of scientific concepts?
Discussions that build understanding and consensus involve students sharing, connecting, questioning, and building on their own and others’ findings, claims, evidence and reasoning. They support students to develop a more complete understanding of phenomena by encompassing learning from prior investigations as well as the one being discussed.
During these discussions teachers ask questions that have been carefully sequenced to draw out students’ claims and understanding, and support students to make connections between their experiences, integrating new knowledge into their thinking. The discourse moves a teacher makes are crucial to ensure that students’ ideas are canvassed and progressively shaped to build communal understanding.
Some of the ways you might support students to reach consensus include:
- probing and acknowledging new ideas.
- marking interesting, valuable or relevant ideas by repeating them or recording them in the class science journal.
- clarifying a student’s ideas by asking them to re-voice or re-word what they have said. You should allow students an opportunity to do this before you yourself re-cast or paraphrase the idea using the correct terminology.
- Canvassing other students’ opinions in relation to ideas by asking questions such as ‘who agrees…?” or “Who else has evidence to support or contradict …?”
- Encouraging other students to ask questions of each team to find out more about their investigation methods, conclusions and evidence.