

Shelter in a storm
View Sequence overviewStudents will:
- identify different types of shelters and who uses them.
- consider how shelters protect plants and animals, including people.
- name and describe shelter parts such as “base”, “frame” and “cover”.
Students will represent their understanding as they:
- participate in a shelter hunt around the school grounds.
- discuss examples of shelters and who or what they protect.
- contribute ideas and drawings to the class science journal.
In the Launch phase, assessment is diagnostic.
Take note of:
- students’ ability to identify a shelter and explain its purpose.
- students’ discussion about who or what a shelter protects and their use of simple language, such as “base”, “frame” and “cover”, when discussing shelters.
- students’ ability to recognise the material used to make shelters and relate material choices to their purpose. For example, they might explain that a frame is made from wood because wood is strong or a cover is made of tiles because tiles keep water out.
Whole class
Class science journal (digital or hard-copy)
Materials to make a word wall
An area in the school grounds or local community where students can carry out a shelter hunt
Photos of shelters, either from a demonstration copy of the Who shelters here? Resource sheet or taken during a shelter hunt in the school grounds
Note: The photos of shelters on the Who shelters here? Resource sheet are generic and may not match the types of shelters found in your community. Adapt the resource sheet to use images of human and animal shelters that will be more recognisable to your students.
A copy of the story The Three Little Pigs, or an alternative such as The Three Little Bush Pigs by Paul Dallimore, The Three Little Aussie Pigs by Renee Conoulty or The Three Little Javelinas by Susan Lowell and Jim Harris (see Preparing for this sequence for more details)
Two small toy characters. These might represent:
- the two pigs who built unsuccessful shelters in The Three Little Pigs or the alternative story you read.
- two different characters that will appeal to your students.
A digital device for taking photos
Each student
Individual science journal (digital or hard-copy)
1 x paper cup or bag, labelled with student’s name
Lesson
The Launch phase is designed to increase the science capital in a classroom by asking questions that elicit and explore students’ experiences. It uses local and global contexts and real-world phenomena that inspire students to recognise and explore the science behind objects, events and phenomena that occur in the material world. It encourages students to ask questions, investigate concepts, and engage with the Core Concepts that anchor each unit.
The Launch phase is divided into four routines that:
- ensure students experience the science for themselves and empathise with people who experience the problems science seeks to solve (Experience and empathise)
- anchor the teaching sequence with the key ideas and core science concepts (Anchor)
- elicit students’ prior understanding (Elicit)
- and connect with the students’ lives, languages and interests (Connect).
Students arrive in the classroom with a variety of scientific experiences. This routine provides an opportunity to plan for a common shared experience for all students. The Experience may involve games, role-play, local excursions or yarning with people in the local community. This routine can involve a chance to Empathise with the people who experience the problems science seeks to solve.
When designing a teaching sequence, consider what experiences will be relevant to your students. Is there a location for an excursion, or people to talk to as part of an incursion? Are there local people in the community who might be able to talk about what they are doing? How could you set up your classroom to broaden the students’ thinking about the core science ideas? How could you provide a common experience that will provide a talking point throughout the sequence?
Read more about using the LIA FrameworkThe Elicit routine provides opportunities to identify students’ prior experiences, existing science capital and potential alternative conceptions related to the Core concepts. The diagnostic assessment allows teachers to support their students to build connections between what they already know and the teaching and learning that occurs during the Inquire cycle.
When designing a teaching sequence, consider when and where students may have been exposed to the core concepts and key ideas in the past. Imagine how a situation would have looked without any prior knowledge. What ideas and thoughts might students have used to explain the situation or phenomenon? What alternative conceptions might your students hold? How will you identify these?
The Deep connected learning in the ‘Pedagogical Toolbox: Deep connected learning’ provides a set of tools to identify common alternative conceptions to aid teachers during this routine.
Read more about using the LIA FrameworkShelter hunt
In this lesson, students undertake a shelter hunt to look for different types of shelters and identify the materials used to construct them.
Before the shelter hunt
Introduce the term “shelter” and ask students what they think they know about shelters, including different types of shelters and how they are used by plants and animals (including humans).
Record students’ ideas using simple words, labels and quick sketches on a chart or a page in the class science journal. Encourage all contributions, including informal or everyday examples.
If necessary, explain that a shelter is a place, structure or covering that protects a living thing. Identify synonyms that students may know, such as house, unit, townhouse, flat, building or school.
Explain that in this lesson, students will begin thinking like designers and scientists by noticing shelters in the world around them and considering how they are used.
Ask students to suggest examples of shelters they might see during the shelter hunt and whether they think plants need shelter.
Explain that during the shelter hunt, students will also collect some small, non-living objects from the ground and place them in a paper cup or bag marked with their names. Brainstorm the types of non-living objects students might find on the ground around the school, such as small rocks, plastic pieces, paper pieces or metal and plastic lids.
You might also discuss what is living and non-living, although students might find it difficult to distinguish at this stage. Alternatively, if students collect living or once-living things, remove these at the end of the lesson or during the subsequent lesson.
Before leaving the classroom, also establish clear expectations for moving safely outdoors, including:
- staying with the group and supervising adult at all times.
- staying alert and listening to instructions.
- not disturbing the natural environment.
- only collecting objects in their paper cup or bag that are not plants or animals.
- checking for hazards before collecting items.
- never picking up anything that is sharp (including broken glass), dirty, or potentially unsafe, and asking the teacher or supervising adult if unsure.
- washing or sanitising their hands after returning to the classroom.
During the shelter hunt
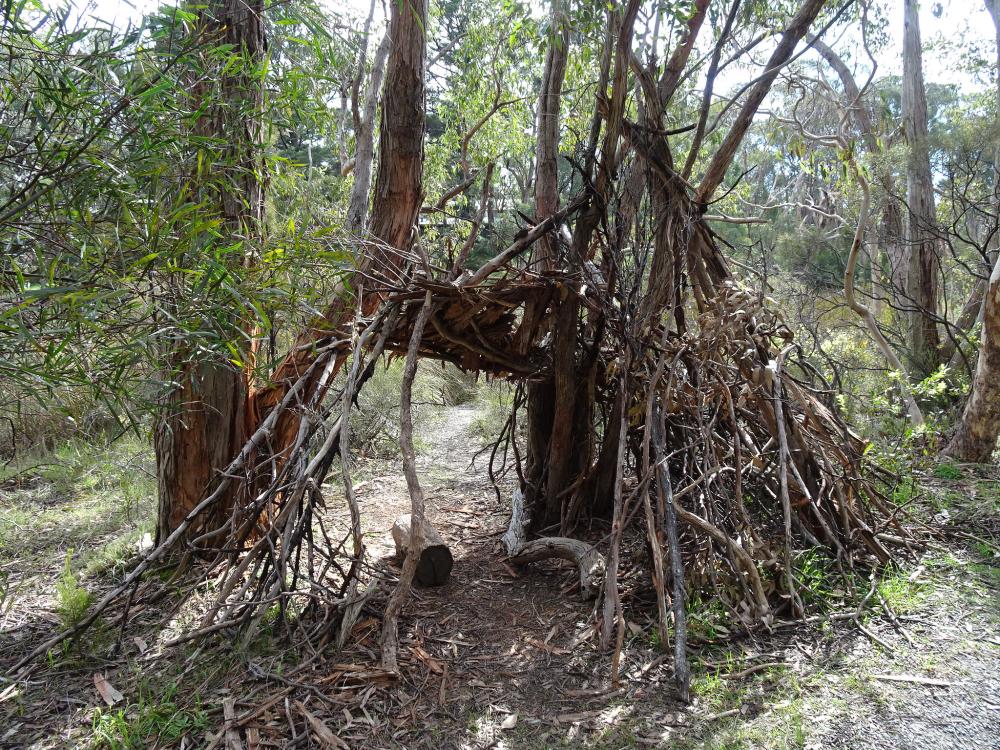
Explore the school grounds or local area for shelters used by people, other animals and plants.
While exploring, ask students to collect samples as discussed before the shelter hunt.
Stop periodically to observe a shelter closely and discuss what students notice. During these stops, allow students time to collect objects as outlined above.
- What can you see here that could be a shelter?
- A building, roof, shade cloth, cubby, nest, web, hollow, box, greenhouse cover, fence or another place that provides protection.
- Who or what might use this shelter?
- People, birds, insects, spiders, possums, pets, plants or other living things.
- Is the shelter protecting a person, another animal or a plant?
- It could be protecting any of these, depending on how it is used.
- What do you think this shelter provides protection from?
- Rain, wind, sun, heat, cold, danger, drying out or damage.
- Does this shelter look strong, covered, open, hidden, big or small?
- It might look like any of these, depending on the shelter being observed.
- Have you seen a shelter like this before? Where?
- At home, at school, in a park, in a garden, on a farm, in a storybook, on television, in a tree, near a dog kennel or somewhere else nearby.
Encourage students to compare shelters and notice that shelters can look very different depending on who uses them and how.
Optional: Photograph examples to revisit later in the lesson.
After the shelter hunt
In the classroom, place students’ paper cups or bags containing their collections in a safe location, ready for use in Lesson 2.
Review students’ ideas about shelters recorded before the shelter hunt. Compare these ideas with the students’ observations, identifying which ideas they still agree with, are unsure about or now disagree with. Focus on how shelters provide protection for living things and can look different depending on who or what they are for.
If photos were taken during the shelter hunt, display these to support students to recall the experience accurately.
- What did we think we knew about shelters before we went on the shelter hunt?
- Do we agree with these ideas now? Why or why not?
- How do we know whether something is a shelter?
- Which shelters did you notice on our shelter hunt?
- A classroom, covered area, shade structure, possum box, spider shelter or ant nest.
- Why do you think animals other than humans need shelter?
- Why might a plant need shelter? What might it need protection from?
- What might make one shelter feel safer or better than another?
Core concepts and key ideas
Where does this sequence fit into the larger picture of science and the science curriculum?
When planning for teaching in your classroom, it can be useful to understand where a learning sequence fits within the broader picture of science education across the primary years. This unit is anchored to the Science understanding core concepts for Chemical Sciences.
- The chemical and physical properties of substances are determined by their structure at a range of scales.
In Foundation, the learning focus is on recognising that objects are often made from different materials and the ability to describe the observable properties of those materials. In this teaching sequence, students apply their understanding of these observable properties to determine which materials are suitable for building shelters.
The core concept is linked to key science ideas:
- Parts, shapes, materials and processes can be identified and named (Systems).
- Objects have observable characteristics (Form and function).
- Relative language, such as “bendy”, can be used to compare objects and phenomena (Scale and measurement).
- Objects and events can be sorted based on observed characteristics, such as flexibility (Patterns, order and organisation).
- Patterns of properties and materials can be observed and used to make predictions (Patterns, order and organisation).
- Changes in materials can be observed and described (Stability and change).
Students next explore this core concept in Year 3, where they investigate the observable properties of solids and liquids and how adding or removing heat energy can cause a change of state between a solid, liquid or gas.
When planning for teaching in your classroom, it can be useful to understand where a learning sequence fits within the broader picture of science education across the primary years. This unit is anchored to the Science understanding core concepts for Chemical Sciences.
- The chemical and physical properties of substances are determined by their structure at a range of scales.
In Foundation, the learning focus is on recognising that objects are often made from different materials and the ability to describe the observable properties of those materials. In this teaching sequence, students apply their understanding of these observable properties to determine which materials are suitable for building shelters.
The core concept is linked to key science ideas:
- Parts, shapes, materials and processes can be identified and named (Systems).
- Objects have observable characteristics (Form and function).
- Relative language, such as “bendy”, can be used to compare objects and phenomena (Scale and measurement).
- Objects and events can be sorted based on observed characteristics, such as flexibility (Patterns, order and organisation).
- Patterns of properties and materials can be observed and used to make predictions (Patterns, order and organisation).
- Changes in materials can be observed and described (Stability and change).
Students next explore this core concept in Year 3, where they investigate the observable properties of solids and liquids and how adding or removing heat energy can cause a change of state between a solid, liquid or gas.
Using science journals with Foundation Year students
When and how are science journals used with Foundation students?
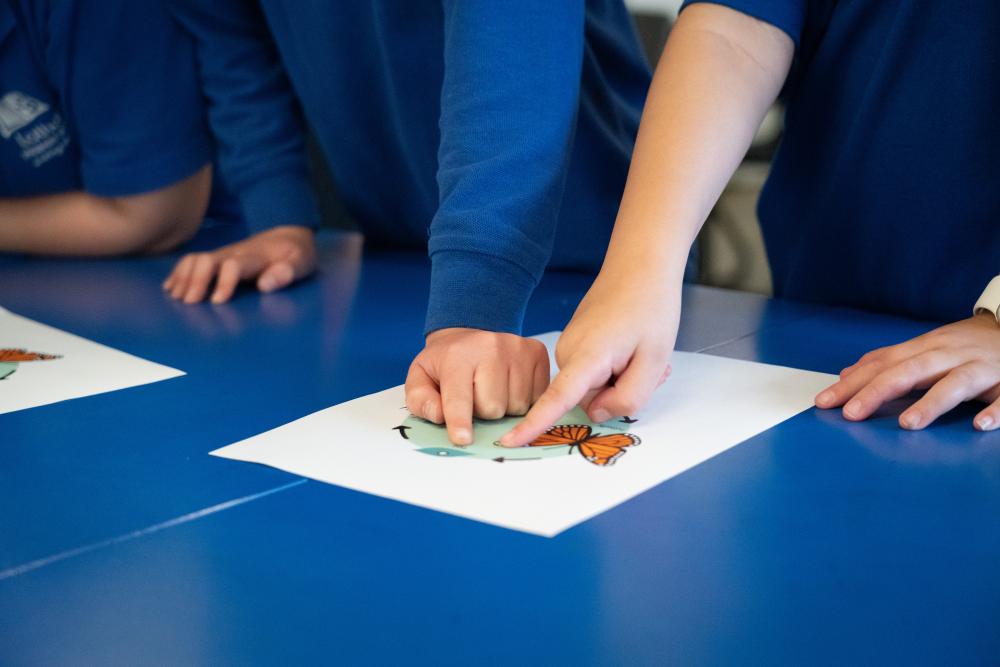
The class science journal is a large, shared record, such as a big book, chart paper or projected digital document, that the teacher develops with the class throughout the unit. It captures agreed class statements, results tables, questions and new vocabulary. Because it is co-constructed, it reflects the class’s collective understanding at any point in time and provides a reference point that students can return to in later lessons.
Key entries in this sequence include the questions posed in Lesson 1 that drive later inquiry, the class statements co-constructed at the end of each lesson and the results of investigations in Lessons 3-6. Keep these entries visible by displaying them on the wall or marking the relevant pages so they can be easily revisited. This supports students in connecting new learning to prior lessons.
Individual science journals
Individual science journals give each student a personal record of their learning. At Foundation level, journal entries primarily consist of drawings, often with labels added by the student or scribed by the teacher or another adult. Completed Resource sheets are also included.
A good Foundation journal entry is defined by evidence of thinking, not neatness or spelling accuracy. A drawing that represents a shelter with its base, frame and cover labelled, even using teacher-scribed words, demonstrates understanding. A results table with ticks or symbols that a student can explain orally is meaningful scientific recording. Resist the urge to redraw or over-correct journal entries. The student’s own representation, however simple, is more diagnostically useful.
Using journals for formative assessment
Circulating while students draw and recording brief observational notes is more efficient than collecting journals after each lesson. Pay attention to students who draw a shelter without distinguishing its base, frame or cover, as this may indicate that their understanding of this language has not yet been consolidated. A student who draws a completely enclosed structure with no openings in Lesson 1 may be demonstrating sophisticated thinking about function of shelters and may benefit from extension discussion.
Journal entries also provide useful talking points in parent communication. A sequence of three or four journal pages from across the unit shows growth over time in a way that is immediately understandable to families, even when students are pre-literate.
The class science journal is a large, shared record, such as a big book, chart paper or projected digital document, that the teacher develops with the class throughout the unit. It captures agreed class statements, results tables, questions and new vocabulary. Because it is co-constructed, it reflects the class’s collective understanding at any point in time and provides a reference point that students can return to in later lessons.
Key entries in this sequence include the questions posed in Lesson 1 that drive later inquiry, the class statements co-constructed at the end of each lesson and the results of investigations in Lessons 3-6. Keep these entries visible by displaying them on the wall or marking the relevant pages so they can be easily revisited. This supports students in connecting new learning to prior lessons.
Individual science journals
Individual science journals give each student a personal record of their learning. At Foundation level, journal entries primarily consist of drawings, often with labels added by the student or scribed by the teacher or another adult. Completed Resource sheets are also included.
A good Foundation journal entry is defined by evidence of thinking, not neatness or spelling accuracy. A drawing that represents a shelter with its base, frame and cover labelled, even using teacher-scribed words, demonstrates understanding. A results table with ticks or symbols that a student can explain orally is meaningful scientific recording. Resist the urge to redraw or over-correct journal entries. The student’s own representation, however simple, is more diagnostically useful.
Using journals for formative assessment
Circulating while students draw and recording brief observational notes is more efficient than collecting journals after each lesson. Pay attention to students who draw a shelter without distinguishing its base, frame or cover, as this may indicate that their understanding of this language has not yet been consolidated. A student who draws a completely enclosed structure with no openings in Lesson 1 may be demonstrating sophisticated thinking about function of shelters and may benefit from extension discussion.
Journal entries also provide useful talking points in parent communication. A sequence of three or four journal pages from across the unit shows growth over time in a way that is immediately understandable to families, even when students are pre-literate.
The Launch phase is designed to increase the science capital in a classroom by asking questions that elicit and explore students’ experiences. It uses local and global contexts and real-world phenomena that inspire students to recognise and explore the science behind objects, events and phenomena that occur in the material world. It encourages students to ask questions, investigate concepts, and engage with the Core Concepts that anchor each unit.
The Launch phase is divided into four routines that:
- ensure students experience the science for themselves and empathise with people who experience the problems science seeks to solve (Experience and empathise)
- anchor the teaching sequence with the key ideas and core science concepts (Anchor)
- elicit students’ prior understanding (Elicit)
- and connect with the students’ lives, languages and interests (Connect).
Science education consists of a series of key ideas and core concepts that can explain objects, events and phenomena, and link them to the experiences encountered by students in their lives. The purpose of the Anchor routine is to identify the key ideas and concepts in a way that builds and deepens students’ understanding. During the Launch phase, the Anchor routine provides a lens through which to view the classroom context, and a way to frame the key knowledge and skills students will be learning.
When designing a teaching sequence, consider the core concepts and key ideas that are relevant. Break these into small bite-sized pieces that are relevant to the age and stage of your students. Consider possible alternative concepts that students might hold. How could you provide activities or ask questions that will allow students to consider what they know?
Parts of a shelter
Using the images from either the Who shelters here? Resource sheet or the ones taken during the hunt, ask students to identify the different animal shelters and the animals who might use them.
- What types of shelters can you see?
- Who or what might use them?
- Why might they use them?
- To stay safe, keep dry in the rain, shelter from the wind or sun, rest or sleep.
- What types of shelters do you use? Why do you use them?
- Responses to these questions may vary depending on students’ lived experiences. You may need to prompt students by asking about shelters at school, where they might go if it were hot, sunny or raining and where they might stay on holiday.
- Be sensitive to students’ experiences and use your knowledge and judgement to tailor the questions to your class.
- What might happen if people had no shelter?
- They might become wet, too hot, too cold, uncomfortable or unsafe.
- Do plants need shelter too?
- What might protect a plant?
- Shade cloth, a greenhouse, a tree guard, a fence, a larger plant or being planted in a protected place.
- Did we see any plant shelters?
With student input, use the images to identify the common parts of a shelter and any other names for them. Identify each part in the various images.
- The bottom part of a shelter is the “base”. This might be the ground or the floor.
- The supporting parts of a shelter are called the “frame”. The frame might be enclosed by walls or open, as in a shade structure.
- The top part of a shelter is the “cover”. This is sometimes called the “roof”.
Draw an explicit example of a diagram of one or two shelters e.g. a shade structure and a classroom building from the school grounds, emphasising base, frame and cover. Use simple lines and add clear word labels.
Explain the purpose of each part of a shelter and discuss what features each part might need to have to achieve its purpose. Do not use the word “properties” with students unless they offer it first. It will be introduced later in the sequence.
- What does the base of a shelter do?
- It attaches the structure to the ground and connects to the frame.
- What might it look like?
- Do different types of shelters have different types of bases?
- What do the bases of the shelters we observed have in common? How are they different?
- Select one or more images and ask: How can we describe the base of this shelter? Is it hard, soft, flat or bumpy? What shape is it?
- What materials might the base of a shelter be made from?
- It may be a clear section of the ground made from whatever natural material is found in the environment. It might also be made from materials such as wood, cloth, metal or concrete.
- What does the frame do?
- The frame connects to the base and holds up the cover. It can be enclosed or open.
- How would you describe the frames in the images we looked at? Are they hard, soft, bendy or something else?
- What are the frames made from?
- Why do you think they are made from those materials?
- What does the cover do?
- It provides protection from rain, sun and wind.
- How would you describe the covers in the images we looked at? Are they big, small, flat, soft or something else?
- What are the covers made from?
- Why do you think they are made from those materials?
Co-construct a class statement and record it in the class science journal. For example:
A shelter protects people, other animals or plants. A shelter has parts. The parts can include a base, frame and cover.
Ask students to draw a shelter they remember from the shelter hunt in their science journals. Ask them to label its base, frame and cover, as well as any materials they can identify.
The Launch phase is designed to increase the science capital in a classroom by asking questions that elicit and explore students’ experiences. It uses local and global contexts and real-world phenomena that inspire students to recognise and explore the science behind objects, events and phenomena that occur in the material world. It encourages students to ask questions, investigate concepts, and engage with the Core Concepts that anchor each unit.
The Launch phase is divided into four routines that:
- ensure students experience the science for themselves and empathise with people who experience the problems science seeks to solve (Experience and empathise)
- anchor the teaching sequence with the key ideas and core science concepts (Anchor)
- elicit students’ prior understanding (Elicit)
- and connect with the students’ lives, languages and interests (Connect).
Each student comes to the classroom with experiences made up from science-related knowledge, attitudes, experiences and resources in their life. The Connect routine is designed to tap into these experiences and that of their wider community. It is also an opportunity to yarn with community leaders (where appropriate) to gain an understanding of the student’s lives, languages and interests. In the Launch phase, this routine identifies and uses the science capital of students as the foundation of the teaching sequence so students can appreciate the relevance of their learning and its potential impact on future decisions. In short, this routine moves beyond scientific literacy and increases the science capital in the classroom and science identity of the students.
When planning a teaching sequence, take an interest in the lives of your students. What are their hobbies, how do they travel to and from school? What might have happened in the lives of your students (i.e. blackouts) that might be relevant to your next teaching sequence? What context might be of interest to your students?
Read more about using the LIA FrameworkIntroducing the design challenge
Read the story of The Three Little Pigs, or an alternative such as The Three Little Bush Pigs, The Three Little Aussie Pigs or The Three Little Javelinas.
Discuss the houses or shelters that were constructed by each character, what they were made from and whether or not they were successful.
The question prompts below are based on the well-known story The Three Little Pigs. Adapt them as required to suit the animals and materials used in an alternative version.
The discussion refers to storms, particularly strong winds, damaging houses. In some parts of Australia, students may have experienced this. Use your knowledge of your students’ contexts and experiences to determine whether these questions are appropriate.
- What did each little pig build their house or shelter from?
- Did their houses or shelters have a base, frame and cover?
- Did their houses make good shelters? Why or why not?
- How did the first pig’s house fall over?
- How did the second pig’s house fall over?
- Why did the third pig’s house not blow over?
- Could you really blow a house over by blowing out a big, deep breath?
- What is like a big, deep breath but happens naturally?
- Wind.
- Does wind always blow houses over?
- Not usually, although very strong winds can damage houses.
- Have you ever felt really strong winds?
- Strong winds often happen during storms. What else can happen during a storm?
- Thunder, lightning, rain and flooding.
Show students the two small toy characters selected for the sequence. These might match the characters from the stories read earlier or be different characters that will appeal to students, such as dragons, unicorns, robots or ducks.
Explain that throughout the sequence, students will learn about shelters, how they are constructed and the materials from which they are made. They will then design and build a shelter to protect the characters from a storm.
Discuss the main weather conditions from which the shelters will need to protect the characters, focusing on wind and rain.
- What happens during a storm? What kind of weather is it?
- What will the shelter need to protect the character from?
- What do you think a good storm shelter might need to be like?
- It needs to be strong, remain standing and keep rain out.
Create a class science journal page titled What do we want to find out about shelters and materials?
Guide students to pose simple questions about shelters and the materials from which they are made. Record their questions for use in later lessons.
Questions you might model include:
- What are shelters made from?
- Which materials are stiff or bendy?
- Which material keeps water out?
- Which shape stands up best?
- Which shelter works best?
Explain that scientists and designers pose questions to help them investigate and solve problems. Discuss how students will work like scientists over the next few lessons, learning about shelters and materials so they can design and build shelters for their characters.
Reflect on the lesson
You might:
- review the word wall, adding any words and supporting images as required.
- revisit the key ideas from the lesson using the class science journal.
- re-examine the intended learning goals for the lesson.