

Shelter in a storm
View Sequence overviewStudents will:
- identify that objects, including shelters, are made from materials.
- name some common materials found in their environment.
- sort found objects into groups based on the material they are made from.
- discuss how different material choices affect shelters.
Students will represent their understanding as they:
- discuss story examples of shelters and materials.
- sort and classify collected objects.
- contribute to a class sorting chart.
- record material groups in their science journals.
In this lesson, assessment is formative.
Feedback might focus on students’ ability to:
- identify and name some common materials in their environment.
- sort found objects into groups based on material.
- explain that shelters and other objects are made from materials.
- talk about why some materials might be useful for shelters.
Whole class
Class science journal (digital or hard-copy)
Materials to make a word wall
Photos or drawings of shelters taken/made in Lesson 1
The two small toy characters used in Lesson 1
A copy of the story of The Three Little Pigs (or the alternative story) that was used in Lesson 1
A collection of different classroom objects, such as rulers, scissors, pencils, concrete materials, containers
Examples of classroom objects that have the same function but are made of different materials e.g. a wooden ruler and a plastic ruler, a pen and a pencil, a plastic water bottle and a metal water bottle, a paper cup and a plastic cup
Demonstration copy of the Who shelters here? Resource sheet, as used in Lesson 1
Each student
Individual science journal (digital or hard-copy)
Paper bags or cups containing each student’s objects collected in Lesson 1
Lesson
The Inquire phase allows students to cycle progressively and with increasing complexity through the key science ideas related to the core concepts. Each Inquire cycle is divided into three teaching and learning routines that allow students to systematically build their knowledge and skills in science and incorporate this into their current understanding of the world.
When designing a teaching sequence, it is important to consider the knowledge and skills that students will need in the final Act phase. Consider what the students already know and identify the steps that need to be taken to reach the level required. How could you facilitate students’ understanding at each step? What investigations could be designed to build the skills at each step?
Read more about using the LIA FrameworkRe-orient
Using the photographs or students’ drawings created in Lesson 1, recall examples of shelters observed during the shelter hunt. Discuss what those shelters were for and their parts (base, frame and cover).
- What is a shelter?
- A shelter protects a living thing.
- Who might need a shelter?
- People, animals and plants.
- What parts can a shelter have?
- A base, frame and cover.
Use the toy characters to remind students about the design challenge they were given in Lesson 1, and that they will be learning all about shelters so that they can build one to protect a character from wind and rain.
The Inquire phase allows students to cycle progressively and with increasing complexity through the key science ideas related to the core concepts. Each Inquire cycle is divided into three teaching and learning routines that allow students to systematically build their knowledge and skills in science and incorporate this into their current understanding of the world.
When designing a teaching sequence, it is important to consider the knowledge and skills that students will need in the final Act phase. Consider what the students already know and identify the steps that need to be taken to reach the level required. How could you facilitate students’ understanding at each step? What investigations could be designed to build the skills at each step?
Read more about using the LIA FrameworkIdentifying and constructing questions is the creative driver of the inquiry process. It allows students to explore what they know and how they know it. During the Inquire phase of the LIA Framework, the Question routine allows for past activities to be reviewed and to set the scene for the investigation that students will undertake. The use of effective questioning techniques can influence students’ view and interpretation of upcoming content, open them to exploration and link to their current interests and science capital.
When designing a teaching sequence, it is important to spend some time considering the mindset of students at the start of each Inquire phase. What do you want students to be thinking about, what do they already know and what is the best way for them to approach the task? What might tap into their curiosity?
Read more about using the LIA FrameworkWhat makes a good shelter?
Introduce the term “material” and ask students what they think it means. Students are likely to equate the term with cloth or fabric.
Explain that whilst sometimes the word “material” can be used the same way as cloth or fabric, scientists use it to mean the physical “stuff” which something is made of. Give examples by holding up a selection of familiar classroom items (for example, cups, rulers or pencils) and ask students to name the material they are made of, providing support and guidance as required.
Explain that sometimes two objects can do the same job but be made of different materials. Model this by showing two objects that have the same purpose but are made of different materials (for example, a wood and plastic ruler). Name the object (ruler) and the materials (plastic and wood) explicitly for students, recording it in the class science journal. Use some other examples that students should find easy to identify, for example water bottles made of plastic and metal, or cups made of paper and plastic. Each time, be explicit about the name of the items and the different materials they are made of.
Re-read and discuss the story of The Three Little Pigs (or the alternative story you read in Lesson 1), focusing again on what each shelter is made from and what happens to it in the wind. Discuss how the material each shelter was made from influenced what happened and why.
Support students to compare the shelters and begin noticing that different materials can be used for different purposes.
The question prompts below are based on the story of the three little pigs. They can be easily altered to suit the animals/materials used in an alternative version, if required.
- What was this shelter made from?
- Straw, sticks, bricks.
- Which shelter/s blew away easily? Why do you think that happened?
- The straw shelter and the stick shelter blew away easily because the materials were lighter, weaker and not strong enough to stay upright in the wind from the wolf.
- Which shelter stayed standing?
- The brick shelter stayed standing.
- What was the danger or threat in the story?
- The wolf trying to blow the shelter down with strong wind.
- How did what each house was made of affect what happened?
- The sticks and straw were not heavy and strong enough and the shelters blew down. The bricks were stronger and helped the shelter stay standing. The brick house kept the pigs safe.
- If you were inside that shelter, would you feel safe? Why or why not?
- Students should feel safer in the brick shelter because it stayed standing. They would not feel safe in the straw or stick shelter because it blew away.
- Are houses usually made of straws or sticks?
- What kind of shelters are made of straws or sticks? Who uses these shelters?
- Are houses usually made of bricks? Why do you think that is?
Pose the question: What else is used to make shelters?
Vocabulary use—“materials”
Why is it important to define the term “materials” when teaching this sequence?
Taking students’ existing ideas into account is critical when planning effective teaching sequences in science. Students come to school having developed their own science ideas during their experiences in everyday life and often hold more than one idea about an event or phenomenon. For example, students may know a range of meanings for the term “material” (such as fabric or written information) and for the term “property” (such as land, real estate or possessions), which do not align with how the terms are used scientifically. For this teaching sequence (and others), opportunities need to be provided for students to identify all of the potential definitions of these terms, and to then select which are suitable when exploring material properties scientifically i.e. not looking at fabric or plots of land.
In this sequence, the term “material” refers to what an object is made of, and “properties” are the object’s qualities or attributes. Many students might be unaware that the properties of a material determine how useful it is for particular purposes. For instance, students might accept that rubber is commonly used in the soles of shoes, or that saucepans are usually made of metal, without considering the properties which make them suitable e.g. rubber is soft underfoot, flexible and durable, while metal is an excellent heat conductor, durable and easy to clean.
This sequence addresses this idea by highlighting the properties of common materials and making connections between these properties and the ways in which the material is used.
Taking students’ existing ideas into account is critical when planning effective teaching sequences in science. Students come to school having developed their own science ideas during their experiences in everyday life and often hold more than one idea about an event or phenomenon. For example, students may know a range of meanings for the term “material” (such as fabric or written information) and for the term “property” (such as land, real estate or possessions), which do not align with how the terms are used scientifically. For this teaching sequence (and others), opportunities need to be provided for students to identify all of the potential definitions of these terms, and to then select which are suitable when exploring material properties scientifically i.e. not looking at fabric or plots of land.
In this sequence, the term “material” refers to what an object is made of, and “properties” are the object’s qualities or attributes. Many students might be unaware that the properties of a material determine how useful it is for particular purposes. For instance, students might accept that rubber is commonly used in the soles of shoes, or that saucepans are usually made of metal, without considering the properties which make them suitable e.g. rubber is soft underfoot, flexible and durable, while metal is an excellent heat conductor, durable and easy to clean.
This sequence addresses this idea by highlighting the properties of common materials and making connections between these properties and the ways in which the material is used.
The Inquire phase allows students to cycle progressively and with increasing complexity through the key science ideas related to the core concepts. Each Inquire cycle is divided into three teaching and learning routines that allow students to systematically build their knowledge and skills in science and incorporate this into their current understanding of the world.
When designing a teaching sequence, it is important to consider the knowledge and skills that students will need in the final Act phase. Consider what the students already know and identify the steps that need to be taken to reach the level required. How could you facilitate students’ understanding at each step? What investigations could be designed to build the skills at each step?
Read more about using the LIA FrameworkThe Investigate routine provides students with an opportunity to explore the key ideas of science, to plan and conduct an investigation, and to gather and record data. The investigations are designed to systematically develop content knowledge and skills through increasingly complex processes of structured inquiry, guided inquiry and open inquiry approaches. Students are encouraged to process data to identify trends and patterns and link them to the real-world context of the teaching sequence.
When designing a teaching sequence, consider the diagnostic assessment (Launch phase) that identified the alternative conceptions that students held. Are there activities that challenge these ideas and provide openings for discussion? What content knowledge and skills do students need to be able to complete the final (Act phase) task? How could you systematically build these through the investigation routines? Are there opportunities to build students’ understanding and skills in the science inquiry processes through the successive investigations?
Read more about using the LIA FrameworkSorting materials
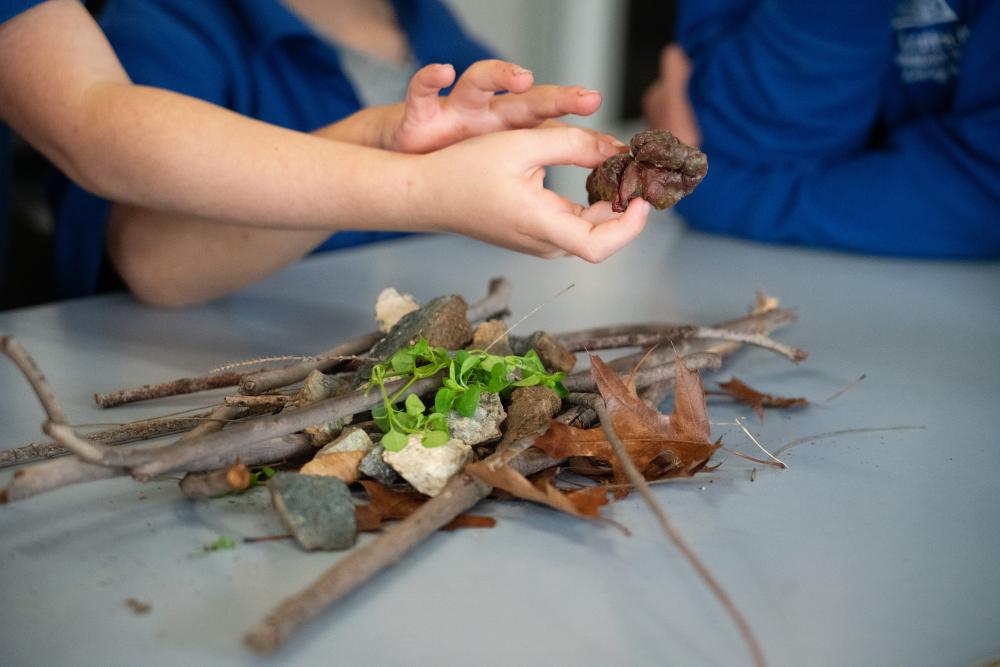
Return the named paper cups/bags of items that students collected in Lesson 1. They remove their items from the bag and spread them out on the table in front of them.
If not done in the previous lesson, support students to identify and set aside any living or once living things that were accidentally collected. This might include leaves, shells, feathers. Explain that they will focus only on non-living objects.
Students will then sort their items into groups. The items might be sorted into groups based on:
- what they are, for example all lids in a group, all straws in a group.
- what they are made of, such as plastic, metal, paper, rock/stone, wood, fabric and glass.
You might allow students to attempt sorting the items first, before providing guidance. Otherwise, guide students to sort as required.
After the items have been sorted by material, use examples of materials from the class collection and discuss the possible names of each material.
- What is this object called?
- A bottle lid/a can tab/a paper scrap/a small rock.
- What material is it made from?
- Plastic/metal/paper/rock.
- Do these two objects have the same material or different materials?
- Can you put all the plastic things together?
- Which things feel like metal, paper or rock?
- One feels like metal because it is hard and shiny, this one feels like paper because it is light and thin, this one feels like rock because it is hard and rough.
The Inquire phase allows students to cycle progressively and with increasing complexity through the key science ideas related to the core concepts. Each Inquire cycle is divided into three teaching and learning routines that allow students to systematically build their knowledge and skills in science and incorporate this into their current understanding of the world.
When designing a teaching sequence, it is important to consider the knowledge and skills that students will need in the final Act phase. Consider what the students already know and identify the steps that need to be taken to reach the level required. How could you facilitate students’ understanding at each step? What investigations could be designed to build the skills at each step?
Read more about using the LIA FrameworkFollowing an investigation, the Integrate routine provides time and space for data to be evaluated and insights to be synthesized. It reveals new insights, consolidates and refines representations, generalises context and broadens students’ perspectives. It allows student thinking to become visible and opens formative feedback opportunities. It may also lead to further questions being asked, allowing the Inquire phase to start again.
When designing a teaching sequence, consider the diagnostic assessment that was undertaken during the Launch phase. Consider if alternative conceptions could be used as a jumping off point to discussions. How could students represent their learning in a way that would support formative feedback opportunities? Could small summative assessment occur at different stages in the teaching sequence?
Read more about using the LIA FrameworkMade of materials
In the following Integrate routine, students are guided to link their experiences identifying and sorting materials with the science concept being explored, that is, that objects are made of materials, and that there are different types of materials. Through modelling, questioning and discussion, students should come to a consensus that:
|
Discuss how students separated their objects and the things they looked for to identify which material made up the object. Reinforce names for the material groups such as plastic, metal, paper, rock/stone, glass, fabric and wood.
In a table headed with the names of different materials, create a class list of the items students found, recording the name of each item in the appropriate column. Encourage students to name the item and the material when sharing their response, for example “This lid is made of glass” or “This lid is made of metal”.

- Why did you put this object here?
- Because it is made from plastic/metal/paper/rock.
- Could this material be used in a shelter?
- Yes, some materials can be used to make shelters.
- Would this material be useful for a base, frame or cover?
- It could be useful for a base/frame/cover because...
- Why might some materials be better than others for shelters?
- Because some materials are stronger, stiffer, heavier or better at keeping out wind and rain.
Students draw one or two sorted objects in their individual science journals and, with support if required, record the material name.
Look at the images of shelters either taken in Lesson 1, or available on the Who shelters here Resource sheet, and identify the different materials used in the shelters.
Add new material words and any related drawings or photos to the word wall.
Create a class statement in the class science journal such as: Objects are made from materials. Objects that are the same can be made of different materials. Different materials can be used to make shelters.
Reflect on the lesson
You might:
- review the class science journal.
- review the idea that the class sorted the found objects by material type, not just by object name.
- reinforce that shelters and other objects are made from materials and that different materials can do different jobs.
- link the learning back to the toy character challenge by reminding students that they will need to think carefully about material choices when designing shelters in later lessons.