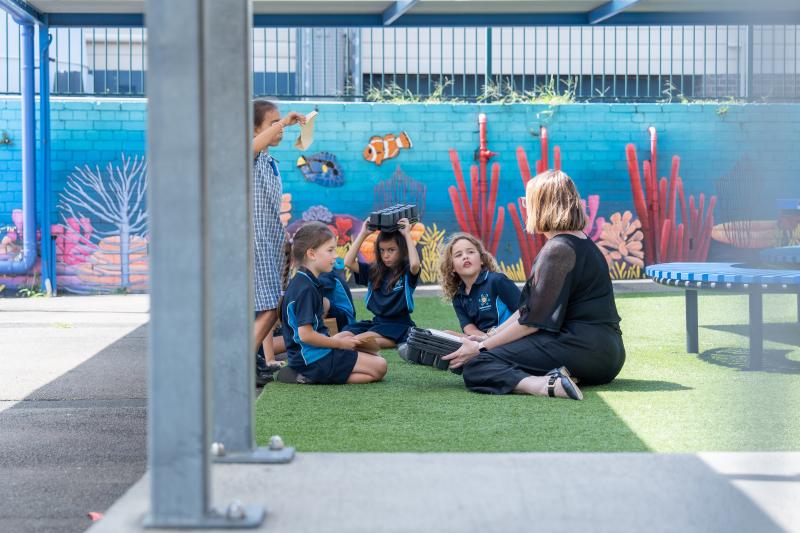
Space innovators
View Sequence overviewStudents will:
- use models to represent the movement of the Sun, Earth and Moon.
- investigate how lenses work.
- consider the role of lenses in the construction of a telescope.
Students will represent their understanding as they:
- contribute to class discussions to build shared understanding.
- construct a timeline of notable events in the history of what is now widely accepted about the positions and movements of the Sun, Earth and Moon.
In this lesson, assessment is formative.
Feedback might focus on:
- students’ understanding of how scientists build on each other’s work.
- Are they able to recognise the connections between the work of various astronomers over time?
- Are they able to notice the changing design of the telescope, and suggest reasons for it?
Class science journal (digital or hard-copy)
Equipment to access the internet and watch suggested video clips and view images
Demonstration copy of the View finder Resource sheet
Demonstration copy of the Investigating claims Resource sheet
Demonstration copy of the A scientific history of the heavens Resource sheet
Demonstration copy of the Telescopes Resource sheet
Demonstration copy of the Magnifying magic Resource sheet
Demonstration copy of the How does a lens work? Resource sheet
Sun, Moon and Earth Model (1:00)
Investigating claims Resource sheet
A collection of spherical objects of different sizes, such as basketballs, soccer/netballs, tennis balls, ping pong balls, marbles etc. Each group of students will select three objects to represent the Sun, Earth and Moon.
Optional: A scientific history of the heavens Resource sheet
1 x magnifying glass
1 x piece of hard, clear plastic—the lid of a take-away container works well
Water
Individual science journal (digital or hard-copy)
2 x paper plates
3 x split pins
Scissors
Coloured textas or pencils
Magnifying magic Resource sheet (or make their own)
Lesson
Re-orient
Revisit the three claims about the position of the Sun, Earth and Moon that students considered in Lesson 1. Ask students to recall which claim they thought was true and why.
Explain that in this lesson they will be using models to explore each claim, considering the claims in light of their own experiences, and investigating how humans’ understanding of the positions of the Sun, Earth and Moon has changed over time.
Using the View finder Resource sheet, view an image of the sky, both during the day and at night, as taken from the Earth, and an image of the Earth taken from space. Discuss the different perspectives that the images are taken from (an ‘Earth’ view and an ‘Astronaut’ view) and determine which is which.
Ask students to take particular note of this, as they will be asked to model various phenomena interchangeably from these two perspectives throughout the sequence.
Modelling the movement of the Sun, Earth, Moon and planets
Why is it important to establish the difference between an ‘Earth’ view and the ‘Astronaut’ view at the very beginning of this sequence?

Learning about the relative positions of the Sun, Earth, Moon and planets can present challenges for students, because the sheer scale involved is outside their everyday experience. Even though they experience day and night every day, they can’t actually see how the planets are moving. Physical and illustrated models can help here, allowing students to ‘scale down’ what they are attempting to observe and make it something they ‘can see’.
Throughout this sequence students will be asked to create both 2 and 3 dimensional models from an ‘Earth’ view (what one would expect to see and experience if standing on Earth) and from an ‘Astronaut’ view (what one would expect to see and experience if they were in a spacecraft viewing Earth etc. from space).
Determining the meaning of and difference between these two perspectives from the beginning of the sequence will support students to be able to make this change in perspective as required.
The Inquire phase allows students to cycle progressively and with increasing complexity through the key science ideas related to the core concepts. Each Inquire cycle is divided into three teaching and learning routines that allow students to systematically build their knowledge and skills in science and incorporate this into their current understanding of the world.
When designing a teaching sequence, it is important to consider the knowledge and skills that students will need in the final Act phase. Consider what the students already know and identify the steps that need to be taken to reach the level required. How could you facilitate students’ understanding at each step? What investigations could be designed to build the skills at each step?
Read more about using the LIA FrameworkIdentifying and constructing questions is the creative driver of the inquiry process. It allows students to explore what they know and how they know it. During the Inquire phase of the LIA Framework, the Question routine allows for past activities to be reviewed and to set the scene for the investigation that students will undertake. The use of effective questioning techniques can influence students’ view and interpretation of upcoming content, open them to exploration and link to their current interests and science capital.
When designing a teaching sequence, it is important to spend some time considering the mindset of students at the start of each Inquire phase. What do you want students to be thinking about, what do they already know and what is the best way for them to approach the task? What might tap into their curiosity?
Read more about using the LIA FrameworkWho claimed what?
Remind students that the three claims they have considered were made by different scientists/astronomers over the course of history as they tried to explain phenomena such as day and night, seasons, etc.
These claims have been accepted or disputed by both scientists and people in the community, based on their own experiences and evidence, just like Eratosthenes experienced.
Pose the question: What might a model of each claim look like, and how do they compare to our own experiences?
The Inquire phase allows students to cycle progressively and with increasing complexity through the key science ideas related to the core concepts. Each Inquire cycle is divided into three teaching and learning routines that allow students to systematically build their knowledge and skills in science and incorporate this into their current understanding of the world.
When designing a teaching sequence, it is important to consider the knowledge and skills that students will need in the final Act phase. Consider what the students already know and identify the steps that need to be taken to reach the level required. How could you facilitate students’ understanding at each step? What investigations could be designed to build the skills at each step?
Read more about using the LIA FrameworkThe Investigate routine provides students with an opportunity to explore the key ideas of science, to plan and conduct an investigation, and to gather and record data. The investigations are designed to systematically develop content knowledge and skills through increasingly complex processes of structured inquiry, guided inquiry and open inquiry approaches. Students are encouraged to process data to identify trends and patterns and link them to the real-world context of the teaching sequence.
When designing a teaching sequence, consider the diagnostic assessment (Launch phase) that identified the alternative conceptions that students held. Are there activities that challenge these ideas and provide openings for discussion? What content knowledge and skills do students need to be able to complete the final (Act phase) task? How could you systematically build these through the investigation routines? Are there opportunities to build students’ understanding and skills in the science inquiry processes through the successive investigations?
Read more about using the LIA FrameworkModelling claims
In collaborative teams, students use the Investigating claims Resource sheet and three spherical objects (representing the Sun, Earth and Moon) to model each of the claims made. Allow students to select from a selection of spherical objects of different sizes—do not provide any instruction about which object to assign as the Sun, Earth or Moon.
Teams discuss each model as they test it, considering each one in light of their own experiences of day and night etc. Prompt them to look at each model and determine if it explains these experiences.
Note: It is unlikely that students will be able to determine which claim is correct based only on the models and their experiences. The discussion is, however, worthwhile as a means of getting them to think more deeply about phenomena they experience every day. ‘Proving’ which claim is correct would be extremely difficult to do in a primary classroom setting without specialised equipment. The evidence that has been collected by scientists over history will be examined in the Integrate step of this sequence.
The Inquire phase allows students to cycle progressively and with increasing complexity through the key science ideas related to the core concepts. Each Inquire cycle is divided into three teaching and learning routines that allow students to systematically build their knowledge and skills in science and incorporate this into their current understanding of the world.
When designing a teaching sequence, it is important to consider the knowledge and skills that students will need in the final Act phase. Consider what the students already know and identify the steps that need to be taken to reach the level required. How could you facilitate students’ understanding at each step? What investigations could be designed to build the skills at each step?
Read more about using the LIA FrameworkFollowing an investigation, the Integrate routine provides time and space for data to be evaluated and insights to be synthesized. It reveals new insights, consolidates and refines representations, generalises context and broadens students’ perspectives. It allows student thinking to become visible and opens formative feedback opportunities. It may also lead to further questions being asked, allowing the Inquire phase to start again.
When designing a teaching sequence, consider the diagnostic assessment that was undertaken during the Launch phase. Consider if alternative conceptions could be used as a jumping off point to discussions. How could students represent their learning in a way that would support formative feedback opportunities? Could small summative assessment occur at different stages in the teaching sequence?
Read more about using the LIA FrameworkWhich claim is accepted?
Teams share their thoughts, ideas, and other discussions they had for each model. Also ask each team which objects they selected to represent the Sun, Earth and Moon and why they selected each object. Take a note of these across all of the groups.
Discuss any trends or interesting anomalies that occurred in the students’ choices, and what we can infer from these. For example:
- Most groups assigned their smallest sphere to represent the Moon. This suggests that most people in this class think the Moon is smaller than the Earth and the Sun.
- Some groups have assigned their largest sphere as the Earth, and some have assigned it as their Sun. This tells us that collectively we don’t have a consensus about the sizes of the Sun, Earth and Moon compared to each other.
Ask students if they have been using 2D and/or 3D models from an ‘Earth’ view or an ‘Astronaut’ view and why they think that. Through discussion, establish a consensus that students have been using models from an ‘Astronaut’ view.
Read the text A scientific history of the heavens Resource sheet.
Students use the information in the text and the table provided to build a timeline, showing accepted scientific understandings about the planets over time, how they changed, and the technological innovations that contributed to this change in thinking. See the embedded professional learning Adapting to your context for details on how you might modify this task to suits your students and context.
After reading the text, determine which of the three claims is considered most accurate according to current scientific evidence.
Discuss the technological innovation of the telescope, and how it led to Galileo’s findings about the planets.
Discuss how and why Galileo’s findings about Venus and Jupiter’s moons did not fit easily with the commonly held conception that the Earth was in the centre and that everything moved around it. This eventually led to the widespread acceptance of the heliocentric model of the solar system, with the Sun at the centre.
Using a paper plate and split pins, students make a model of the Sun, Earth and Moon showing their positions and movement relative to each other. Watch the video Sun, Moon and Earth Model (1:00) for a demonstration of how to construct this model.
Discuss how this model shows the Earth moving around the Sun, and the Moon moving around Earth. Introduce the terms orbit and revolve/revolving as the terms for this movement.
Optional: Discuss the meaning and origins of the terms heliocentric and geocentric.
Adapting to your context
How might you organise the reading of the text?
The reading of the A scientific history of the heavens Resource sheet could be completed as a joint or independent activity.
- Read the text and build a timeline as a whole class activity. It could be done during shared or guided reading activities.
- Divide the text into smaller sections and assign a section to each group to complete the data table provided.
- Collaborative teams might read the entire text and create their timeline independently, for comparison with other groups during the Integrate discussion.
The term heavens has been used in the title of this text because it is often used when referring to the sky and thus it’s useful to draw students’ attention to this double meaning. The word ‘heaven’ comes from the Old English Heofon, and later the Middle English Hefen, meaning sky. It also has religious connotations because many belief systems equate divinity and holiness with ‘the highest place’—the sky. Discuss the meaning of the term ‘heavens’ in this context and why it is used to refer to the sky.
The title of the text can be modified to A scientific history of the sky as appropriate for your students and context.
The Inquire phase allows students to cycle progressively and with increasing complexity through the key science ideas related to the core concepts. Each Inquire cycle is divided into three teaching and learning routines that allow students to systematically build their knowledge and skills in science and incorporate this into their current understanding of the world.
When designing a teaching sequence, it is important to consider the knowledge and skills that students will need in the final Act phase. Consider what the students already know and identify the steps that need to be taken to reach the level required. How could you facilitate students’ understanding at each step? What investigations could be designed to build the skills at each step?
Read more about using the LIA FrameworkIdentifying and constructing questions is the creative driver of the inquiry process. It allows students to explore what they know and how they know it. During the Inquire phase of the LIA Framework, the Question routine allows for past activities to be reviewed and to set the scene for the investigation that students will undertake. The use of effective questioning techniques can influence students’ view and interpretation of upcoming content, open them to exploration and link to their current interests and science capital.
When designing a teaching sequence, it is important to spend some time considering the mindset of students at the start of each Inquire phase. What do you want students to be thinking about, what do they already know and what is the best way for them to approach the task? What might tap into their curiosity?
Read more about using the LIA FrameworkRemembering Jonah’s telescope
Recall, or rewatch if needed, Amateur Astronomer - Behind The News (3:59) from the previous lesson. Ask students to remember what two things Jonah did to support him to investigate the sky more closely.
Focus on the telescope Jonah built, and how he mentioned that he used mirrors. Discuss how this is different to what students read about the telescope Galileo built, which only mentioned lenses.
Using a demonstration copy of the Telescopes Resource sheet, look at the labelled diagrams of a Galilean telescope (a refracting telescope) and a more modern telescope (a reflecting telescope). Discuss the differences and similarities, noting that both use lenses.
Pose the question: How does a lens work?
The Inquire phase allows students to cycle progressively and with increasing complexity through the key science ideas related to the core concepts. Each Inquire cycle is divided into three teaching and learning routines that allow students to systematically build their knowledge and skills in science and incorporate this into their current understanding of the world.
When designing a teaching sequence, it is important to consider the knowledge and skills that students will need in the final Act phase. Consider what the students already know and identify the steps that need to be taken to reach the level required. How could you facilitate students’ understanding at each step? What investigations could be designed to build the skills at each step?
Read more about using the LIA FrameworkThe Investigate routine provides students with an opportunity to explore the key ideas of science, to plan and conduct an investigation, and to gather and record data. The investigations are designed to systematically develop content knowledge and skills through increasingly complex processes of structured inquiry, guided inquiry and open inquiry approaches. Students are encouraged to process data to identify trends and patterns and link them to the real-world context of the teaching sequence.
When designing a teaching sequence, consider the diagnostic assessment (Launch phase) that identified the alternative conceptions that students held. Are there activities that challenge these ideas and provide openings for discussion? What content knowledge and skills do students need to be able to complete the final (Act phase) task? How could you systematically build these through the investigation routines? Are there opportunities to build students’ understanding and skills in the science inquiry processes through the successive investigations?
Read more about using the LIA FrameworkUsing lenses
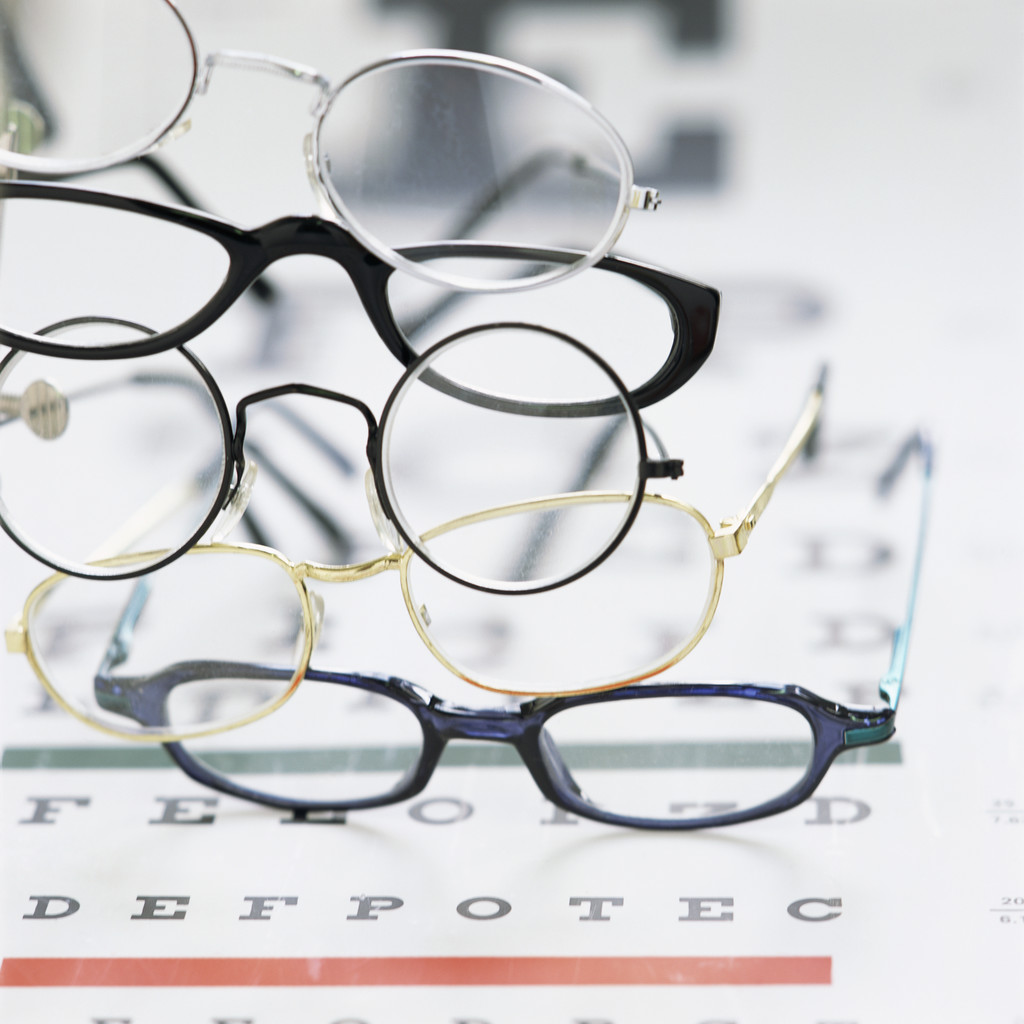
Brainstorm with students other items that use lenses, e.g. magnifying glasses, eyeglasses, cameras, binoculars, telescopes, microscopes.
In collaborative teams, students explore how lenses work by reading text through a piece of clear plastic, a drop of water, and a magnifying glass, and comparing the effects.
- Look at the text through a piece of clear, hard plastic and observe if the writing is the same or easier to read (larger).
- Place a drop of water on the surface of the plastic and observe the writing again, considering if it appear different.
- View and read the text through a magnifying glass.
- Compare the effect of the water drop to that of a magnifying glass.
Students record their observations on the Magnifying magic Resource sheet, including observations about the shape of the water droplet when viewed from the side and the shape of the magnifying glass.
The Inquire phase allows students to cycle progressively and with increasing complexity through the key science ideas related to the core concepts. Each Inquire cycle is divided into three teaching and learning routines that allow students to systematically build their knowledge and skills in science and incorporate this into their current understanding of the world.
When designing a teaching sequence, it is important to consider the knowledge and skills that students will need in the final Act phase. Consider what the students already know and identify the steps that need to be taken to reach the level required. How could you facilitate students’ understanding at each step? What investigations could be designed to build the skills at each step?
Read more about using the LIA FrameworkFollowing an investigation, the Integrate routine provides time and space for data to be evaluated and insights to be synthesized. It reveals new insights, consolidates and refines representations, generalises context and broadens students’ perspectives. It allows student thinking to become visible and opens formative feedback opportunities. It may also lead to further questions being asked, allowing the Inquire phase to start again.
When designing a teaching sequence, consider the diagnostic assessment that was undertaken during the Launch phase. Consider if alternative conceptions could be used as a jumping off point to discussions. How could students represent their learning in a way that would support formative feedback opportunities? Could small summative assessment occur at different stages in the teaching sequence?
Read more about using the LIA FrameworkHow does a lens work?
Students share their observations: comparing the similarities and differences of what could be viewed through just the piece of plastic, the water droplet, and the magnifying glass.
Discuss the shape of the items. What similarities and differences do students notice? How easy was it to read the secret message through them? Draw attention to the convex shape of the drop of water and the lens of the magnifying glass. Explain that it is this shape that makes the writing appear larger. The magnifying glass is double, or biconvex, meaning it is curved outwards on both sides. The drop of water is plano-convex as it sits flat where it touches the against the plastic.
Examine the photographs of light travelling through differently shaped lenses using a demonstration copy of the How does a lens work? Resource sheet.
Ask students to describe the shape of the lenses and how the beams of light are travelling through them. Jointly construct a description for the class science journal. For example:
- A convex lens is thicker in the middle and thinner at the edges. The light rays bend inwards towards each other (they converge).
- A concave lens is thinner in the middle and thicker at the edges. The light rays bend outwards away from each other (they diverge).
Explain that convex lenses make things look bigger, and concave lenses make things look smaller, but closer. Add these details to the relevant image in the class science journal.
Show students a glass full of water and place something behind the glass (e.g. a pencil, or a piece of card or paper with writing on it). Students describe and discuss what they observe and what they know about it.
Discuss refraction as light changing its direction when it moves from one material to another (air-to-lens or lens-to-air).
See the embedded professional learning How a lens works for details on what prior knowledge students might have about refraction.
Drawing on students’ existing knowledge of light and how it reflects off mirrors, and referring again to the Telescopes Resource sheet, discuss how the design of modern telescopes has changed (they use mirrors to direct light rays) and why this might have happened (to make more powerful telescopes, capable of seeing further into space). See NASA’s page How do telescopes work for further information.
Optional: Build a crude refracting lens with a soft drink bottle and water. See How to make lens at home || DIY Magnifying Glass || science project (2:58).
Optional: Build a simple Galilean telescope using a set of magnifying glasses and a cardboard tube. See How to Build a Telescope.
Reflect on the lesson
You might:
- consider the two questions posed before each investigation: Which of the three claims seems correct? and How does a lens work? Jointly construct a sentence or two to answer these questions and record them in the class science journal.
- add relevant terms to the class word wall or glossary.
- add to the L and H columns of the TWLH chart.
How a lens works
How does a lens work to make things easier to see?
Light is transferred through transparent materials, such as air, water and glass, which allows us to see through them. However, light travels at a different speed through each medium. For example, light travels faster through air than it does through water.
This change in speed as the light moves from one medium to another causes the light to bend slightly where the two surfaces meet, in a process called refraction.
Refraction of light can makes things look different or distorted. For example, the part of a straw submerged in a glass of water will look bigger than the part out of the water.
Refraction has some important uses. For example the lenses in eyeglasses use refraction to correct focus so objects don’t appear blurred. The convex shape of the lens in a magnifying glass or telescope refracts the light, allowing the light from the object to focus and appear closer.
Students have likely learned about refraction in Year 5 physical sciences, while learning about light (specifically, how it travels and how it can be bent using reflective surfaces). The purpose of the discussion and demonstration in this step is to use a familiar experiment to remind students of their prior knowledge.
See Lesson 6 • Does light travel through water from the Year 5 sequence Light imitates art for further details about activities students may have done, or that can be used to supplement their understanding.