

What‘s great for growth?
View Sequence overviewStudents will:
- identify what they think they know about what a plant needs to grow.
- consider the temperature they are most comfortable at and the temperature range they can tolerate.
- explore how different temperatures affect plants and animals.
- identify a local species and consider its habitat.
Students will represent their understanding as they:
- share and discuss the temperature of their preferred time of year/season.
- contribute to brainstorms and tables in the class science journal.
- record prior learning about an environment in a “radish race strategy”.
In the Launch phase, assessment is diagnostic.
Take note of students’ ideas about:
- comfortable temperatures and survivable temperatures for humans.
- ideal growing conditions of plants, particularly what conditions they include in their radish race strategy.
Whole class
Class science journal (digital or hard-copy)
Available resources about a local plant/animal species, such as documentary footage, photographs, local experts or trail cam footage (see Selecting a local plant or animal species for focus in the Preparing for this sequence tab on the sequence overview)
Video: Is the Great Barrier Reef in danger of dying? - Behind the News (3:41)
Each group
Radish seed/seedling (see Preparing for this sequence or the embedded professional learning Adapting to your context, found below, for more information about growing seeds vs seedlings, and other alternative plants to grow)
Container for growing a radish, such as a small pot or cup
Potting mix or soil
Dust masks (if handling potting mix)
Water
Permanent marker
Each student
Individual science journal (digital or hard-copy)
Radish race journal Resource sheet
Lesson
The Launch phase is designed to increase the science capital in a classroom by asking questions that elicit and explore students’ experiences. It uses local and global contexts and real-world phenomena that inspire students to recognise and explore the science behind objects, events and phenomena that occur in the material world. It encourages students to ask questions, investigate concepts, and engage with the Core Concepts that anchor each unit.
The Launch phase is divided into four routines that:
- ensure students experience the science for themselves and empathise with people who experience the problems science seeks to solve (Experience and empathise)
- anchor the teaching sequence with the key ideas and core science concepts (Anchor)
- elicit students’ prior understanding (Elicit)
- and connect with the students’ lives, languages and interests (Connect).
The Elicit routine provides opportunities to identify students’ prior experiences, existing science capital and potential alternative conceptions related to the Core concepts. The diagnostic assessment allows teachers to support their students to build connections between what they already know and the teaching and learning that occurs during the Inquire cycle.
When designing a teaching sequence, consider when and where students may have been exposed to the core concepts and key ideas in the past. Imagine how a situation would have looked without any prior knowledge. What ideas and thoughts might students have used to explain the situation or phenomenon? What alternative conceptions might your students hold? How will you identify these?
The Deep connected learning in the ‘Pedagogical Toolbox: Deep connected learning’ provides a set of tools to identify common alternative conceptions to aid teachers during this routine.
Read more about using the LIA FrameworkStudents arrive in the classroom with a variety of scientific experiences. This routine provides an opportunity to plan for a common shared experience for all students. The Experience may involve games, role-play, local excursions or yarning with people in the local community. This routine can involve a chance to Empathise with the people who experience the problems science seeks to solve.
When designing a teaching sequence, consider what experiences will be relevant to your students. Is there a location for an excursion, or people to talk to as part of an incursion? Are there local people in the community who might be able to talk about what they are doing? How could you set up your classroom to broaden the students’ thinking about the core science ideas? How could you provide a common experience that will provide a talking point throughout the sequence?
Read more about using the LIA FrameworkRadish race
Show and identify for students the radish (or alternative) seeds/seedlings. Explain that over the coming weeks the seeds/seedlings will undertake a “radish race” for students to see under which conditions they grow the best.
Revise what students think seeds need to germinate and plants need to grow. Discuss/explain the difference between germination and growth:
- Germination is the process by which a dormant seed “wakes up”, cracks open and grows its first roots and shoots. During this time, the seed relies solely on energy stored inside the seed pod.
- Growth is the ongoing process where a plant increases in size, weight and complexity. Plants must draw their energy from an external source in order to grow.
If you have already germinated the seeds for students, and they will be planting seedlings, review the process and photographs.
Discuss:
- what a plant needs to ensure it grows strong and healthy.
- Plants need water, nutrients, sunlight and an ideal temperature (the amounts of which all depends on the type of plant).
- the current time of year and the typical weather in your location. Do students think this will impact plant growth?
- places in the classroom/school grounds where students might leave a pot-planted seed, or plant a seed directly in the ground.
- factors of the above environments that might make them suitable or unsuitable to grow a plant. For example:
- How much sunlight does it get?
- What is the temperature like? Why is it like that? (i.e. Does it get full sun, or is it shaded/partially shaded?)
- How much water will the plant get?
- Will it get water naturally from rain, or will it need to be watered?
- What is the soil like (if applicable)?
- Is it windy in that location, or on a slope, or any other factors students think might affect the growth of the plant?
Identify which places students would and would not like to place/plant a seed/seedling.
Define how the winning radish will be determined. For example: plant height, radish diameter/mass, leaf colour and health, or a combination. Make a list of these agreed criteria.
Clarify any further race rules, such as not tampering with other radishes, and whether students can take their radishes home each day to provide 24-hour care.
Assign one selected location to each team. Ask each team to identify who will be in charge of planting and monitoring the seed/seedling, ensuring it gets what it needs to grow effectively (including being watered everyday if required) and reporting the data back to the class.
Allow teams time/opportunity to plant their seeds/seedlings and place them in the selected locations. Ensure you use any safety equipment, such as masks, to avoid breathing in mould or other fungal spores from the potting mix.
If students are experienced in conducting fair tests, they may ask if this experiment is fair, as teams may change multiple different variables in while setting up and maintaining their plants. In this case, explain to students that, just like with growing plants in real-life, this race is not designed to be a fair test investigation, but rather an in-situ, practical observation of the best conditions to grow this specific plant.
After seeds have been planted and placed in their locations, use a demonstration copy of the Radish race journal Resource sheet to model to students how to record the conditions of their radish seed/seedling every few days. The first entry will describe the conditions of the place their radish is located, for example:
- in full sun, partial shade; undercover or exposed.
- sloping land.
- pot placed on concrete path etc.
Subsequent entries will focus on the conditions each day, for example:
- light levels (cloudy, sunny)
- temperature (very hot, cool)
- Local weather reports can be used, or temperature measured with a thermometer.
- water received (it rained heavily overnight, sprinkled lightly, given 200 ml of water from the tap).
- for radishes in pots, if it was moved and why.
Allow students time to complete their first entry in their Radish race journal Resource sheet.
TEACHER NOTE: This investigation could take 3-8 weeks. For this sequence, it is enough that the plant is established. However, it could continue to be monitored to see how many leaves it produces or if it shows any signs of distress/unhealthiness, such as yellowing leaves, root rot, or succumbing to pests/diseases (which are often an indicator of a weakened plant immune system).
Core concepts and key ideas
Where does this sequence fit into the larger picture of science and the science curriculum?
When planning for teaching in your classroom, it can be useful to see where a sequence fits into the larger picture of science. This unit is anchored to the Science Understanding core concepts for biological sciences.
- Biological systems are interdependent and interact with each other and their environment.
By Year 6, students have experienced this core concept before by examining the basic needs of plants and animals (Year 1) and the roles and interactions of consumers, producers and decomposers within a habitat (Year 4). In Year 6, this core concept involves explaining how changing physical conditions in a habitat affects the growth and survival of living things.
This core concept is linked to the key science ideas:
- Energy (thermal heat energy and kinetic movement of water) moves through and can cause observable changes to habitats. (Energy)
- Stability in a habitat can be disrupted by sudden changes or gradual changes over time. (Stability and change)
- Patterns of change in the physical conditions of habitats can be used to identify cause -and-effect relationships and make predictions. (Patterns, order and organisation)
- Models can be used to investigate relationships between components of systems. (Systems)
When your students next progress through this core concept, they will investigate the use of models, including food webs, to represent matter and energy flow in ecosystems (Year 7).
When planning for teaching in your classroom, it can be useful to see where a sequence fits into the larger picture of science. This unit is anchored to the Science Understanding core concepts for biological sciences.
- Biological systems are interdependent and interact with each other and their environment.
By Year 6, students have experienced this core concept before by examining the basic needs of plants and animals (Year 1) and the roles and interactions of consumers, producers and decomposers within a habitat (Year 4). In Year 6, this core concept involves explaining how changing physical conditions in a habitat affects the growth and survival of living things.
This core concept is linked to the key science ideas:
- Energy (thermal heat energy and kinetic movement of water) moves through and can cause observable changes to habitats. (Energy)
- Stability in a habitat can be disrupted by sudden changes or gradual changes over time. (Stability and change)
- Patterns of change in the physical conditions of habitats can be used to identify cause -and-effect relationships and make predictions. (Patterns, order and organisation)
- Models can be used to investigate relationships between components of systems. (Systems)
When your students next progress through this core concept, they will investigate the use of models, including food webs, to represent matter and energy flow in ecosystems (Year 7).
Adapting to your context
What can be used as a substitute for radishes?
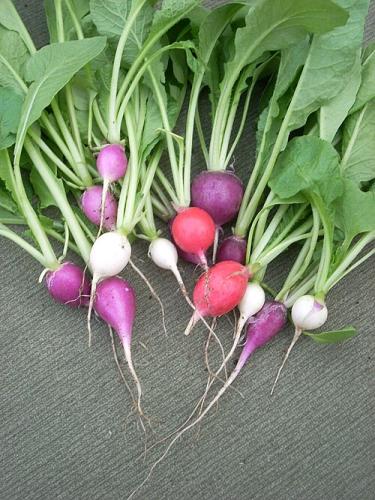
The radish race allows students to consider the ideal growing conditions for a particular plant. Radishes are ideal because they are fast-growing and typically go from seed to being ready for harvest in three to six weeks. Smaller salad varieties can mature in 3-4 weeks.
The “best radish” can be collectively defined by students and may include plant height, radish diameter/mass, leaf colour.
Substitutes
Radishes could be substituted with other fast-growing plants such as beans, snow peas, sunflowers, marigolds or cosmos.
Growing from seeds vs growing seedlings
Students can either grow radishes from seeds or from seedlings. Growing plants from seeds takes a longer amount of time than growing from seedlings, because growing from seedlings skips the germination stage. Radish seeds typically germinate in 3-7 days depending on the conditions (warmer conditions will lead to faster germination). However, if it is difficult to source radish seeds, a fast growing alternative such as beans, snow peas, sunflowers, marigolds or cosmos can be used.
If time is a factor, consider germinating the seeds before beginning to teach the sequence so that teams can plant seedlings instead of seeds. Document the process so that students can see/discuss what happened during germination.
Also, when seeds germinate the nutrients required come entirely from the seed itself. The seed does not need soil in order to germinate. However, to continue growth a seed will need to draw further nutrients from a different source, most typically the soil it is planted in. Students may have germinated seeds without soil in the past and may mistakenly believe that plants can grow without soil. However, once the nutrients from the seed have been absorbed, the plants will die without another source of nutrients.
If students grow radishes from seedlings, it can reinforce that most plants need soil in order to grow and survive.
The radish race allows students to consider the ideal growing conditions for a particular plant. Radishes are ideal because they are fast-growing and typically go from seed to being ready for harvest in three to six weeks. Smaller salad varieties can mature in 3-4 weeks.
The “best radish” can be collectively defined by students and may include plant height, radish diameter/mass, leaf colour.
Substitutes
Radishes could be substituted with other fast-growing plants such as beans, snow peas, sunflowers, marigolds or cosmos.
Growing from seeds vs growing seedlings
Students can either grow radishes from seeds or from seedlings. Growing plants from seeds takes a longer amount of time than growing from seedlings, because growing from seedlings skips the germination stage. Radish seeds typically germinate in 3-7 days depending on the conditions (warmer conditions will lead to faster germination). However, if it is difficult to source radish seeds, a fast growing alternative such as beans, snow peas, sunflowers, marigolds or cosmos can be used.
If time is a factor, consider germinating the seeds before beginning to teach the sequence so that teams can plant seedlings instead of seeds. Document the process so that students can see/discuss what happened during germination.
Also, when seeds germinate the nutrients required come entirely from the seed itself. The seed does not need soil in order to germinate. However, to continue growth a seed will need to draw further nutrients from a different source, most typically the soil it is planted in. Students may have germinated seeds without soil in the past and may mistakenly believe that plants can grow without soil. However, once the nutrients from the seed have been absorbed, the plants will die without another source of nutrients.
If students grow radishes from seedlings, it can reinforce that most plants need soil in order to grow and survive.
The Launch phase is designed to increase the science capital in a classroom by asking questions that elicit and explore students’ experiences. It uses local and global contexts and real-world phenomena that inspire students to recognise and explore the science behind objects, events and phenomena that occur in the material world. It encourages students to ask questions, investigate concepts, and engage with the Core Concepts that anchor each unit.
The Launch phase is divided into four routines that:
- ensure students experience the science for themselves and empathise with people who experience the problems science seeks to solve (Experience and empathise)
- anchor the teaching sequence with the key ideas and core science concepts (Anchor)
- elicit students’ prior understanding (Elicit)
- and connect with the students’ lives, languages and interests (Connect).
Science education consists of a series of key ideas and core concepts that can explain objects, events and phenomena, and link them to the experiences encountered by students in their lives. The purpose of the Anchor routine is to identify the key ideas and concepts in a way that builds and deepens students’ understanding. During the Launch phase, the Anchor routine provides a lens through which to view the classroom context, and a way to frame the key knowledge and skills students will be learning.
When designing a teaching sequence, consider the core concepts and key ideas that are relevant. Break these into small bite-sized pieces that are relevant to the age and stage of your students. Consider possible alternative concepts that students might hold. How could you provide activities or ask questions that will allow students to consider what they know?
How important is temperature?
Ask students what they would consider their favourite time of year in terms of the temperature, and why.
- If you like it better when it is cold, why?
- Can it ever get too cold for you?
- If you prefer it when it is hot, why?
- Can it ever get too hot for you?
- What temperature range can you think you can tolerate?
- Do you make changes to help you tolerate the temperature when it is too hot or too cold? What are they?
Suggest to students that over the course of the radish race they will be able to test if temperature has an impact on the growth of radish plants.
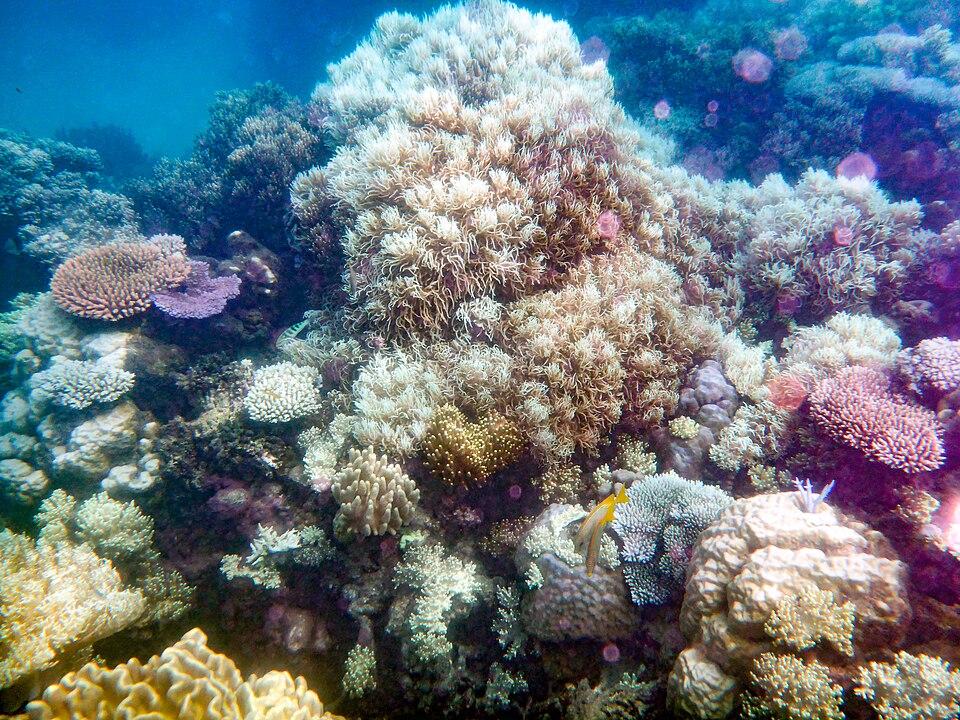
Explain that students are going to watch a video that explores how temperature might be having an impact on the Great Barrier Reef. Ask what they think they already know about the Great Barrier Reef and any experiences they may have had at the reef, or with coral reefs in general.
Show the video Is the Great Barrier Reef in danger of dying? - Behind the News (3:41).
Discuss how heat affects the small marine algae (zooxanthellae) that live in the coral.
- What is happening at the Great Barrier Reef?
- How is temperature involved?
- An increase in water temperature is causing coral bleaching.
- If water temperature decreases the coral is able to recover.
- How do coral (polyps) and marine algae help each other survive?
- Marine algae are the small algae that live in the coral. The coral structure provides protection while the algae provide the energy for the coral to keep growing.
- What happens when the water around coral gets too hot?
- Marine algae leave the coral, causing the coral to turn white/bleach.
- How does heat make it harder for the marine algae to do their job?
- Warmer temperatures can make it hard for the coral and algae to work together.
- What is coral bleaching, and what does it look like?
- Coloured algae leave the coral. This leaves the coral white/bleached.
- Is a bleached coral always dead?
- No. If the algae can return to live in the coral quickly, the coral will to recover.
- What happens to fish and other sea animals when coral reefs are damaged?
- Bleached coral is harder for fish and other sea creatures to camouflage in. There’s also less food, because the creatures that eat the zooxanthellae, have nothing to eat. This affects the whole food chain.
- Fish tend to leave bleached coral.
From the video, summarise how scientists are helping the Great Barrier Reef, and what everyday people can do to help. Record students’ ideas in the class science journal.
Introduce students to a local plant or animal species using available resources such as school walks, documentary footage, photographs, local experts and trail cam footage.
Begin a T chart in individual science journals (or the class science journal) to record species facts and habitat factors in the species’ habitat. Habitat factors might include the temperature of the habitat, access to light and food, the species’ preferred food source/s, and what the landscape is like. For example:
The Albany pitcher plant
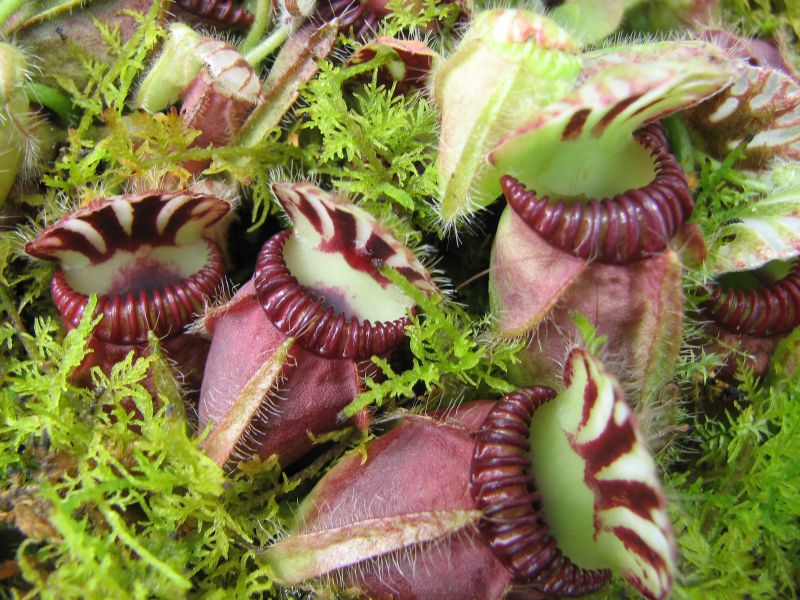
| Species facts | Habitat factors |
|
|
Coral
What is coral?
Corals is made up of tiny living units called polyps, which build hard skeletons from calcium carbonate. Over many years, these skeletons pile up to form coral reefs, which are among the most diverse ecosystems on Earth.
Zooxanthellae are microscopic algae that live inside the tissues of corals. They use photosynthesis to convert sunlight into sugars. These sugars are shared with the coral polyps, providing most of the energy the coral polyps need to grow and survive.
The relationship between coral polyps and zooxanthellae is an example of mutualism, where both organisms benefit. The algae receive protection and nutrients from the skeletons of the coral polyps, while the coral polyps receive energy from the algae. This is why corals grow best in clear, shallow water where sunlight can reach them.
Coral polyps are very sensitive to changes in temperature. When ocean temperatures rise even slightly above normal, the process of photosynthesis in the zooxanthellae becomes less efficient. This can cause the algae to produce harmful substances, which can damage both the algae and the coral polyps.
To protect itself from this damage, the coral polyps expel the zooxanthellae from their skeletons. When this happens, the coral loses its colour and turns white, a process known as coral bleaching. Although bleached coral is not dead right away, it becomes weak because it has lost its main source of food. If the stressful conditions continue, the coral polyps may die.
Corals can recover from bleaching if water temperatures return to normal quickly and the zooxanthellae are able to return. In some cases, coral polyps can form relationships with more heat-tolerant types of algae, but this ability is limited and may not be enough to keep up with ongoing climate change.
Corals is made up of tiny living units called polyps, which build hard skeletons from calcium carbonate. Over many years, these skeletons pile up to form coral reefs, which are among the most diverse ecosystems on Earth.
Zooxanthellae are microscopic algae that live inside the tissues of corals. They use photosynthesis to convert sunlight into sugars. These sugars are shared with the coral polyps, providing most of the energy the coral polyps need to grow and survive.
The relationship between coral polyps and zooxanthellae is an example of mutualism, where both organisms benefit. The algae receive protection and nutrients from the skeletons of the coral polyps, while the coral polyps receive energy from the algae. This is why corals grow best in clear, shallow water where sunlight can reach them.
Coral polyps are very sensitive to changes in temperature. When ocean temperatures rise even slightly above normal, the process of photosynthesis in the zooxanthellae becomes less efficient. This can cause the algae to produce harmful substances, which can damage both the algae and the coral polyps.
To protect itself from this damage, the coral polyps expel the zooxanthellae from their skeletons. When this happens, the coral loses its colour and turns white, a process known as coral bleaching. Although bleached coral is not dead right away, it becomes weak because it has lost its main source of food. If the stressful conditions continue, the coral polyps may die.
Corals can recover from bleaching if water temperatures return to normal quickly and the zooxanthellae are able to return. In some cases, coral polyps can form relationships with more heat-tolerant types of algae, but this ability is limited and may not be enough to keep up with ongoing climate change.
The Launch phase is designed to increase the science capital in a classroom by asking questions that elicit and explore students’ experiences. It uses local and global contexts and real-world phenomena that inspire students to recognise and explore the science behind objects, events and phenomena that occur in the material world. It encourages students to ask questions, investigate concepts, and engage with the Core Concepts that anchor each unit.
The Launch phase is divided into four routines that:
- ensure students experience the science for themselves and empathise with people who experience the problems science seeks to solve (Experience and empathise)
- anchor the teaching sequence with the key ideas and core science concepts (Anchor)
- elicit students’ prior understanding (Elicit)
- and connect with the students’ lives, languages and interests (Connect).
Science education consists of a series of key ideas and core concepts that can explain objects, events and phenomena, and link them to the experiences encountered by students in their lives. The purpose of the Anchor routine is to identify the key ideas and concepts in a way that builds and deepens students’ understanding. During the Launch phase, the Anchor routine provides a lens through which to view the classroom context, and a way to frame the key knowledge and skills students will be learning.
When designing a teaching sequence, consider the core concepts and key ideas that are relevant. Break these into small bite-sized pieces that are relevant to the age and stage of your students. Consider possible alternative concepts that students might hold. How could you provide activities or ask questions that will allow students to consider what they know?
Each student comes to the classroom with experiences made up from science-related knowledge, attitudes, experiences and resources in their life. The Connect routine is designed to tap into these experiences and that of their wider community. It is also an opportunity to yarn with community leaders (where appropriate) to gain an understanding of the student’s lives, languages and interests. In the Launch phase, this routine identifies and uses the science capital of students as the foundation of the teaching sequence so students can appreciate the relevance of their learning and its potential impact on future decisions. In short, this routine moves beyond scientific literacy and increases the science capital in the classroom and science identity of the students.
When planning a teaching sequence, take an interest in the lives of your students. What are their hobbies, how do they travel to and from school? What might have happened in the lives of your students (i.e. blackouts) that might be relevant to your next teaching sequence? What context might be of interest to your students?
Read more about using the LIA FrameworkA close look at the big picture
Introduce the terms “micro” and “macro” and discuss their meaning: very small/zoomed in vs large/zoomed out.
Explain that in this sequence, students will examine how the physical conditions of a habitat or environment influence the living elements. They will undertake investigations from a micro-perspective, observing and investigating elements of habitats they can control within the school grounds and classroom and observing the impact of change, then apply their learning on a macro-scale, making generalisations that can apply to other habitats.
For example: By growing radishes in different places around the school, we can determine what factors affect their growth. This can then help us to decide the best place to plant 100 radishes, or test if a local farm/area is a suitable place to grow 1000 radishes.
Explain that they will use this insight to design an ideal habitat for a chosen local plant/animal species, catering to the physical conditions that the species requires, or to identify an existing local habitat and suggest improvements to better suit the needs of local plant/animal species.
Caring for and connecting to Country
How can learning about caring for and connecting to Country enhance student learning in this sequence?
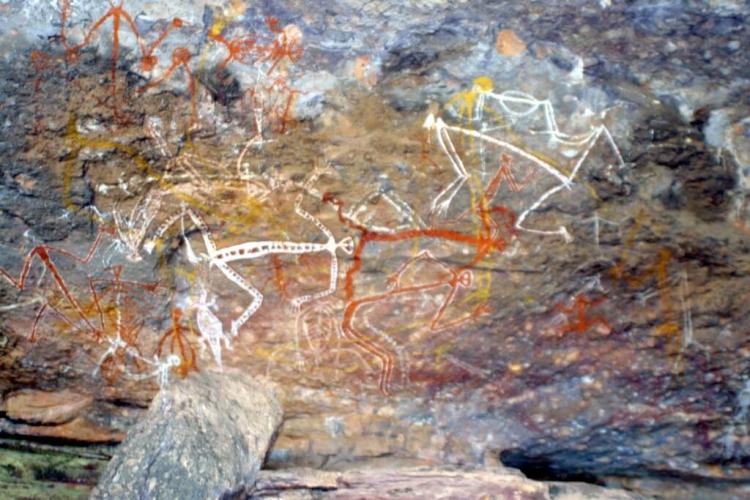
This sequence provides a strong opportunity to introduce and highlight First Nations perspectives.
To First Nations Australians, Country is not just land, but a living, interconnected system that includes people, plants, animals, water and sky. Embedding this understanding supports students in recognising both First Nations Australians' relationship with Country and their role in caring for it, but also encourages students' own relationship with, and responsibility for, Country.
Throughout this learning sequence, students will explore the conditions within habitats that enable plants and animals to survive, including water, temperature, light and food availability. By examining how changes to these conditions affect growth and survival, students develop an understanding of the balance within ecosystems. This learning can be enriched by acknowledging First Nations knowledge systems, which have long understood and sustained these relationships through careful observation and custodianship of Country.
Grounding learning in local environments helps students see themselves as part of Country rather than separate from it. This perspective encourages respect for biodiversity and highlights the importance of caring for habitats, particularly their local habitat. Connecting students to Country fosters respect, responsibility, and a deeper ecological understanding.
A discussion with your school's First Nations liaison (who may be known as an Aboriginal and/or Torres Strait Islander Education Officer, a Community Connector, or a Student Support Officer, among other titles) can help you connect with local First Nations groups and Elders who may be able to support you to meaningfully provide a First Nations perspective over the course of the sequence. Alternatively, contact local First Nations Land Councils and/or Elders to see if they are able, or if it is appropriate for them to help.
This sequence provides a strong opportunity to introduce and highlight First Nations perspectives.
To First Nations Australians, Country is not just land, but a living, interconnected system that includes people, plants, animals, water and sky. Embedding this understanding supports students in recognising both First Nations Australians' relationship with Country and their role in caring for it, but also encourages students' own relationship with, and responsibility for, Country.
Throughout this learning sequence, students will explore the conditions within habitats that enable plants and animals to survive, including water, temperature, light and food availability. By examining how changes to these conditions affect growth and survival, students develop an understanding of the balance within ecosystems. This learning can be enriched by acknowledging First Nations knowledge systems, which have long understood and sustained these relationships through careful observation and custodianship of Country.
Grounding learning in local environments helps students see themselves as part of Country rather than separate from it. This perspective encourages respect for biodiversity and highlights the importance of caring for habitats, particularly their local habitat. Connecting students to Country fosters respect, responsibility, and a deeper ecological understanding.
A discussion with your school's First Nations liaison (who may be known as an Aboriginal and/or Torres Strait Islander Education Officer, a Community Connector, or a Student Support Officer, among other titles) can help you connect with local First Nations groups and Elders who may be able to support you to meaningfully provide a First Nations perspective over the course of the sequence. Alternatively, contact local First Nations Land Councils and/or Elders to see if they are able, or if it is appropriate for them to help.
The Launch phase is designed to increase the science capital in a classroom by asking questions that elicit and explore students’ experiences. It uses local and global contexts and real-world phenomena that inspire students to recognise and explore the science behind objects, events and phenomena that occur in the material world. It encourages students to ask questions, investigate concepts, and engage with the Core Concepts that anchor each unit.
The Launch phase is divided into four routines that:
- ensure students experience the science for themselves and empathise with people who experience the problems science seeks to solve (Experience and empathise)
- anchor the teaching sequence with the key ideas and core science concepts (Anchor)
- elicit students’ prior understanding (Elicit)
- and connect with the students’ lives, languages and interests (Connect).
Identifying and constructing questions is the creative driver of the inquiry process. It allows students to explore what they know and how they know it. During the Inquire phase of the LIA Framework, the Question routine allows for past activities to be reviewed and to set the scene for the investigation that students will undertake. The use of effective questioning techniques can influence students’ view and interpretation of upcoming content, open them to exploration and link to their current interests and science capital.
When designing a teaching sequence, it is important to spend some time considering the mindset of students at the start of each Inquire phase. What do you want students to be thinking about, what do they already know and what is the best way for them to approach the task? What might tap into their curiosity?
Read more about using the LIA FrameworkWhat do we want to know?
Use the Question Formulation Technique, with a local species as the stimulus, to support students to generate questions they might want/need the answers to, in order to design ways to improve a species’ habitat.
Prompt students to ask a broad range of questions about the habitat, the species, what it eats, and how the habitat provides for its needs.
Reflect on the lesson
You might:
- begin a class word wall or glossary of relevant words and images that students will likely use throughout the sequence.
- begin a TWLH chart about habitat conditions effecting plants and animals. Use the questions generated using the QFT as the W section of the chart.
Question Formulation Technique
How can you support your students to generate questions on a topic?

The Question Formulation Technique outlines four steps for students to generate, refine, and select useful questions. These steps are:
- Examine stimulus.
- Brainstorm questions.
- Improve questions: change closed questions or statements into open questions.
- Prioritise questions according to importance, ability to be investigated, what will help with the Act phase, and how it will be answered.
Students should work together in small groups of 3-5.
The Question Formulation Technique outlines four steps for students to generate, refine, and select useful questions. These steps are:
- Examine stimulus.
- Brainstorm questions.
- Improve questions: change closed questions or statements into open questions.
- Prioritise questions according to importance, ability to be investigated, what will help with the Act phase, and how it will be answered.
Students should work together in small groups of 3-5.