Adapt to survive
View Sequence overviewStudents will:
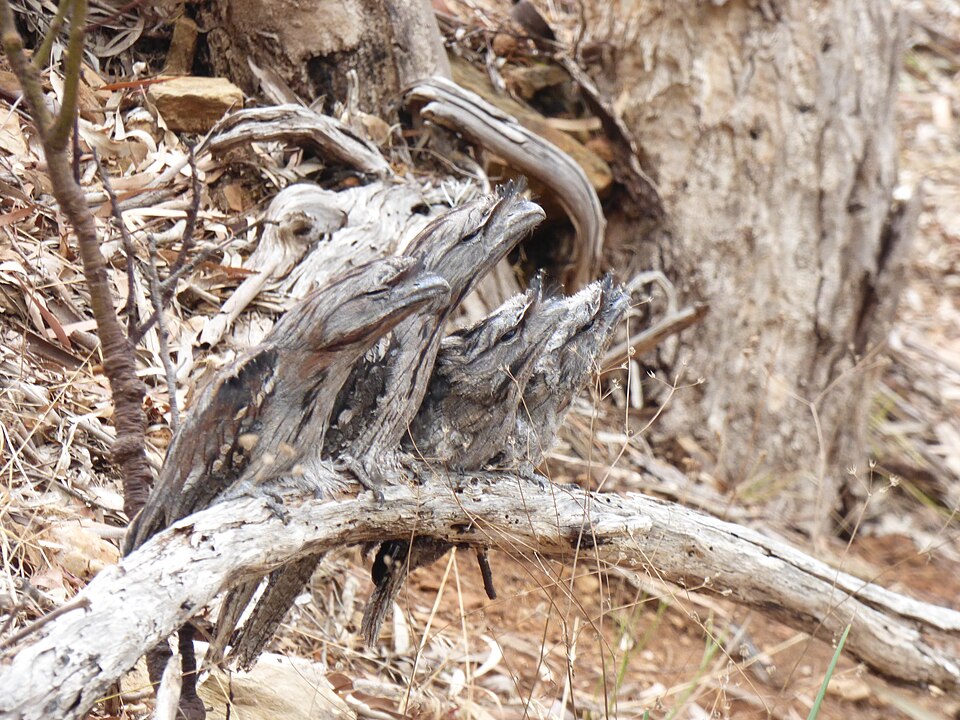
- recognise that plants and animals have specific body features and behaviours that enable survival in specific habitats.
- identify what they think they know about these body features and behaviours that enable plants and animals to survive in specific habitats.
- experience using models to consolidate scientific ideas.
Students will represent their understanding as they:
- participate in partner and class discussions.
- share stories about their plant/animal encounters.
- ask questions about plant and animal adaptations.
- Optional: create a labelled diagram of a leaf.
In the Launch phase, assessment is diagnostic.
Take note of:
- students’ ideas about structural features and behaviours of plants and animals that enable their survival in specific habitats.
- consider the ethics students bring to discussions about living things. Promoting respect for all living things is important.
See the embedded professional learning Students’ conceptions and alternative conceptions in the Elicit step of this lesson.
Whole class
Class science journal (digital or hard-copy)
Optional: Demonstration copy of the Plant survivor Resource sheet
Demonstration copy of the Habitats Resource sheet
Each group
A different feeding tool for each student in the team, for example:
- peg
- toothpick
- tweezers
- tongs
- wet paintbrush
Paper plate containing items to represent a variety of foods. Select items that are different in size, shape and weight, but small enough to fit into a paper cup, for example:
- grains of rice
- dried lentils
- sultanas
- elastic bands
- paper clips
- paper confetti
SAFETY NOTE: Beware of any allergies when selecting foods items for this task.
Timer
Feeding time Resource sheet (or students can make their own data table)
Each student
Individual science journal (digital or hard-copy)
Sticky notes/slips of paper
Paper cup
Optional: A green leaf, selected from the ground whilst on a walk in the school environment
Lesson
The Launch phase is designed to increase the science capital in a classroom by asking questions that elicit and explore students’ experiences. It uses local and global contexts and real-world phenomena that inspire students to recognise and explore the science behind objects, events and phenomena that occur in the material world. It encourages students to ask questions, investigate concepts, and engage with the Core Concepts that anchor each unit.
The Launch phase is divided into four routines that:
- ensure students experience the science for themselves and empathise with people who experience the problems science seeks to solve (Experience and empathise)
- anchor the teaching sequence with the key ideas and core science concepts (Anchor)
- elicit students’ prior understanding (Elicit)
- and connect with the students’ lives, languages and interests (Connect).
The Elicit routine provides opportunities to identify students’ prior experiences, existing science capital and potential alternative conceptions related to the Core concepts. The diagnostic assessment allows teachers to support their students to build connections between what they already know and the teaching and learning that occurs during the Inquire cycle.
When designing a teaching sequence, consider when and where students may have been exposed to the core concepts and key ideas in the past. Imagine how a situation would have looked without any prior knowledge. What ideas and thoughts might students have used to explain the situation or phenomenon? What alternative conceptions might your students hold? How will you identify these?
The Deep connected learning in the ‘Pedagogical Toolbox: Deep connected learning’ provides a set of tools to identify common alternative conceptions to aid teachers during this routine.
Read more about using the LIA FrameworkWhat do we think we know
Explain to students that over the course of this sequence they will undertake investigations about different plants and animals. This will begin by looking at what they already know, first by thinking broadly about the natural environment, before focusing in on the specific topics of plants, animals, and habitats.
The following activity is designed to elicit students’ current ideas about how the body features and behaviour of living things enable their survival. See the embedded professional learning Student conceptions and alternative conceptions for information to support you in recognising and addressing any alternative conceptions students may hold.
Note: The terms “body features” and “behaviours” are used in this lesson. The specific scientific terms “structural and behavioural adaptations” will be introduced as the sequence progresses.
Thinking broadly
Revise with students the difference between living and non-living things. Students should have already learned about this in Year 3. For this sequence it is not necessary for students to have a specific scientific definition—they might note that living things eat, breathe, move, reproduce, react, etc. This is enough for this activity.
Introduce the term “organism” as a term that identifies an individual thing that is alive. If required, clarify that anything that is considered alive (including students) can be called an organism, and give/acknowledge examples as needed.
Pose the broad question: What do living things/organisms need to survive?
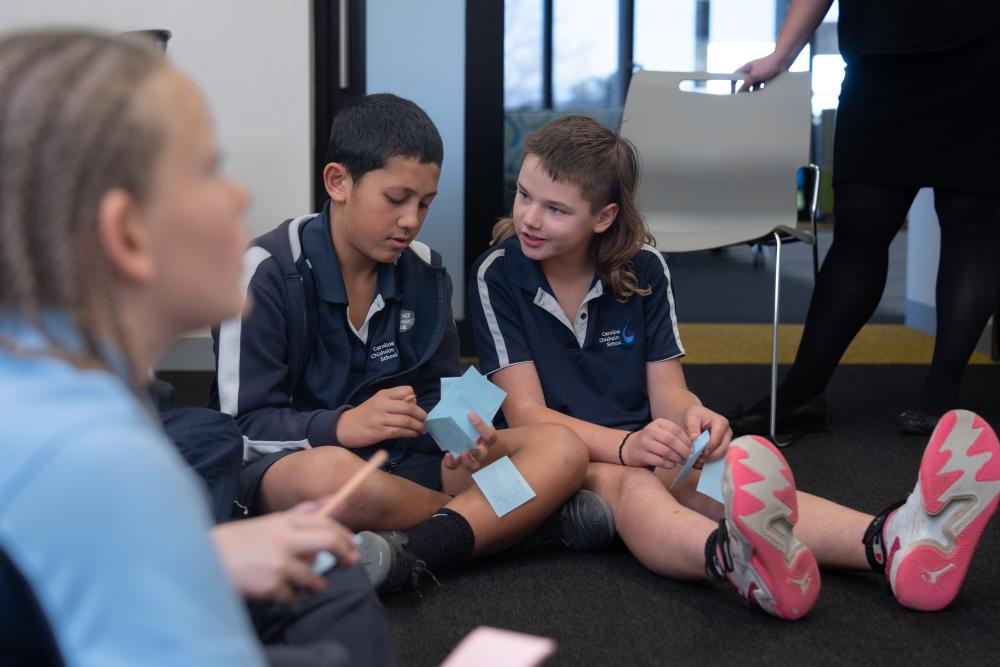
Using the think-pair-share strategy (or any other brainstorming strategy you prefer), students consider what they already know in answer to the question. Record ideas in the class science journal.

Focusing on animals
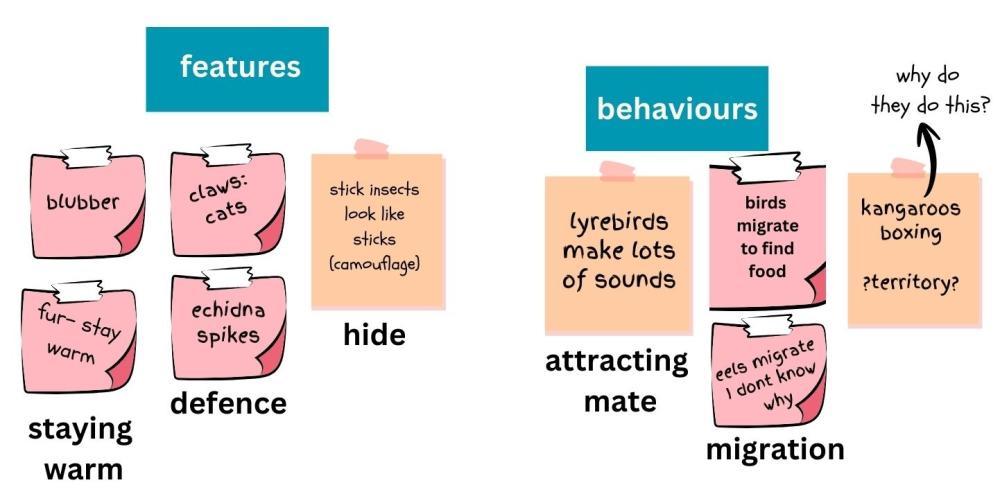
Pose the question: What body features and behaviours allow organisms to get the things they need to survive?
Students might focus on general features shared by many animals, for example “some animals have fur to keep warm”, or focus on a feature of a specific animal, for example “fish have gills to help them breathe underwater”. Share these examples with students if needed.
Students record each of their ideas on a separate sticky note/slip of paper.
Either as a class or in small groups, group similar ideas together.
If students have shared ideas about organisms such as bacteria, fungi, or single-celled organisms, discuss why it might not be possible to investigate these types of organisms in the classroom. With the exception of mushrooms, which students often consider as plants, investigating fungi (such as mould and yeast), bacteria, and other single-celled organisms often requires the use of specialised equipment and protective measures. It is not possible or safe to investigate them in a classroom environment. For this reason, the focus will be on plants and animals that students can easily see and safely access.
Optionally, you might introduce these ideas as a discussion if appropriate for your students.
Focusing on plants
Pose the question: What body features and behaviours allow plants to get the things they need to survive?
Two activities are described below. Select the one that is most suited to your students and context.
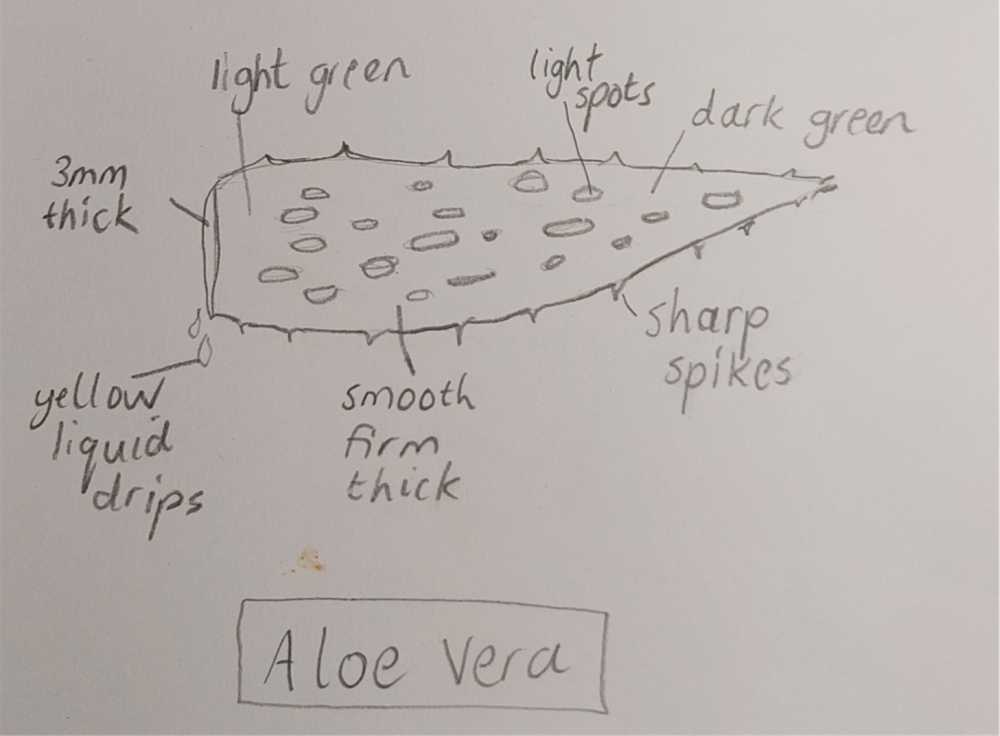
Plants in hands
Students walk around the school grounds or local area and select a fallen leaf that is still green. They sketch the leaf and label its key features, such as colour, texture, shape, and size. Place the leaves on display on a wall or shelf to create a “leaf museum”.
Discuss similarities and differences between the size, shape, thickness, shiny coating, and smell of leaves. Explore students’ ideas about how the features may help the plant to get the things it needs to survive. Record their ideas in the class science journal.
Plants on screen
Display the demonstration copy of the Plant survivor Resource sheet.
On sticky notes, for each image/plant, students write:
- one plant feature, for example: narrow leaves, brightly coloured flowers.
- what they think about how that feature helps the plant get what it needs to survive.
- For example, they might think that narrow leaves reduce water loss, make the plant difficult for animals to eat, or attract birds for pollination.
Invite students to share their ideas and record them in the class science journal.
Focusing on habitats
Review what is meant by the term “habitat”: the natural home of a plant, animal or other organism, that typically provides the things they need to survive.
If required, distinguish between the terms “habitat” and “environment”, and explain why “habitat” is more accurate and will be used throughout this sequence:
- Environment is a broad term that includes all the living and non-living things in an area.
- A habitat is the specific location that an organism visits and where its needs are met.
- A habitat for a small skink might be a garden bed containing shrubs, leaf litter, small insects etc., whereas the environment would be the suburban area surrounding that garden bed, including the houses, roads, other gardens, and domestic animals.
Display the demonstration copy of the Habitats Resource sheet. Examine each image of a specific habitat and, based on discussions about plants and animals, encourage students to suggest ideas about the types of plants and animals (or features of plants and animals) that would be able to survive in that habitat and why they think that.
- Which plants or animals do you know that survive in this habitat (or that you think do/might)? Why do you think that?
- What features of the plant/animal make it suitable for this habitat?
- What features of this habitat make it suitable for this plant/animal?
- Could a plant/animal that normally lives in a desert survive in the ice or snow? Can you give me an example?
Core concepts and key ideas
Where does this sequence fit into the larger picture of science and the science curriculum?
When planning for teaching in your classroom, it can be useful to see where a sequence fits into the larger picture of science. This unit is anchored to the Science Understanding core concepts for Biological sciences.
- A diverse range of living things have evolved on Earth over hundreds of millions of years; this process is ongoing.
- The form and features of living things are related to the functions that their body systems perform.
Students have experienced these core concepts before by examining the characteristics of living and non-living things and the differences between the life cycles of plants and animals (Year 3). In Year 5, these core concepts involve explaining how particular structural features and behaviours of living things enable their survival in specific habitats.
This core concept is linked to the key science ideas:
- Function can be predicted by analysis of form/structure (Form and function).
- Generalisations about relationships between system components can be made (Systems).
- Classification can be used to inform predictions about properties and behaviours (Patterns, order and organisation).
- Models can be used to investigate relationships between components of systems (Systems).
When your students next progress through this core concept, they will investigate the physical conditions of a habitat and analyse how the growth and survival of living things is affected by changing conditions (Year 6).
Student conceptions and alternative conceptions
What alternative conceptions might students have about plant and animal adaptations? How does this sequence address them?
Students might believe that individuals adapt to their environment in their lifetime and pass this ability to their offspring.
It is true that certain animals can change their behaviours in new situations and teach this to their offspring and any animals in their “social group”. For example, many sulfur-crested cockatoos living in suburban areas have learned how to open rubbish bins and remove items in search of food. This is a behaviour that has allowed that particular bird, or flock of birds, to adapt to living in an urban environment that has fewer available natural food sources. Sulfur-crested cockatoos living in an environment surrounded by their natural food sources are unlikely to know how to open a rubbish bin, because they will not have needed to develop that skill.
An adaptation, however, is not something that happens at an individual level, but rather something that occurs when the survival of a whole population of a plant or animal is affected. Adaptations can affect an animal’s instinctive behaviours, such as living in groups or migrating at specific times of the year, or their structural features, such as having longer legs, smaller leaves, or camouflage.
For example, sulfur-crested cockatoos often eat in groups, with some working as lookouts, emitting a piercing warning screech if a predator is spotted. They have a powerful hooked beak to help them crack open nuts, seeds, and fruits. Sulfur-crested cockatoos living in both urban and more natural environments exhibit these behaviours and features. They have enabled the survival of the species over time.
Students might believe that animals choose their adaptations based on their environment. However, adaptations are not a conscious choice by individuals. For example, giraffes do not choose to have a long neck. It is the success of the giraffe parents with the structural features and behaviours that enable them to reach food high in a tree that allows them to survive to have offspring that also have long necks.
Students might think it is easy for animals to change habitats if the one they are in is no longer providing what they need, for example, if food becomes unavailable. While this is the reason some animals migrate during lean seasons, it is dependent on the new habitat being able to supply all the needs of the animal. For example, the bogong moth migrates thousands of kilometres at the start of each summer to the cooler caves in Victoria and NSW’s higher regions. This means they need appropriate food supplies during the journey. They rely on the nectar of particular plants and have moth parts that allow them to harvest this from particular flowers. If those plants are not present, it can make the journey more difficult.
In this sequence, students explore the structural adaptations of many plant and animal species to identify how these features support the survival of the species. In Lesson 5, in particular, they look at a case study of the peppered moth to help form an understanding that adaptation occurs across the entire species, and not simply to individual animals.
Adaptations
What are structural and behavioural features/adaptations?
By simply looking at animals or plants, you can often identify structural features or behaviours that are common across a population/group and the probable function of this feature. For example, some animals have large eyes that allow them to see well in darkness and some populations of plants have waxy leaves that help minimise water loss (although it should be noted that these are not the only possible reasons an animal might have large eyes, or a plant might have waxy leaves).
These features, which are important to the survival of animal or plant populations in their native environment, are called “adaptations”.
Adaptations evolve by means of natural selection. If the conditions in the environment favour particular traits, such as larger eyes that help to see food and predators at night, or waxy leaves that help slow dehydration in water-poor environments, then the individuals who have these traits are more likely to survive and reproduce. If offspring inherit these traits, then future generations are more likely to have larger eyes and waxier leaves.
Generally, scientific adaptations are identified at a population level; one individual with a difference is a mutant who might survive better in the environment. If the individual’s offspring inherit the trait and also survive better in the environment, then the mutation may gradually become “normal” in the population and be considered an adaptation.
The term “environment” includes both the physical habitat that provides the things a population needs to survive (including the geosphere, lithosphere, and atmosphere) and the other living things (biosphere) also found in that location. The abilities of predators in an environment often determine the adaptations of their prey: if a species’ main predator has eyes that primarily detect motion, then the instinct to freeze when spotted is an adaptation to that “environment”.
Beyond survival
The ability to survive in a habitat is not the only factor that determines what features are common in a population. The members of a population also need to be able to reproduce and produce offspring. This can also influence the structures and behaviours of individuals in the population. Examples of this include:
- The necessity to attract a mate in order to reproduce. If there is competition to mate, then males might develop special characteristics to attract a female, even if these make it harder to survive. For example, lyrebirds have evolved long, colourful plumage and extravagant dancing to attract a mate. This also increases the chance of predators finding them.
- The appearance of an individual is a result of the genetic material it inherits from its parents. While this may be modified as a result of the environment (the colour of a thorny devil will become darker in colder weather), plants and animals cannot make complete changes unless their genetic material changes. For example, the thorny devil cannot become purple unless its DNA mutates.
- Random chance can affect how a structural feature evolves. If only a small group of individuals survives an event (i.e., a tsunami), those individuals will carry all of the structural adaptations into future generations (even if they are not most suited to that environment). This is called a genetic bottleneck.
Think-pair-share
What is the think-pair-share strategy and why is it useful?
Within a classroom there are often students who raise their hands and offer ideas readily, as well as those who are less confident to share their ideas. The think-pair-share strategy can encourage more students to get involved because it allows thinking time and removes fear of being wrong, as students can offer ideas they have agreed upon with their partner.
In the strategy:
- Students are prompted with a question, topic, claim or idea.
- They are given time to think, typically between 10 and 20 seconds. The time can be extended for complex questions or topics.
- Students pair up with someone near them to discuss their answers and ideas.
- Invite students to share with the class, starting with “(Student’s name) and I discussed/thought/talked about...”
You can also add the step “square” where pairs team up with another pair to discuss further before sharing. This can be helpful to expose students to a wider range of ideas and vocabulary.
The Launch phase is designed to increase the science capital in a classroom by asking questions that elicit and explore students’ experiences. It uses local and global contexts and real-world phenomena that inspire students to recognise and explore the science behind objects, events and phenomena that occur in the material world. It encourages students to ask questions, investigate concepts, and engage with the Core Concepts that anchor each unit.
The Launch phase is divided into four routines that:
- ensure students experience the science for themselves and empathise with people who experience the problems science seeks to solve (Experience and empathise)
- anchor the teaching sequence with the key ideas and core science concepts (Anchor)
- elicit students’ prior understanding (Elicit)
- and connect with the students’ lives, languages and interests (Connect).
Students arrive in the classroom with a variety of scientific experiences. This routine provides an opportunity to plan for a common shared experience for all students. The Experience may involve games, role-play, local excursions or yarning with people in the local community. This routine can involve a chance to Empathise with the people who experience the problems science seeks to solve.
When designing a teaching sequence, consider what experiences will be relevant to your students. Is there a location for an excursion, or people to talk to as part of an incursion? Are there local people in the community who might be able to talk about what they are doing? How could you set up your classroom to broaden the students’ thinking about the core science ideas? How could you provide a common experience that will provide a talking point throughout the sequence?
Read more about using the LIA FrameworkFeeding time
Working in teams of 2-4 students:
- Each team is provided with a set of “feeding tools”, a paper plate containing different “foods” (see the List of materials above for examples), and a paper cup for each student.
- The size of the teams will depend on the number of different feeding tools available—if two different tools are available (e.g. pegs and toothpicks) students should work in pairs, if three tools are available (e.g. pegs, toothpicks, tongs) students should work in teams of three, and so on. Teams should not exceed four students.
- Each student selects a feeding tool.
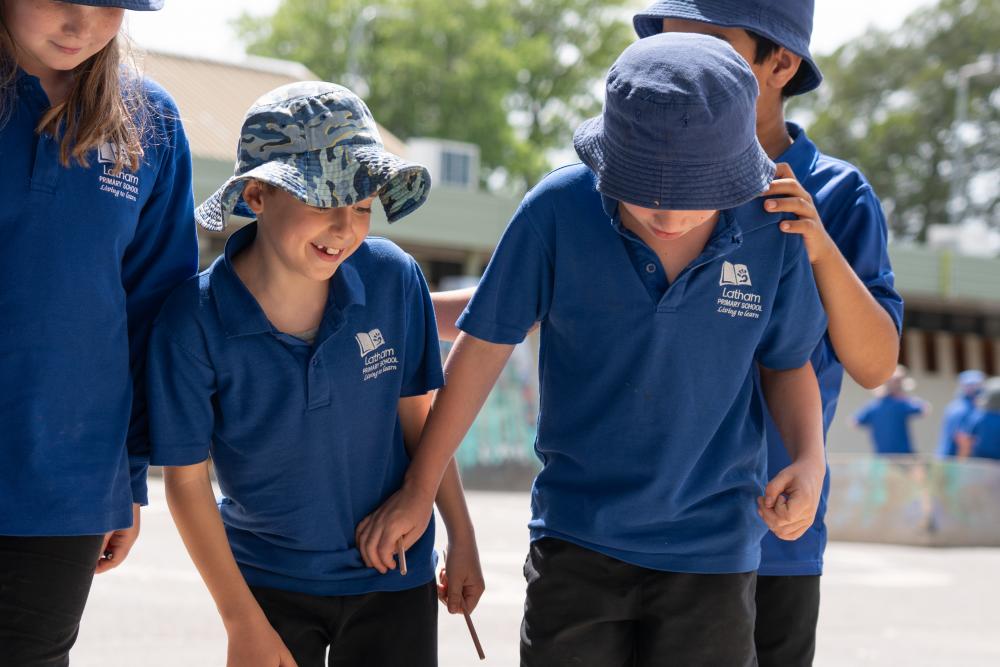
- Students use their feeding tools to collect one piece of food at a time from the central plate of different foods and “feed” the food into their paper cup (which represents a stomach).
- Students collect food for a set amount of time (such as 20 seconds).
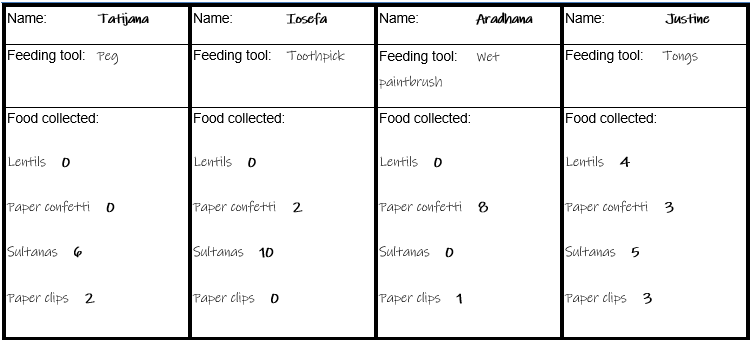
- At the end of the time limit, students count the number of food items collected in their cup and record it in a data table (students can use Feeding time Resource sheet or draw up their own table).
- Optional: Students can also tally the types of food they collected, and how many of each.
- Students swap tools and repeat the feeding challenge several times.
Remind students not to eat any food items, and to use only their tool to collect the food and place into the “stomach”.
The Launch phase is designed to increase the science capital in a classroom by asking questions that elicit and explore students’ experiences. It uses local and global contexts and real-world phenomena that inspire students to recognise and explore the science behind objects, events and phenomena that occur in the material world. It encourages students to ask questions, investigate concepts, and engage with the Core Concepts that anchor each unit.
The Launch phase is divided into four routines that:
- ensure students experience the science for themselves and empathise with people who experience the problems science seeks to solve (Experience and empathise)
- anchor the teaching sequence with the key ideas and core science concepts (Anchor)
- elicit students’ prior understanding (Elicit)
- and connect with the students’ lives, languages and interests (Connect).
Science education consists of a series of key ideas and core concepts that can explain objects, events and phenomena, and link them to the experiences encountered by students in their lives. The purpose of the Anchor routine is to identify the key ideas and concepts in a way that builds and deepens students’ understanding. During the Launch phase, the Anchor routine provides a lens through which to view the classroom context, and a way to frame the key knowledge and skills students will be learning.
When designing a teaching sequence, consider the core concepts and key ideas that are relevant. Break these into small bite-sized pieces that are relevant to the age and stage of your students. Consider possible alternative concepts that students might hold. How could you provide activities or ask questions that will allow students to consider what they know?
Each student comes to the classroom with experiences made up from science-related knowledge, attitudes, experiences and resources in their life. The Connect routine is designed to tap into these experiences and that of their wider community. It is also an opportunity to yarn with community leaders (where appropriate) to gain an understanding of the student’s lives, languages and interests. In the Launch phase, this routine identifies and uses the science capital of students as the foundation of the teaching sequence so students can appreciate the relevance of their learning and its potential impact on future decisions. In short, this routine moves beyond scientific literacy and increases the science capital in the classroom and science identity of the students.
When planning a teaching sequence, take an interest in the lives of your students. What are their hobbies, how do they travel to and from school? What might have happened in the lives of your students (i.e. blackouts) that might be relevant to your next teaching sequence? What context might be of interest to your students?
Read more about using the LIA FrameworkCatching prey
Share, discuss and compare the data that students collected from the feeding tool investigation.
Lead a discussion about the effectiveness of each feeding tool and why certain tools might have been more effective collecting some foods compared to others. Support students to:
- see the activity as a form of scientific modelling (see the embedded professional learning Role-play as a form of scientific modelling for more information).
- determine what they were modelling: the structure and function of animal mouths.
- determine how the structure and function of an animal’s mouth supports the animal to get the food they need to survive.
- Which tool collected the most food? Why do you think that was?
- Was one food type harder to collect?
- Did the shape or size of the tool make it difficult to collect the food? Was one tool okay for collecting some foods, but not others?
- You might record some statements in the class science journal to links results with students’ reasoning. For example:
- The toothpick could collect lots of sultanas because it's easy to poke a soft sultana with a toothpick.
- The toothpick couldn't get into the lentil because the lentils are too hard when they're dried.
- Tongs were good for picking up large bits of food, but couldn't pick up the small pieces one at a time.
- You might record some statements in the class science journal to links results with students’ reasoning. For example:
- What would you call this type of activity? Would you agree that it is a role-play or a model?
- What do you think you were role-playing/modelling? How do you know?
- The role-play/model represented animals grabbing and eating food.
- What did each piece of equipment used in the model (the tool, the cup, the items being collected) represent?
- They represent an animal’s mouth/tongue/teeth, the stomach, and food source respectively.
- What animal’s mouth might have been mimicked by each tool?
- The peg could be a crocodile’s jaws or a large bird’s beak, a wet paint brush could be an echidna or chameleon’s sticky tongue, the tweezers are like the mandibles of an ant, etc.
- How were the feeding tools used in the role-play limited in what we could experience regarding real animals feeding?
- The tools selected were too simple to mimic a real mouth. Real mouths are complicated. The outer structures might be soft, like lips, or hard like beaks. The inner structures can include teeth and tongues of varying size, shapes and ways of moving. The tools selected for the role-play cannot mimic all of these features.
- Do you think the shape and size of an animal's mouth are related to the type of food it eats? How so? Can you give an example?
- You might use the think-pair-share strategy to help students formulate and refine their thinking before answering this question.
- What do you think would happen to an animal if its preferred food suddenly became less available, or completely unavailable? Why do you think that?
Explain to the students that during this sequence they will investigate how the body features of plants and animals and their behaviours enable their survival in specific habitats.
If you have selected the task for the Act phase, introduce it now. For example, students will use this knowledge, along with the design process, to:
- model the adaptive features and behaviours of an existing plant or animal.
- model the adaptive features and behaviours of an imaginary plant or animal.
- (optionally) write a “cli-fi” (climate fiction) narrative to accompany their models. See Lesson 8 for more details.
Role-play as a form of scientific modelling
Why are role-plays beneficial for student learning?
Scientists use models to represent and visualise complex ideas. Models can help bring these ideas into focus, leading to more questions and better explanations. Models are also used to communicate ideas to others. They can be evaluated and refined over time.
In this lesson, students participate in a role-play to explore the role of the mouth/tongue/teeth in feeding, and the different mechanisms and food sources they are suitable for.
In this instance, the role-play gives students a simplified experience of a complex and abstract scientific idea—it is an analogous model exploring how an animal's mouth has evolved to suit the types of food available to it in its habitat and environment.
All scientific models have limitations, and it is critical that students have an opportunity to explore the limitations of the scientific concepts they are modelling. In this case, the simplicity of the model and the materials used cannot really accurately mimic the complexity of an animal's mouth, or how it is used to catch prey that is often moving. However, a scientific model can be deemed effective if it is “good enough” to highlight the specific phenomena it was designed to showcase—that is, the size and shape of the mouth will determine how effective it is at eating different types of food.
The Launch phase is designed to increase the science capital in a classroom by asking questions that elicit and explore students’ experiences. It uses local and global contexts and real-world phenomena that inspire students to recognise and explore the science behind objects, events and phenomena that occur in the material world. It encourages students to ask questions, investigate concepts, and engage with the Core Concepts that anchor each unit.
The Launch phase is divided into four routines that:
- ensure students experience the science for themselves and empathise with people who experience the problems science seeks to solve (Experience and empathise)
- anchor the teaching sequence with the key ideas and core science concepts (Anchor)
- elicit students’ prior understanding (Elicit)
- and connect with the students’ lives, languages and interests (Connect).
Identifying and constructing questions is the creative driver of the inquiry process. It allows students to explore what they know and how they know it. During the Inquire phase of the LIA Framework, the Question routine allows for past activities to be reviewed and to set the scene for the investigation that students will undertake. The use of effective questioning techniques can influence students’ view and interpretation of upcoming content, open them to exploration and link to their current interests and science capital.
When designing a teaching sequence, it is important to spend some time considering the mindset of students at the start of each Inquire phase. What do you want students to be thinking about, what do they already know and what is the best way for them to approach the task? What might tap into their curiosity?
Read more about using the LIA FrameworkGenerating questions
Referring to sticky notes and discussions from this lesson, use the Question Formulation Technique to brainstorm questions about structural features and behaviours of living things and how they enable their survival in specific habitats.
Reflect on the lesson
You might:
- begin a “bird watch” board and encourage students to add any birds they see locally in the coming weeks.
- Encourage students to observe beak shapes, for example cone shape beaks (zebra finch) are for cracking nuts and seeds while longer straight beaks (superb fairywren and laughing kookaburra) are for snapping up small animals such as insects and worms
- begin a nature table in the classroom, for students to add plant and animal material such as flowers, leaves, sticks, weeds, antlers, feathers, shells and insect exoskeletons that have been shed.
- begin a class word wall or glossary of relevant words and images that students will likely use throughout the sequence.
- begin a TWLH chart about plants, animals, habits and ecosystems. Use the questions generated using the QFT as the W section of the chart.
Question Formulation Technique
How can you support your students to generate questions on a topic?

The Question Formulation Technique outlines four steps for students to generate, refine, and select useful questions. These steps are:
- Examine stimulus.
- Brainstorm questions.
- Improve questions: change closed questions or statements into open questions.
- Prioritise questions according to importance, ability to be investigated, what will help with the Act phase, and how it will be answered.
Students should work together in small groups of 3-5.
Nature tables
What is a nature table and how might students benefit from having one in the classroom?
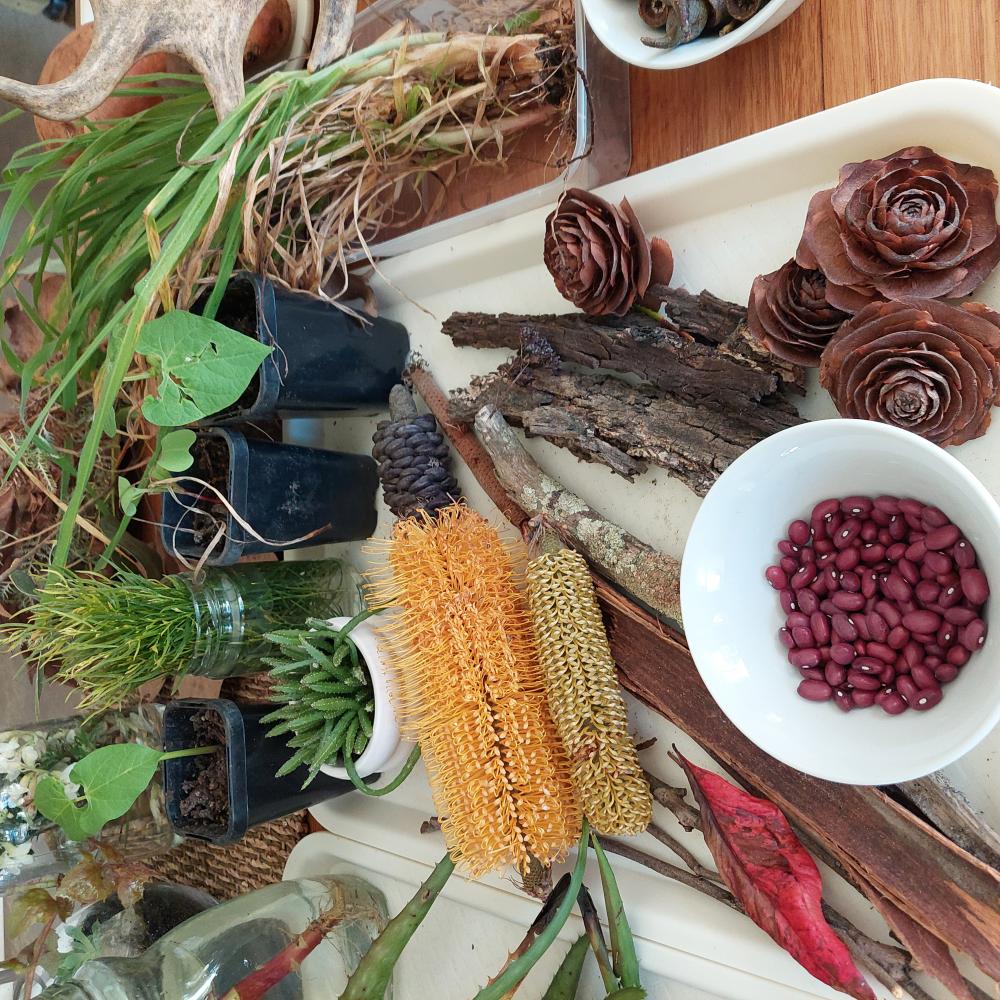
A nature table is covered in items collected by the students and teachers, such as bark, stems, leaves, flowers, seeds, cones, shells, exoskeletons, scat, pellets, feathers, fur, hair, and photos of local rare and endangered species.
The nature table is intriguing to many students and something they can all experience success by contributing to. It also provides an opportunity for students to share their knowledge and experiences, reinforcing that we value them and their understandings. A focus on plants and animals that are found locally will make it more relevant for students and will support them to make connections between what they are learning about and their real-life experiences.
Items may need to be returned to students; a collection of small boxes/tubs/trays ensures those items remain separated and labelled while on the table.
Flowers and leaves can be placed in jars of water to prolong their life, or they can be allowed to dry out to observe their changes over time.
As a class, ensure everyone knows which items they are allowed to touch.